Ọrọ Iṣaaju
This manual provides comprehensive instructions for the setup, operation, and maintenance of your Makeid Q1 Label Maker Machine. Designed for home and office organization, the Q1 offers high-definition 300 dpi printing, Bluetooth connectivity, and intuitive one-click functions for efficient labeling.

The Makeid Q1 Label Maker Machine, showcasing its compact design and included label tape.
Ṣeto
- Gbigba agbara ẹrọ naa:
Locate the USB-C port on the back of the Q1 Label Maker. Connect the provided USB-C cable to the port and plug the other end into a compatible power adapter (not included). The indicator light will show charging status.

The rear of the Makeid Q1, highlighting the USB-C charging port for convenient power input.
- Installing Label Tape:
Open the top cover of the label maker. Insert the label tape roll into the designated slot, ensuring the tape feeds correctly through the output slot. Close the cover securely.

Ti abẹnu view of the Makeid Q1 with the top cover open, showing the compartment for label tape installation.
- Nsopọ nipasẹ Bluetooth:
Download the "MakeID Life" app from your device's app store (compatible with iOS & Android). Turn on the label maker by pressing the 'P' (Power) button. Enable Bluetooth on your smartphone or tablet and open the MakeID Life app. Select the Q1 model from the device list within the app to establish a connection.

The Makeid Q1 label maker connected to a smartphone running the MakeID Life app, demonstrating Bluetooth connectivity.
Awọn ilana Iṣiṣẹ
Direct Button Functions:
- Power Button ('P'):
Press to turn the device on or off. The indicator light will illuminate when the device is active.
- Date Button ('D'):
With continuous label tape installed, press the 'D' button to automatically print the current date. The date format can be customized within the MakeID Life app.

A hand pressing the 'D' (Date) button on the Makeid Q1, resulting in a printed label with the current date.
- Custom Button ('C'):
With continuous label tape installed, press the 'C' button to print a pre-saved custom design or text. This feature is ideal for frequently used labels and can be configured in the MakeID Life app.

A hand pressing the 'C' (Custom) button on the Makeid Q1, demonstrating the printing of a personalized label.
Using the MakeID Life App:
The MakeID Life app provides extensive customization options for your labels:
- Awọn lẹta: Access over 40 different fonts to personalize your text.
- QR Codes & Barcodes: Generate and print QR codes and various barcode types.
- Stickers & Frames: Choose from over 300 stickers and 26+ frames to enhance your labels.
- Awọn awoṣe: Utilize a wide range of pre-designed templates, with monthly updates, for various applications (e.g., home, office, school, food storage).
- Image Printing: Print images directly onto your labels.

The MakeID Life app interface, illustrating the diverse customization features available for label creation.
The Q1 Label Maker produces high-definition 300 dpi prints, ensuring clear and legible labels that remain visible for up to 3 years.

A visual comparison demonstrating the superior clarity of 300 DPI prints from the Makeid Q1 versus lower resolution alternatives.
The versatility of the Q1 allows for a wide range of applications, from organizing home and office supplies to labeling food items and creating tags for small businesses.
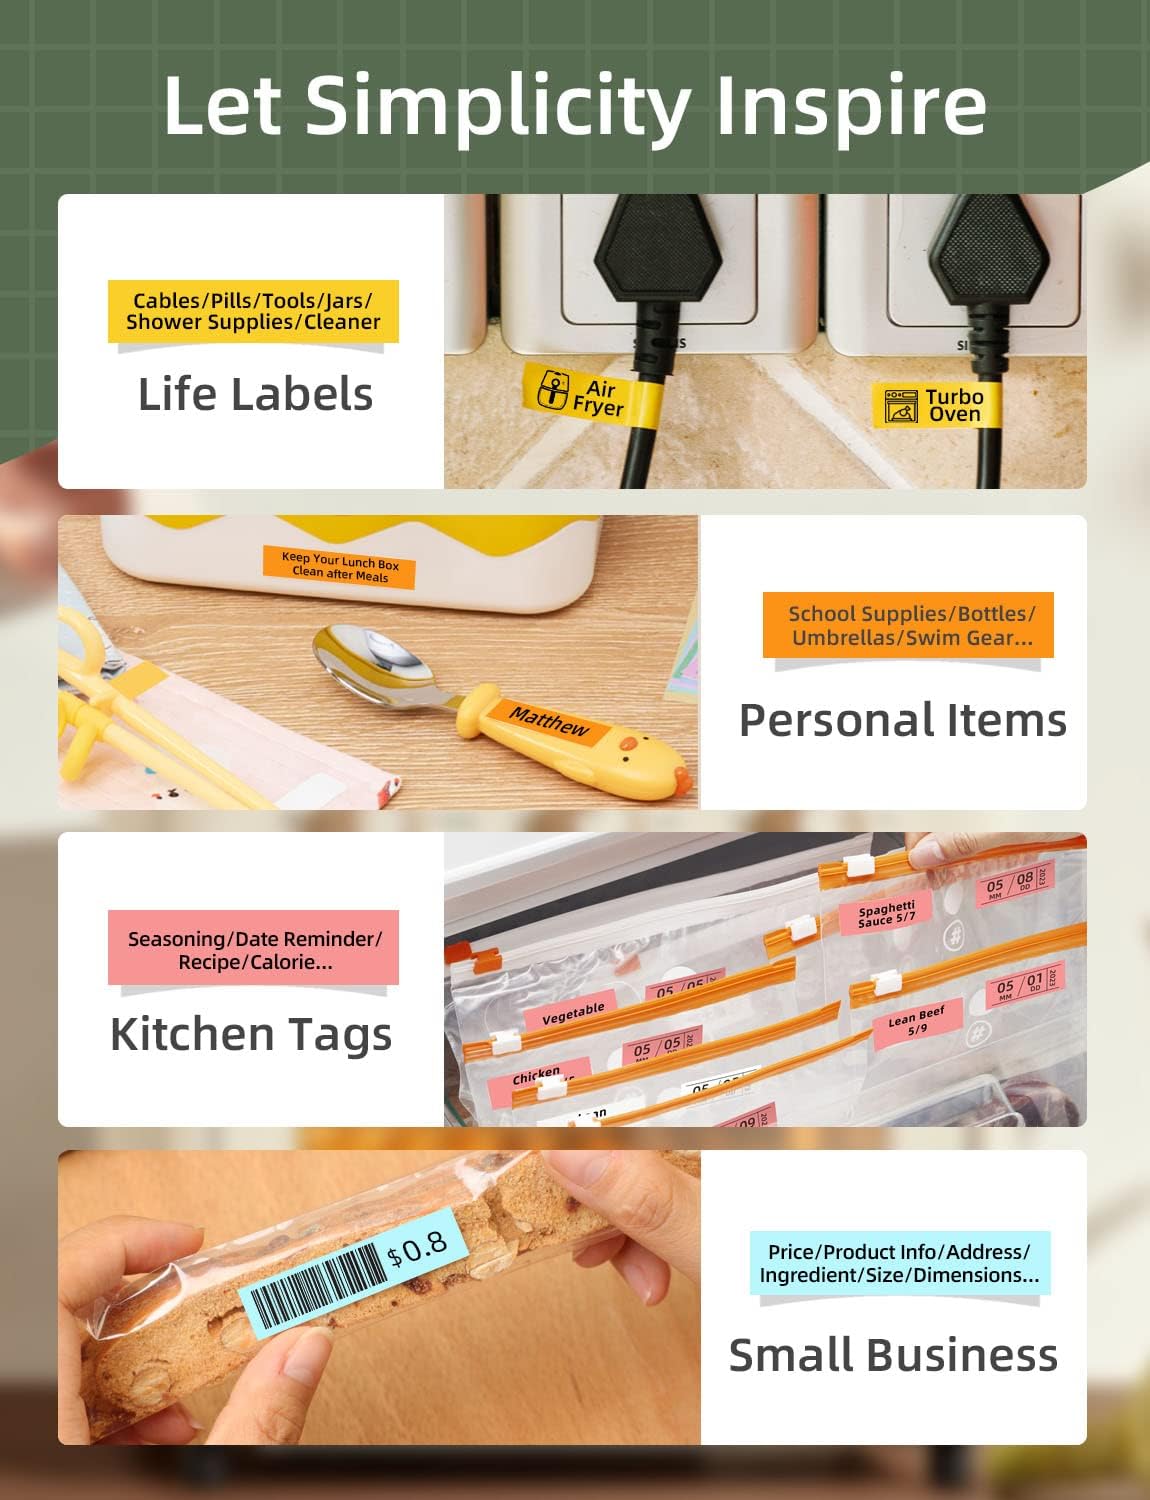
Various applications of the Makeid Q1 labels, including organization for home, kitchen, and small business items.
Itoju
- Rirọpo teepu:
When the label tape runs out or needs to be changed, simply open the top cover, remove the empty roll, and insert a new Makeid compatible label tape. Ensure the tape is properly aligned before closing the cover.
- Ninu:
Periodically wipe the exterior of the device with a soft, dry cloth to remove dust and debris. Avoid using harsh chemicals or abrasive materials.
Laasigbotitusita
| Isoro | Owun to le Fa | Ojutu |
|---|---|---|
| Ẹrọ ko ni titan. | Batiri kekere tabi ko si agbara. | Gba agbara si ẹrọ naa nipa lilo okun USB-C. |
| No label printing. | Tape not installed correctly or tape has run out. | Open the top cover and ensure the tape is properly installed. Replace tape if empty. |
| Didara titẹ sita ti ko dara. | Dust on print head or low tape quality. | Clean the print head (refer to detailed user guide PDF). Ensure you are using official Makeid label tape. |
| Awọn oran asopọ Bluetooth. | Bluetooth is off, device is out of range, or app glitch. | Ensure Bluetooth is enabled on your device and the label maker is within range. Restart the app and the label maker. Try reconnecting. |
| Date/Custom button not working. | Using discontinuous tape or incorrect app settings. | These functions only work with continuous label tape. Verify settings in the MakeID Life app. |
Awọn pato
| Ẹya ara ẹrọ | Ẹ̀kúnrẹ́rẹ́ |
|---|---|
| Brand | Makeid |
| Orukọ awoṣe | Q1 |
| Imọ-ẹrọ titẹ sita | Gbona |
| Titẹ Ipinnu | 300 Dots Per Inch (DPI) |
| Asopọmọra | Bluetooth |
| Awọn ẹrọ ibaramu | iOS & Android smartphones/tablets |
| Ọna Iṣakoso | App (MakeID Life) |
| O pọju Media Iwon | 16 mm |
| Orisun agbara | 1 Lithium Polymer battery (included), USB-C charging |
| Iwọn Nkan | kilo 0.48 (1.06 poun) |
| Ọja Mefa | 5.51"D x 2.76"W x 2.76"H |
Atilẹyin ọja ati Support
For detailed warranty information, please refer to the official user guide PDF provided with your product or visit the Makeid Store on Amazon.
If you encounter any issues not covered in this manual or require further assistance, please contact Makeid customer support through the official channels provided in your product packaging or on the Makeid webojula.
A comprehensive User Guide (PDF) is available for download: Itọsọna olumulo (PDF)


