Ọrọ Iṣaaju
The Vikeri 1520P 20MP Trail Camera is designed for wildlife monitoring, hunting, and property surveillance. It features high-resolution video and photo capabilities, a fast trigger speed, and a durable, waterproof design. This manual provides detailed instructions for setting up, operating, and maintaining your trail camera to ensure optimal performance.

Figure 1: Vikeri 1520P 20MP Trail Camera package contents.
Ṣeto
1. Unboxing ati irinše
Ṣaaju ki o to bẹrẹ iṣeto, rii daju pe gbogbo awọn eroja wa:
- Vikeri 1520P 20MP Trail Camera (2 units)
- Iṣagbesori Okun
- 32GB Micro SD Card (2 units)
- AA Batteries (8 units)
- Okun USB
- Afowoyi Olumulo (iwe-ipamọ yii)
2. Fifi sori batiri
- Wa yara batiri ni ẹhin kamẹra.
- Open the two latches on the side of the camera to access the interior.
- Insert 4 AA batteries into the designated slots, ensuring correct polarity (+/-).
- Pa yara batiri naa ni aabo.
3. SD kaadi ifibọ
- Locate the micro SD card slot inside the camera, typically near the battery compartment.
- Insert the provided 32GB micro SD card into the slot until it clicks into place. Ensure the card is inserted in the correct orientation.
- It is recommended to format the SD card through the camera's menu before first use.
4. Iṣagbesori Kamẹra
The camera can be mounted to a tree or post using the included strap:
- Fi okùn ìsopọ̀ náà mọ́ inú àwọn ihò tó wà ní ẹ̀yìn kámẹ́rà náà.
- Secure the camera to a tree or post at a height of 1-2 meters (approximately 3-6 feet).
- Ensure the camera is aligned parallel to the ground in the desired direction for optimal detection.
- Tighten the strap firmly to prevent movement.

Figure 2: Camera mounted on a tree, demonstrating its IP66 waterproof rating.
Ṣiṣẹ kamẹra
1. Agbara lori / Paa
- To power on the camera, slide the mode switch to the 'ON' position.
- Lati pa agbara, rọra yipada si ipo 'PA'.
2. Lilọ kiri ni Akojọ aṣyn
The camera features a built-in 2.4-inch LCD color screen and control buttons for easy navigation and settings adjustment.
- Lo awọn bọtini itọnisọna (Soke, Isalẹ, Osi, ọtun) lati lọ kiri nipasẹ awọn aṣayan akojọ aṣayan.
- Tẹ bọtini 'OK' lati jẹrisi awọn yiyan.
- Press the 'MENU' button to access the main settings menu.
3. Photo and Video Settings
Adjust the camera settings to suit your monitoring needs:
- Ipinnu: The camera supports up to 1520P video and 20MP photos, providing clear and vibrant images.
- Iyara Iyara: With a lightning-fast 0.2-second trigger speed, the camera captures movements quickly, minimizing missed events.
- Igun Wiwa: The 120° wide-angle PIR (Passive Infrared) detection provides a broad field of view, capturing more activity.
- Iran Alẹ: Equipped with 48pcs 940nm no-glow infrared LEDs, the camera provides clear night vision up to 65 feet without disturbing wildlife.
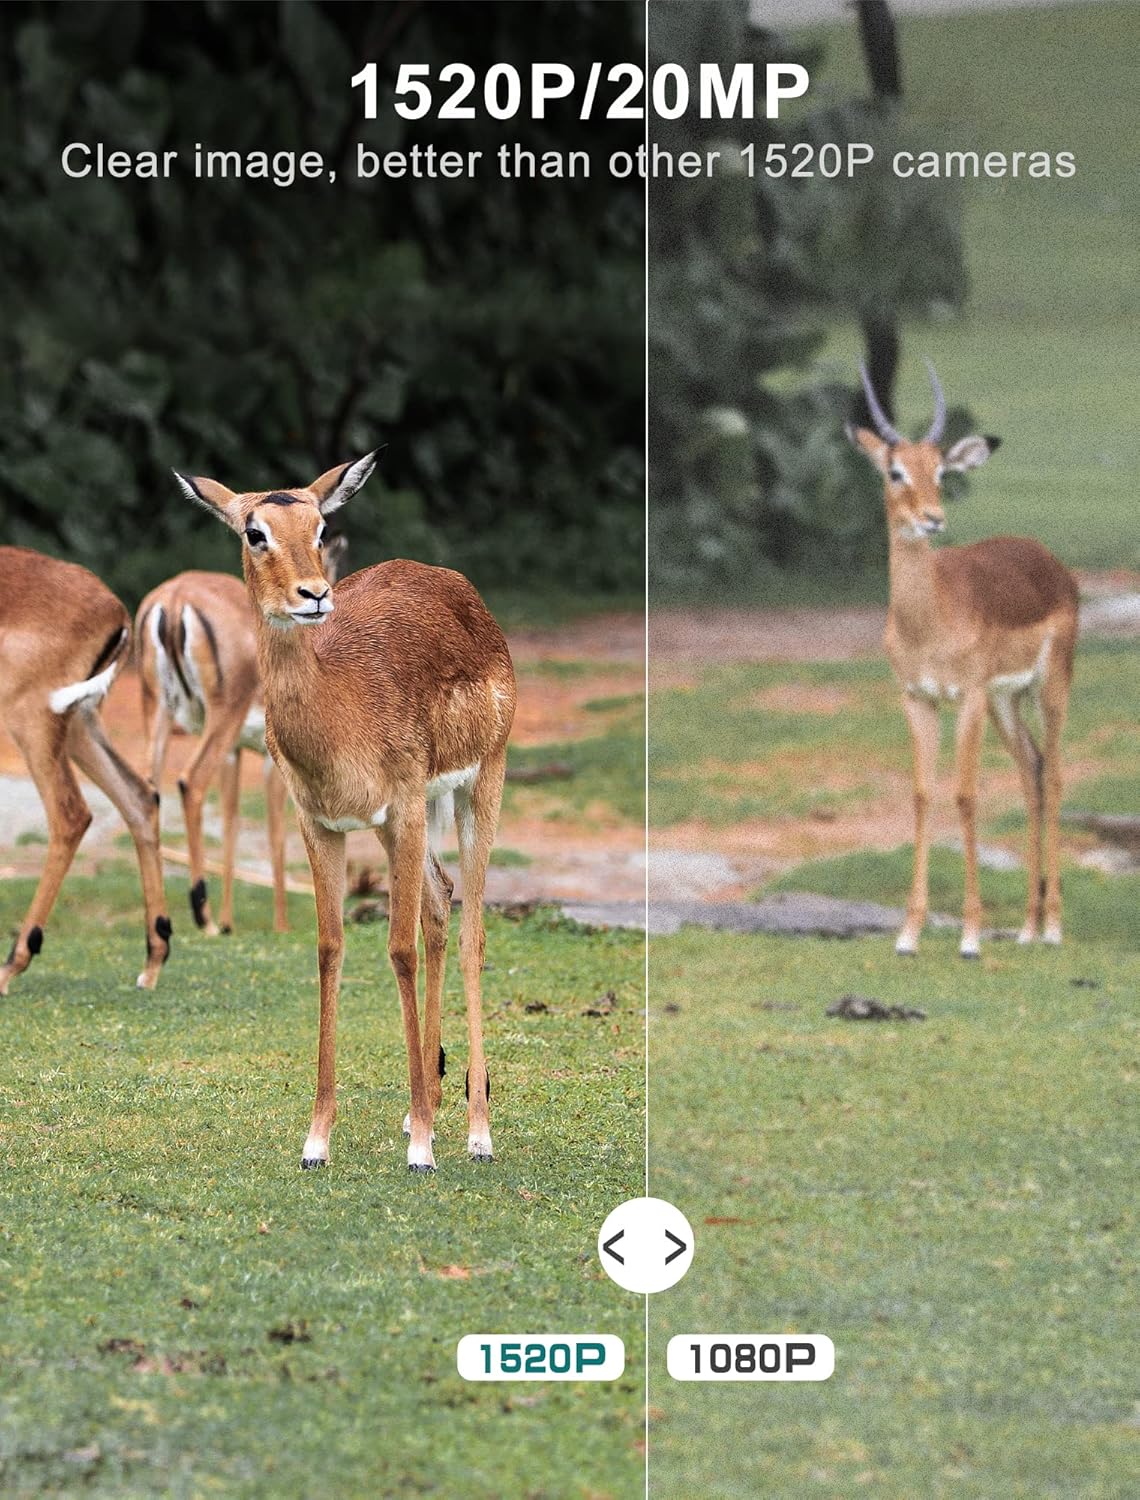
Figure 3: Image quality comparison between 1520P and 1080P resolutions.

Figure 4: Demonstration of the 0.2s trigger speed capturing fast-moving subjects.

Figure 5: The 120° wide-angle detection captures a broader area.

Figure 6: Night vision capability with 940nm no-glow IR LEDs.
4. Viewing Yaworan Media
O le view photos and videos directly on the camera's LCD screen:
- Switch the camera to 'PLAYBACK' mode using the mode switch.
- Use the directional buttons to browse through captured images and videos.
- Tẹ 'OK' lati view ti a yan file.
- Lati gbe files to a computer, remove the micro SD card and insert it into a card reader, or connect the camera directly via the USB cable.
Itoju
- Ninu: Regularly clean the camera lens and PIR sensors with a soft, dry cloth to ensure clear images and accurate detection. Avoid abrasive materials.
- Ṣayẹwo Batiri: Monitor battery levels through the LCD screen. Replace all batteries when low to prevent interruption of recording.
- Iṣakoso Kaadi SD: Periodically format the SD card to maintain optimal performance and prevent data corruption. Back up important files ṣaaju ki o to kika.
- Igbẹhin ti ko ni omi: Ensure the latches are securely closed and the rubber seal around the camera housing is free from debris to maintain its IP66 waterproof rating.
- Ibi ipamọ: Nigbati o ko ba wa ni lilo fun awọn akoko ti o gbooro sii, yọ awọn batiri kuro ki o fi kamẹra pamọ si ibi ti o tutu, ti o gbẹ.
Laasigbotitusita
| Isoro | Owun to le Fa | Ojutu |
|---|---|---|
| Kamẹra ko ṣiṣẹ | Low or dead batteries; Incorrect battery insertion | Replace all batteries with new ones; Ensure correct polarity (+/-) |
| Aworan ti ko dara / didara fidio | Dirty lens; Incorrect resolution settings; Insufficient lighting | Clean the lens; Adjust resolution settings in the menu; Ensure adequate light for non-night vision modes |
| Sensọ išipopada ko nfa | PIR sensor obstructed; Sensitivity set too low; Subject out of range | Clear any obstructions from the sensor; Increase PIR sensitivity in settings; Ensure subject is within detection range (up to 65-80ft) |
| SD card error message | SD card not formatted; Corrupted SD card; Incompatible SD card | Format the SD card via the camera menu; Try a different, high-quality micro SD card (up to 32GB) |
| Aye batiri kukuru | Frequent triggers; Extreme temperatures; Low-quality batteries | Reduce trigger frequency if possible; Use high-quality alkaline or lithium batteries; Avoid extreme temperature exposure |
Imọ ni pato
| Ẹya ara ẹrọ | Sipesifikesonu |
|---|---|
| Ipinnu Yaworan fidio | 1520P |
| Ipinnu Iduro ti o munadoko | 20 MP |
| Iyara Nfa | 0.2 aaya |
| Viewigun igun | Awọn iwọn 120 |
| Ibiti Iran Night | 65 Ẹsẹ |
| Nọmba ti IR LED | 48 (940nm No Glow) |
| International Idaabobo Rating | IP66 (Mabomire) |
| Orisun agbara | Agbara Batiri (batiri AA 4 nilo) |
| Asopọmọra Technology | Wireless (USB for data transfer) |
| Ifihan | 2.4" LCD Color Screen |
| Ohun elo | Acrylonitrile Butadiene Styrene (ABS) |
| Ọja Mefa | 5.39 x 3.42 x 2.36 inches |
| Iwọn Nkan | 2.79 pounds (for 2 cameras) |
Atilẹyin ọja ati Support
For information regarding product warranty, returns, or technical support, please refer to the official Vikeri brand store or contact Vikeri customer service directly.
Official Vikeri Brand Store: Visit the Vikeri Store on Amazon
Jọwọ ṣe idaduro iwe rira rẹ fun eyikeyi awọn ibeere atilẹyin ọja.


