1. Ifihan
This user manual provides comprehensive instructions for the installation, operation, and maintenance of your HDWR videoCAR-L300 Dash Cam. Please read this manual thoroughly before using the device to ensure proper functionality and to maximize its lifespan. Keep this manual for future reference.
2. Ọja Ipariview
The HDWR videoCAR-L300 is a versatile dash camera designed to enhance your driving safety and record your journeys. It functions as both a front and rear recording device, integrated into a rearview mirror with a touchscreen display.
Awọn ẹya pataki:
- Gbigbasilẹ fidio HD ni kikun: The front camera records in Full HD (1920x1080) resolution, providing clear and detailed video footage.
- Iṣẹ́ Kamera Ẹ̀yìn: The rear camera offers VGA (640x480) recording resolution and can also serve as a reverse camera for parking assistance.
- Integrated 4.7-inch Touchscreen Display: The wide mirror, approximately 30 cm, features a built-in 4.7-inch touchscreen for easy operation and increased rear visibility.
- Lẹnsi Igun Gigun-Iwọn 120: The front camera's lens offers a 120-degree viewing angle, capturing a broad area in front of your vehicle.
- Isẹ aladaaṣe: Features include automatic camera start and stop, motion detection, and adjustable sensitivity.
- G-Sensor for Impact Detection: Automatically protects recordings from being overwritten in the event of sudden braking or a collision.
- Kaadi MicroSD atilẹyin: Supports microSD memory cards up to 32GB for storing recorded video and audio files.

olusin 2.1: Iwaju view of the HDWR videoCAR-L300 Dash Cam, showing the mirror display with a car image.
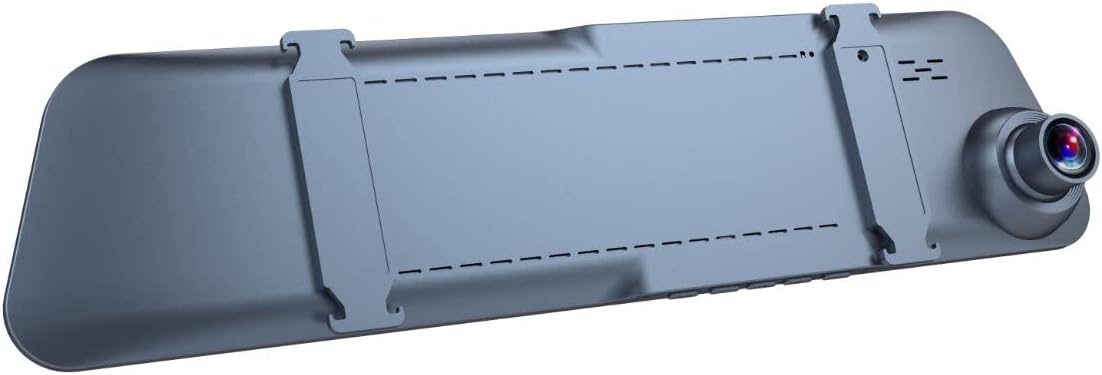
olusin 2.2: Ẹyìn view of the HDWR videoCAR-L300 Dash Cam, highlighting the mounting clips for installation.
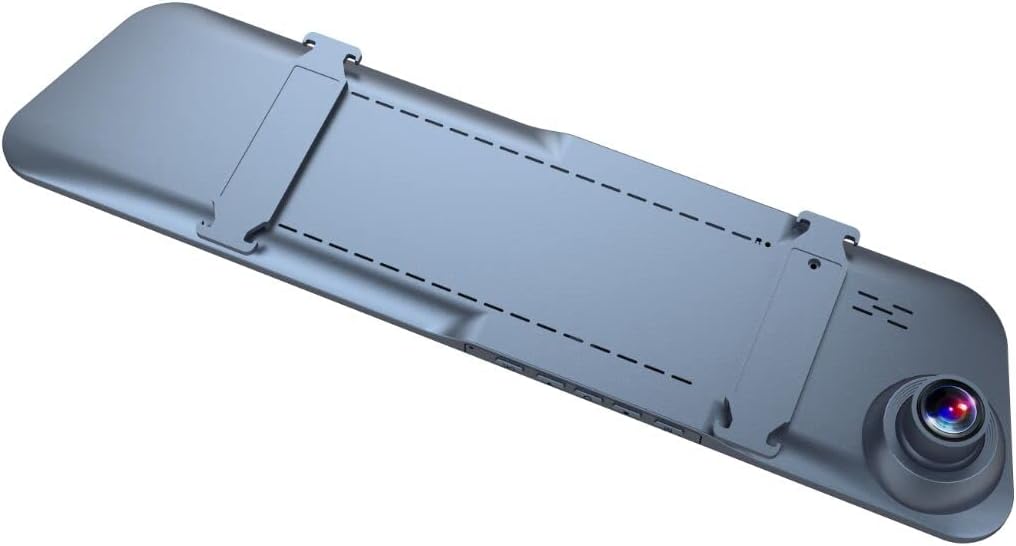
olusin 2.3: Angled ru view of the HDWR videoCAR-L300 Dash Cam, showing the camera lens and mounting clips.

olusin 2.4: exploded view illustrating the various perspectives of the HDWR videoCAR-L300 Dash Cam.
3. Eto ati fifi sori
3.1 Kini ni Apoti
Before beginning installation, please ensure all components are present:
- HDWR videoCAR-L300 Dash Cam Unit
- Ngba agbara USB
- Ọpa fifi sori ẹrọ
- Afowoyi Olumulo (iwe-ipamọ yii)
3.2 Installation Steps (Windshield Mount)
The videoCAR-L300 is designed for windshield mounting, typically over your existing rearview digi.
- Ṣetan Ẹrọ naa: Gently unbox the dash cam and ensure the protective film is removed from the screen and lens.
- Iṣagbesori: Securely attach the dash cam to your vehicle's rearview mirror using the integrated clips. Ensure it is firmly in place and does not obstruct your view.
- So agbara: Use the provided charging cable to connect the dash cam to your vehicle's 12V power outlet (cigarette lighter socket). Route the cable neatly to avoid interference with driving.
- Fi Kamẹra Tẹhin sori ẹrọ (Aṣayan): If using the rear camera, connect it to the main unit and route its cable to the rear of the vehicle. Mount the rear camera in a suitable location, typically near the license plate or inside the rear window, ensuring a clear view.
- Fi kaadi MicroSD sii: Insert a compatible microSD card (up to 32GB, not included) into the designated slot on the dash cam. Ensure it is inserted correctly until it clicks into place.
- Agbara Ibẹrẹ Tan: Start your vehicle. The dash cam should automatically power on. If not, press the power button.
- Ṣatunṣe Igun: Adjust the angle of the front camera lens to ensure it captures the road ahead clearly. Use the live view on the touchscreen display for precise alignment.

Figure 3.1: The dash cam installed on the vehicle's rearview mirror, showing its integration into the car's interior.
4. Awọn ilana Iṣiṣẹ
4.1 Agbara Tan / Pa
- Isẹ aladaaṣe: The device is designed to automatically power on and begin recording when your vehicle's ignition is turned on, and power is supplied. It will automatically power off when the ignition is turned off.
- Isẹ afọwọṣe: To manually power on or off, press and hold the power button located on the device.
4.2 Lilọ kiri Iboju ifọwọkan
The 4.7-inch touchscreen display allows for intuitive navigation through menus and settings.
- Ibanisọrọ akọkọ: Awọn ifihan ifiwe view from the front and/or rear cameras.
- Wiwọle si Awọn Akojọ aṣayan: Tap the screen to reveal menu icons. Swipe left/right or up/down to navigate through options.
- Yiyan Awọn aṣayan: Fọwọ ba aami kan tabi aṣayan lati yan.

Figure 4.1: The dash cam's screen showing a live road view, indicating active recording.
4.3 Awọn ọna Gbigbasilẹ
- Gbigbasilẹ Loop: The dash cam continuously records video in segments (e.g., 1, 3, or 5 minutes). When the memory card is full, the oldest unlocked files ti wa ni laifọwọyi kọ.
- G-Sensọ (Gbigbasilẹ pajawiri): In the event of sudden braking or a collision, the built-in G-Sensor detects the impact and automatically locks the current video segment, preventing it from being overwritten by loop recording.
- Iwari išipopada: When enabled, the camera will automatically start recording if it detects movement in front of the vehicle while parked. This feature requires continuous power supply.
4.4 Sisisẹsẹhin
Lati tunview foo ti o ti gbasilẹtage:
- From the main screen, tap to access the menu.
- Select the "Playback" or "Gallery" option.
- Browse through the recorded video and audio files. Titiipa files (from G-Sensor events) will typically be in a separate folder.
- Fọwọ ba a file to play it back on the screen.
4.5 Settings Adjustment
Access the settings menu to customize various parameters:
- Ipinnu fidio: Adjust recording quality (e.g., Full HD, VGA).
- Akoko Gbigbasilẹ Loop: Set the length of video segments.
- G-Sensọ Ifamọ: Adjust the sensitivity of the impact detection.
- Iwari išipopada: Muu ṣiṣẹ tabi mu ẹya ara ẹrọ yii ṣiṣẹ.
- Ọjọ/Aago Stamp: Ensure the correct date and time are set for accurate recording timestamps.
- Gbigbasilẹ ohun: Enable or disable microphone recording.
- Iboju kọmputa: Set the display to turn off after a period of inactivity to avoid distraction while driving.
5. Itọju
Regular maintenance ensures optimal performance and longevity of your dash cam.
- Fifọ lẹnsi naa: Lo asọ ti ko ni lint lati nu awọn lẹnsi kamẹra rọra. Yago fun awọn ohun elo abrasive tabi awọn kemikali simi ti o le fa lẹnsi naa.
- Ninu iboju: Wipe the touchscreen display with a soft, dry cloth. For stubborn smudges, slightly dampen awọn asọ pẹlu omi.
- Itọju Kaadi MicroSD: Format the microSD card regularly (e.g., once a month) within the camera's settings to prevent data corruption and ensure smooth recording. Back up any important footage ṣaaju ki o to kika.
- Iwọn otutu: Avoid exposing the device to extreme temperatures (very hot or very cold) for extended periods, as this can affect battery life and component performance.
- Iṣagbesori to ni aabo: Lorekore ṣayẹwo pe kamera dash ti gbe ni aabo lati ṣe idiwọ awọn gbigbọn lati ni ipa lori didara fidio tabi fa ki ẹrọ naa ṣubu.
6. Laasigbotitusita
If you encounter issues with your HDWR videoCAR-L300, refer to the following common problems and solutions:
| Isoro | Owun to le Fa | Ojutu |
|---|---|---|
| Ẹrọ naa ko ṣiṣẹ. | No power supply; loose cable connection; faulty power adapter. | Check the charging cable connection to the device and the vehicle's power outlet. Ensure the vehicle's ignition is on. Try a different power outlet or cable if available. |
| Gbigbasilẹ duro tabi di. | Full or corrupted microSD card; slow microSD card; G-Sensor triggered too often. | Format the microSD card (back up data first). Use a high-speed (Class 10 or U1/U3) microSD card. Adjust G-Sensor sensitivity in settings. |
| Fidio footage jẹ blurry tabi koyewa. | Dirty lens; protective film still on lens; improper camera angle. | Clean the camera lens with a soft cloth. Remove any protective film. Adjust the camera angle to ensure a clear view ti opopona. |
| Iboju ko dahun. | Ibùgbé software glitch. | Perform a soft reset by pressing and holding the power button until the device restarts. If unresponsive, disconnect power and reconnect. |
| Rear camera not working. | Loose connection; faulty cable or camera. | Ṣayẹwo asopọ ti okun kamẹra ẹhin si ẹyọ akọkọ. Rii daju wipe okun ko baje. |
If the problem persists after trying these solutions, please contact HDWR customer support for further assistance.
7. Awọn pato
| Ẹya ara ẹrọ | Ẹ̀kúnrẹ́rẹ́ |
|---|---|
| Brand | HDWR |
| Orukọ awoṣe | videoCAR |
| Nọmba Awoṣe Nkan | L300 |
| Ọja Mefa | 3.5D x 29.7W x 7H cm; 180 grams |
| Iwon iboju | 4.7 inches |
| Video Resolution (Front) | HD ni kikun (1920x1080p) |
| Video Resolution (Rear) | VGA (640x480) |
| Viewigun igun | Awọn iwọn 120 |
| Flash Memory Iru | microSD (to 32GB) |
| Asopọmọra Technology | AUX |
| Pataki Awọn ẹya ara ẹrọ | Motion Sensor, G-Sensor |
| Ọna Iṣakoso | Fọwọkan |
| Iṣagbesori Iru | Afẹfẹ afẹfẹ |
| Awọn batiri To wa | Rara |
| Awọn ẹrọ ibaramu | Foonuiyara |
8. Atilẹyin ọja ati Support
For warranty information and technical support, please refer to the official HDWR website or contact their customer service directly. Details regarding warranty periods and service procedures are typically provided with your purchase documentation or on the manufacturer's webojula.
Fun iranlọwọ siwaju sii, jọwọ ṣabẹwo: www.hdwr.eu


