1. Ọja Ipariview
The AUTDER AD-380 is a versatile and portable tire inflator designed for various inflation needs, including vehicle tires (cars, SUVs, motorcycles, bicycles), inflatable toys, and sports balls. It features a powerful 21V/2000mAh rechargeable battery, automatic shut-off, and an integrated LED light for emergency situations.

Image 1.1: The AUTDER AD-380 Portable Tire Inflator and its included accessories, such as various nozzles and a carrying case.
Awọn ẹya pataki:
- Iṣe to gaju: Inflates a standard car tire (195/55/R16) in approximately 2.5 minutes with an air flow of 50 L/min.
- Orisun Agbara Meji: Operates on its internal 21V/2000mAh rechargeable battery or via a 12V car power connection.
- Tiipa aifọwọyi: Laifọwọyi duro afikun ni kete ti a ba de titẹ ti a ti ṣeto tẹlẹ.
- Digital Manometer: Provides precise pressure readings and allows for accurate pressure setting (0.2 to 12.4 bar / 3 to 180 PSI).
- Ina LED pajawiri: Features three modes: illumination, double flash, and SOS for visibility in low-light conditions.
- Ikole ti o tọ: Designed with dust, humidity, and fire protection, a stainless metal valve, and a heat-resistant hose (-20 °C to 60 °C).
- Apẹrẹ to gbe: Lightweight (1.2 kg) with an ergonomic, anti-slip grip and includes a waterproof carrying case.
2. Awọn ilana aabo
Please read and understand all safety instructions before operating the AUTDER AD-380 tire inflator. Failure to follow these instructions may result in injury or damage to the product.
- Lilo ti a pinnu: This device is designed for inflating tires of cars, SUVs, motorcycles, bicycles, and various inflatable items. Do not use it for industrial machinery or truck tires.
- Gbigba agbara: Only use the charger provided with the product to recharge the battery. The 12V DC car cable is for operation only and cannot charge the battery.
- Ibi ipamọ: Do not store the device in humid environments to protect the battery.
- Ipele Ariwo: The operating noise level is below 80 dB, complying with EU standards. Prolonged exposure to high noise levels may require hearing protection.
- Afikun afikun: Always set the correct pressure and monitor the inflation process to prevent over-inflation, which can cause tires or objects to burst.
- Awọn ọmọde: Jeki ẹrọ naa kuro ni arọwọto awọn ọmọde.
- Iwọn otutu: Avoid operating or storing the device in extreme temperatures outside the specified range (-20 °C to 60 °C).
- Afẹfẹ: Ensure adequate ventilation during operation to prevent overheating. The device has an integrated fan for heat dissipation.
3. Eto
3.1 Ngba agbara si Batiri naa
Before first use, fully charge the 21V/2000mAh lithium battery using the included AC adapter.
- Connect the AC adapter to the charging port on the battery base.
- Pulọọgi AC ohun ti nmu badọgba sinu kan boṣewa iṣan iṣan.
- The battery indicator lights will show the charging status. A full charge typically takes 2 hours.
- Ni kete ti o ti gba agbara ni kikun, ge asopọ ohun ti nmu badọgba.

Image 3.1: The 21V battery base being charged via a USB cable, and the inflator's LED light illuminating a tire at night.
3.2 Attaching the Air Hose and Nozzles
The inflator comes with a flexible air hose and various adapters for different applications.
- Screw the air hose securely onto the inflator's air outlet.
- Select the appropriate nozzle or adapter for the item you wish to inflate. The included accessories are:
- 1x Tire Quick Connector (Pre-attached to hose)
- 1x Tapered nozzle (for inflatable toys, air mattresses)
- 1x Presta Valve Adapter (for certain bicycle tires)
- 1x Inflator needle (for sports balls)
- 4x Car tire caps
- Attach the selected nozzle to the end of the air hose.

Image 3.2: The AUTDER AD-380 inflator displayed with its range of included accessories, including a tire quick connector, tapered nozzle, Presta valve adapter, and inflator needle.
4. Awọn ilana Iṣiṣẹ
4.1 Powering On and Setting Pressure
- Tẹ bọtini agbara lati tan inflator. Ifihan oni-nọmba yoo tan imọlẹ.
- Use the 'M' button to cycle through the preset modes: Car, Motorcycle, Bicycle, Ball, and Manual. Each mode has a default pressure setting.
- To adjust the target pressure, use the '+' and '-' buttons. The display shows real-time pressure and the preset target pressure.
- Connect the hose with the appropriate nozzle to the item you wish to inflate.

Image 4.1: An internal diagram of the AUTDER AD-380 highlighting its dual metal motors, heat dissipation design, circuit protection, auto shut-off feature, and the digital display showing real-time and preset pressure.
4.2 Bibẹrẹ ati Idaduro Afikun
- Once the hose is connected and the desired pressure is set, press the inflation button (usually indicated by a play/start icon) to begin inflation.
- The inflator will automatically stop when the target pressure is reached.
- To manually stop inflation at any time, press the inflation button again.
- Ge asopọ okun waya kuro ninu ohun naa.
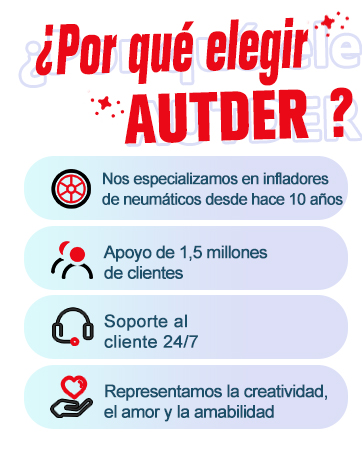
Image 4.2: A user inflating a car tire using the AUTDER AD-380 portable tire inflator.
4.3 Using the 12V Car Adapter
For continuous operation or when the battery is low, the inflator can be powered directly from your car's 12V cigarette lighter socket.
- Rii daju pe ẹrọ inflator wa ni pipa.
- Connect the 12V DC car adapter cable to the designated port on the inflator.
- Plug the other end into your car's 12V cigarette lighter socket.
- Proceed with inflation as described in Section 4.1 and 4.2. Note: The 12V cable does not charge the internal battery.

Image 4.3: The AUTDER AD-380 demonstrating its flexibility with both battery-powered operation and the option to connect to a car's 12V DC power outlet.
4.4 LED Light Išė
The integrated LED light can be activated independently for various purposes.
- Press the light button (usually indicated by a light bulb icon) to turn on the illumination mode.
- Press again to cycle through double flash and SOS modes.
- Tẹ igba kẹta lati paa ina.
5. Itọju
5.1 Ninu
- Ensure the device is turned off and disconnected from any power source before cleaning.
- Pa ode nu pẹlu asọ, damp asọ. Maṣe lo awọn kẹmika ti o lewu tabi awọn afọmọ abrasive.
- Keep the air intake and exhaust vents clear of dust and debris.
5.2 batiri Itọju
- To prolong battery life, avoid completely draining the battery before recharging.
- If storing the device for an extended period, charge the battery to approximately 50-70% and recharge every 3-6 months.
- Store the device and battery in a cool, dry place, away from direct sunlight and extreme temperatures.
5.3 Hose and Nozzle Inspection
- Regularly inspect the air hose for cracks, kinks, or damage. Replace if necessary.
- Ensure all nozzles and adapters are clean and free from obstructions.
6. Laasigbotitusita
| Isoro | Owun to le Fa | Ojutu |
|---|---|---|
| Inflator ko ni tan-an. | Batiri ti dinku tabi ko fi sori ẹrọ daradara. | Charge the battery. Ensure the battery is securely attached to the inflator. |
| Inflator náà ń ṣiṣẹ́ ṣùgbọ́n afẹ́fẹ́ kò jáde. | Hose or nozzle is blocked. Hose is not securely attached. | Check for obstructions in the hose and nozzle. Ensure the hose is tightly screwed onto the inflator. |
| Inflation is slow or stops prematurely. | Low battery. Target pressure reached. Leak in connection. | Recharge the battery. Check the preset pressure. Ensure all connections are tight. |
| Kika titẹ ti ko pe. | Sensor issue or extreme temperature. | Ensure the device is operating within its specified temperature range. If the issue persists, contact customer support. |
| Ẹ̀rọ náà gbóná ju bó ṣe yẹ lọ. | Prolonged use. Blocked vents. | Allow the device to cool down. Ensure air vents are clear. The integrated fan helps prevent overheating. |
7. Awọn pato
| Ẹya ara ẹrọ | Sipesifikesonu |
|---|---|
| Nọmba awoṣe | AD-380 |
| Olupese | AUTDER |
| Awọn iwọn (L x W x H) | 16.3 x 7.8 x 26.8 cm |
| Iwọn | 1.36 kg |
| Batiri | 21V Lithium metal, 2000mAh |
| Agbara | 180 Wattis |
| Ipa ti o pọju | 180 PSI (igi 12.4) |
| Air Sisan Agbara | 50 liters fun iseju |
| Ariwo Ipele | 79 dB |
| Hose Gigun | 60 cm |
| Awọn iwọn otutu ti nṣiṣẹ | -20 °C si 60 °C |
| Pataki Awọn ẹya ara ẹrọ | Cordless, Digital Manometer, Automatic Shut-off, Integrated Fan, LED Light |
| Awọn irinše to wa | 4 inflator accessories (ball pin, 2 air nozzles, Presta valve adapter), 4 car tire caps, waterproof carrying case |
8. Atilẹyin ọja ati Support
8.1 atilẹyin ọja Alaye
The AUTDER AD-380 Portable Tire Inflator comes with a 12-osu atilẹyin ọja from the date of purchase. This warranty covers manufacturing defects and workmanship under normal use. Please retain your proof of purchase for warranty claims.
Spare parts are available for up to ọdun meji 5 lati ọjọ ti o ra.
8.2 Onibara Support
AUTDER is committed to customer satisfaction. If you have any questions, concerns, or require assistance with your product, please contact our support team.
- Atilẹyin WhatsApp: + 1 (858) 328-1126
- Imeeli Atilẹyin: EURsupport@autder.net

Image 8.1: AUTDER customer service representatives ready to assist with product inquiries and support.


