1. Ifihan
Thank you for choosing the Anern 40A MPPT Solar Charge Controller. This manual provides essential information for the safe and efficient operation of your device. The AN-MSC series MPPT charge controllers are designed for maximum power point solar charging, ensuring high efficiency and optimal energy transfer to your battery bank. They automatically detect 12V/24V lead-acid battery systems and offer preset functions for various battery types, including gel, flooded, and sealed batteries. Manual setup is required for 24V lithium batteries.

olusin 1: Iwaju view of the Anern MPPT Solar Charge Controller, showing its display and buttons.
2. Key Awọn ẹya ara ẹrọ
- Iṣiṣẹ to gaju: Up to 99% tracking efficiency for maximum power point solar charging.
- Aifọwọyi VoltagÌdámọ̀ e: Automatically detects 12V/24V battery systems.
- Ibamu Batiri Pupọ: Supports lead-acid (sealed, flooded, gel) and lithium batteries (24V lithium requires manual setup).
- Gbigba agbara lọwọlọwọ: Available in 20A, 30A, and 40A models. This model is 40A.
- Awọn ọna Iṣakoso pupọ: Includes Regular mode, Light control mode, Light and time control mode, and Reverse light control mode.
- Apẹrẹ ti o lagbara: Aluminum molded structure ensures good heat dissipation for continuous and stable charging.
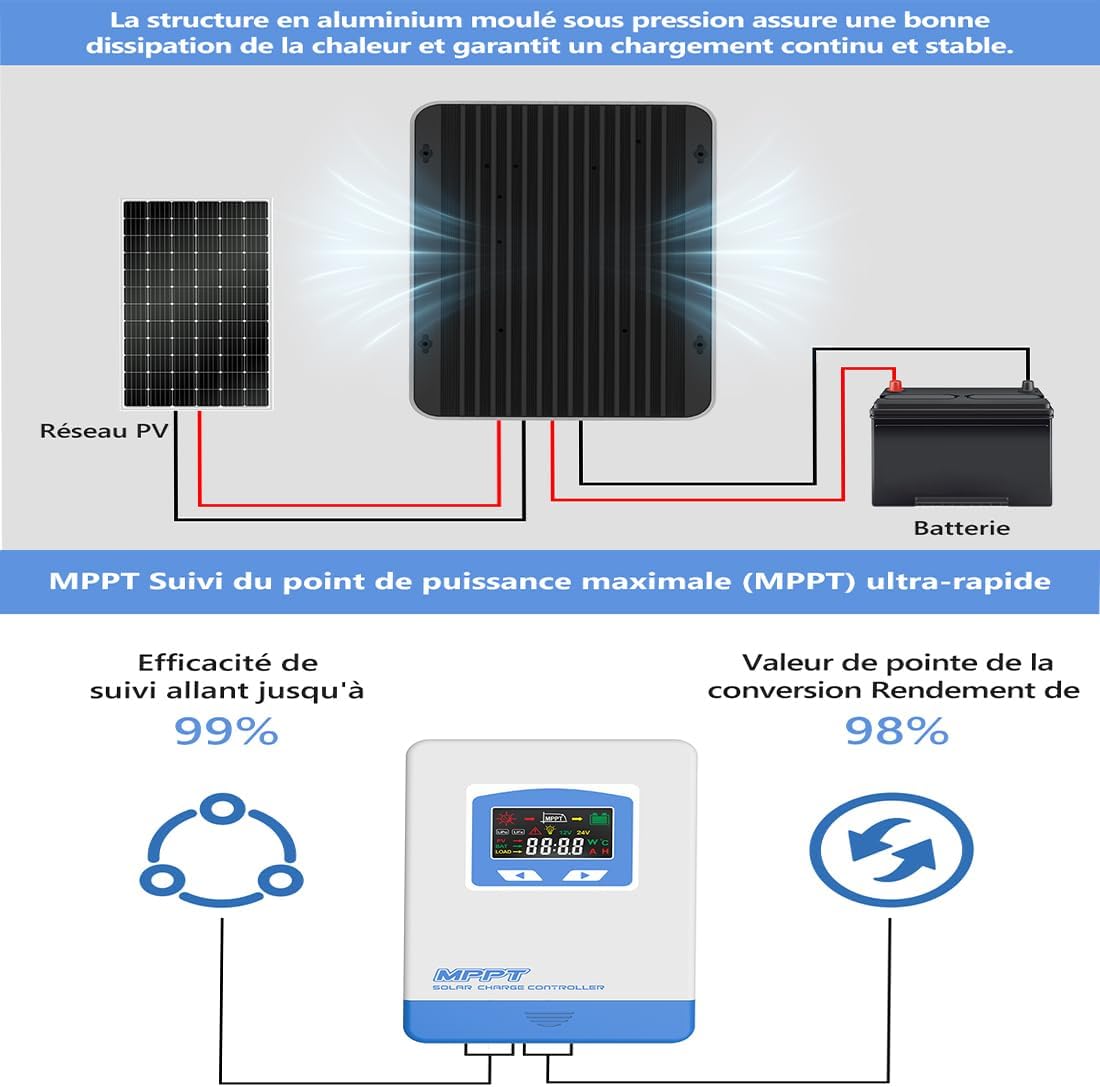
Figure 2: Diagram highlighting the aluminum molded structure for heat dissipation and emphasizing the ultra-fast MPPT tracking efficiency of up to 99% and conversion efficiency of 98%.
3. Eto ati fifi sori
Proper installation is crucial for the safe and efficient operation of your solar charge controller. Please follow these steps carefully:
- Mura fun fifi sori: Ensure all components are present and undamaged. Disconnect any existing power sources.
- So batiri pọ: First, connect the battery to the charge controller. Ensure correct polarity (+ to + and - to -). The controller will automatically detect the battery voltage (12V tabi 24V).
- Solar Panel: Next, connect the solar panel(s) to the charge controller. Ensure correct polarity. The controller will begin charging the battery.
- So ẹrù náà pọ̀ (Àṣàyàn): Finally, connect your DC load to the controller's load terminals. Ensure correct polarity.
Important Safety Note: Always connect the battery first and disconnect it last. Incorrect connection order can damage the controller.
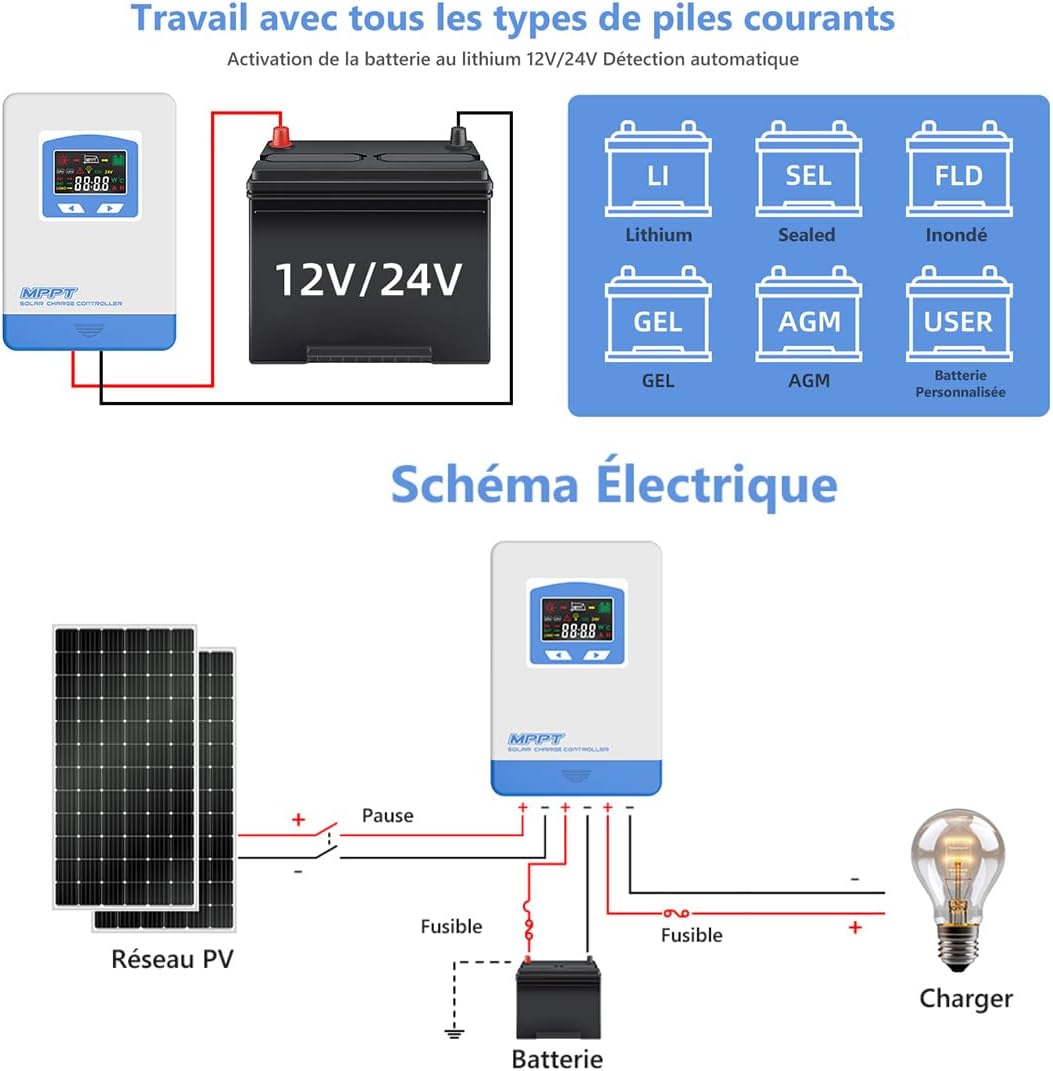
Figure 3: Detailed wiring diagram showing the correct connection sequence for the solar panels, battery, and load to the MPPT solar charge controller. Note the fuses for safety.
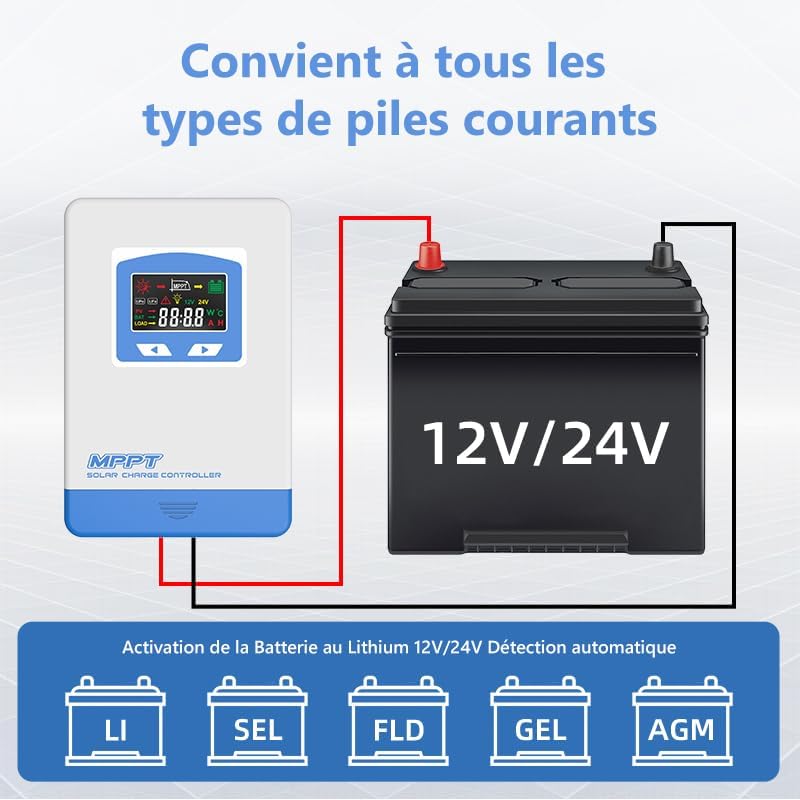
Figure 4: Diagram illustrating the compatibility of the solar charge controller with various battery types, including Lithium, Sealed, Flooded, Gel, and AGM batteries, and automatic 12V/24V detection.

Figure 5: Illustration detailing the protection features of the controller, such as protection against reverse solar panel connection, reverse battery connection, battery overvoltage, battery overload, and overcharge.
4. Awọn ilana Iṣiṣẹ
4.1 Ifihan Interface
The controller features a clear display that shows various operational parameters and status indicators. Refer to the image below for a detailed description of the interface and icons.

olusin 6: Isunmọ view of the controller's display interface and a table explaining the icons, their states (Day/Night, Charging, Battery Capacity), and button functions (MENU, SET).
4.2 bọtini Awọn iṣẹ
- Bọtini MENU: Short press to scroll down through interfaces. Press and hold for 3 seconds to enter the next interface.
- Ṣeto Bọtini: Short press to move to the next level. Press and hold for 3 seconds to save settings and exit.
4.3 Awọn ọna ṣiṣe
The charge controller offers four distinct operating modes, which can be selected based on your application needs. The default setting is 24-hour operation.
- LD1 (Normal Mode): The load operates normally and can be turned on or off manually.
- LD2 (Light Control Mode): The load automatically turns on at dusk and turns off at dawn.
- LD3 (Light and Time Control Mode): The load turns on at dusk and operates for a set number of hours before turning off. Automatic identification of darkness and light based on the local environment.
- LD4 (Reverse Light Control Mode): The load automatically turns on at dawn and turns off at dusk.

Figure 7: Diagram explaining the four operational modes: Normal Mode (LD1), Light Control Mode (LD2), Light and Time Control Mode (LD3), and Reverse Light Control Mode (LD4).
5. Itọju
To ensure the longevity and optimal performance of your Anern MPPT Solar Charge Controller, regular maintenance is recommended:
- Mimọ: Jẹ́ kí olùdarí náà mọ́ tónítóní, kí ó sì wà láìsí eruku àti ìdọ̀tí. Lo aṣọ gbígbẹ fún fífọ nǹkan mọ́.
- Awọn isopọ: Periodically check all wiring connections to ensure they are tight and secure. Loose connections can cause overheating or performance issues.
- Afẹfẹ: Ensure the controller has adequate ventilation to prevent overheating. Do not block the ventilation openings.
- Awọn ipo Ayika: Avoid exposing the controller to extreme temperatures, direct sunlight, or excessive moisture.
6. Laasigbotitusita
If you encounter issues with your solar charge controller, consider the following basic troubleshooting steps:
- Ko si Ifihan/Agbara: Check battery connections and ensure the battery has sufficient charge. Verify fuses are intact.
- Ko si gbigba agbara: Ṣàyẹ̀wò àwọn ìsopọ̀ mọ́tò oòrùn kí o sì rí i dájú pé oòrùn tó wà níbẹ̀ ló ń gbà wọ́n.tage wa laarin iwọn iṣiṣẹ ti oludari naa.
- Fifuye ko ṣiṣẹ: Check load connections and ensure the load is not exceeding the controller's rated current. Verify the selected operating mode is appropriate.
- Awọn koodu aṣiṣe: Refer to the display interface section (Figure 6) for explanations of any displayed error icons or codes.
For persistent issues, please contact Anern customer support or your seller for assistance.
7. Awọn pato
| Paramita | Iye |
|---|---|
| Ọja Mefa | 10.16 x 7.99 x 3.82 inches |
| Iwọn Nkan | 3.63 iwon (1.65 kilo) |
| Olupese | Anern |
| ASIN | B0CT5TVHWV |
| Nọmba Awoṣe Nkan | MPPT 40A |
| Awọn irinše to wa | Rara |
| Max Ṣii Voltage ti PV Module | 60V (for 20A model), 100V (for 30A/40A models) |
| Max PV Input Power | 260W~1040W (depending on model and voltage) |
| Won won Ngba agbara Lọwọlọwọ | 40A |
8. Atilẹyin ọja ati Support
For information regarding warranty coverage, technical support, or service, please refer to the documentation provided with your purchase or contact the seller/manufacturer directly. You can visit the official Anern store on Amazon for more details: Anern Store.
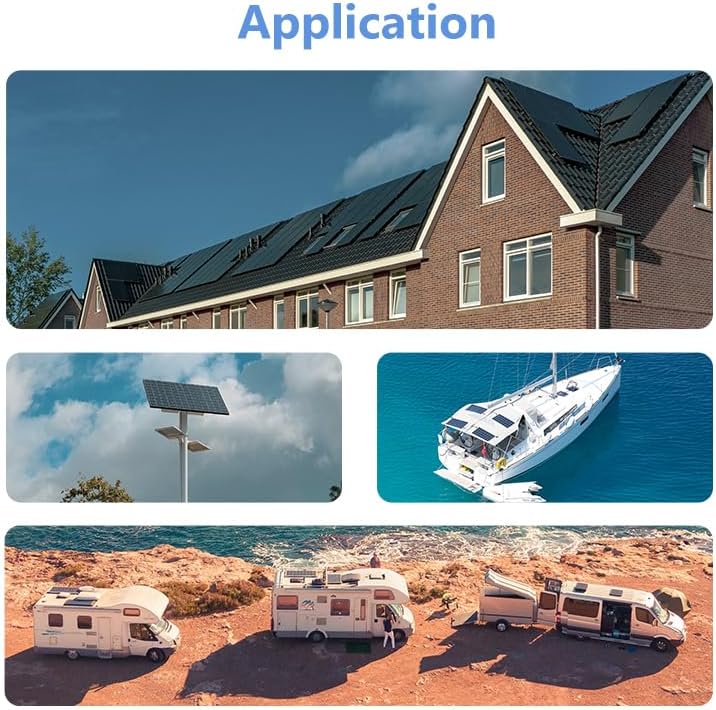
Olusin 8: Examples of typical applications for the solar charge controller, including residential solar systems, street lighting, RVs, and marine use.


