1. Ifihan
Thank you for choosing the CREWORKS 9" x 24" Mini Metal Lathe. This manual provides essential information for the safe operation, maintenance, and troubleshooting of your new machine. Please read this manual thoroughly before operating the lathe to ensure proper use and to prevent injury or damage.
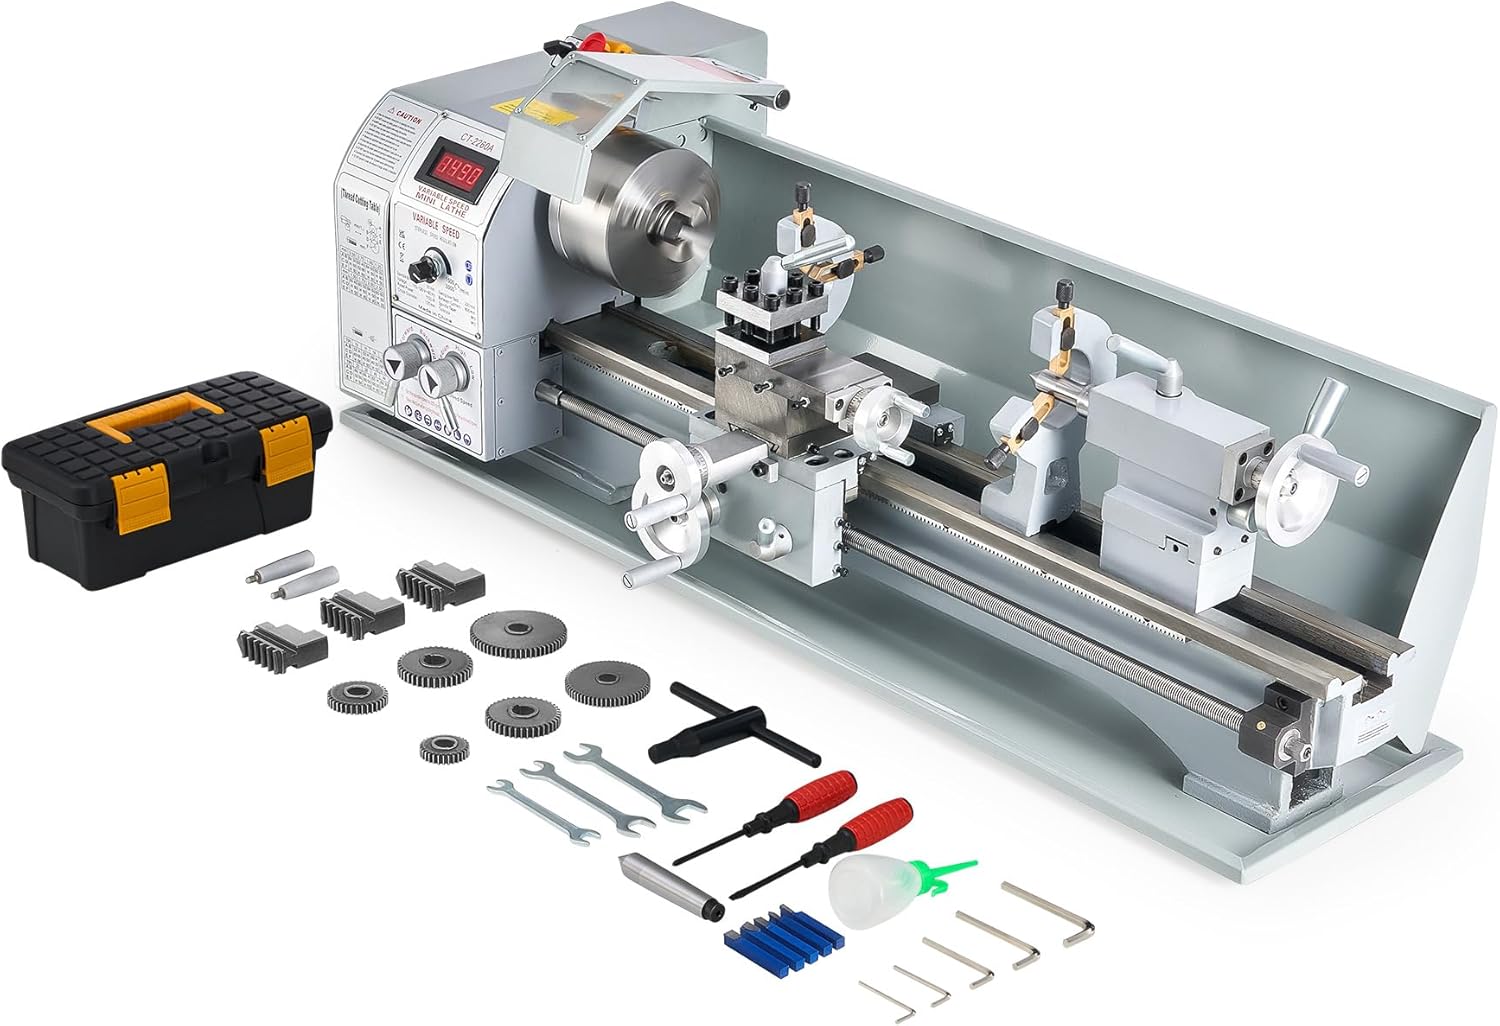
Figure 1.1: CREWORKS 9" x 24" Mini Metal Lathe with included accessories.
2. Awọn ilana aabo
Máa fi ààbò sí ipò àkọ́kọ́ nígbà tí o bá ń lo ẹ̀rọ. Àìtẹ̀lé àwọn ìlànà wọ̀nyí lè fa ìpalára tàbí ikú ńlá.
- Ka iwe afọwọkọ naa: Mọ gbogbo awọn itọnisọna ati awọn ikilọ ṣaaju ṣiṣe.
- Ohun elo Idaabobo Ti ara ẹni (PPE): Always wear safety glasses or a face shield. Use hearing protection. Do not wear loose clothing, gloves, ties, or jewelry that can get caught in moving parts. Tie back long hair.
- Agbegbe Iṣẹ: Jẹ́ kí ibi iṣẹ́ náà mọ́, tí ó tàn dáadáa, kí ó sì bọ́ lọ́wọ́ ìdàrúdàpọ̀. Rii daju aaye to peye ni ayika ẹrọ naa.
- Machine Condition: Inspect the lathe for damage or loose parts before each use. Do not operate if damaged.
- Asopọ agbara: Ensure the machine is properly grounded. Disconnect power before making adjustments, changing tools, or performing maintenance.
- Aabo Iṣẹ-iṣẹ: Nigbagbogbo rii daju awọn workpiece ni labeabo clampti a fi sinu chuck tabi collet.
- Yiyọ Chip kuro: Never remove chips by hand while the machine is running. Use a brush or hook.
- Iduro Pajawiri: Mọ ararẹ pẹlu ipo ati iṣẹ ti bọtini idaduro pajawiri.
- Abojuto: Maṣe fi ẹrọ naa silẹ laini abojuto lakoko ti o nṣiṣẹ.

Olusin 2.1: Pariview of the lathe components, including the emergency stop button.
3. Irinše ati idari
Understanding the various parts of your lathe is crucial for effective and safe operation.
3.1 Main irinše
- Oko-ori: Houses the main spindle, motor, and gear train.
- ẹyọ: Holds the workpiece securely. The CREWORKS lathe features a 3-jaw chuck.
- Gbigbe: Moves along the bed, carrying the cross slide and tool post.
- Cross Slide: Moves perpendicular to the bed, allowing for facing operations.
- Compound Rest: Rotates and slides to allow for angled cuts and fine adjustments.
- Tool Post: Holds the cutting tools.
- Ọja Tail: Supports the end of long workpieces or holds drilling/reaming tools.
- Ibusun: The main frame of the lathe, providing precision guide rails for the carriage and tailstock.
- Asiwaju skru: Used for automatic feeding and threading operations.
3.2 Awọn iṣakoso
- Power and Emergency Stop: Main power switch and immediate shutdown button.
- Siwaju/ Yipada Yipada: Controls spindle rotation direction.
- Bọtini Iṣatunṣe Iyara: Varies the spindle speed.
- Ifihan Iyara oni-nọmba: Shows the current spindle RPM.
- Carriage Handwheel: Manual movement of the carriage along the bed.
- Cross Slide Handwheel: Manual movement of the cross slide.
- Compound Control Wheel: Manual movement of the compound rest.
- Tail Feed Handwheel: Advances the tailstock quill.
- Half Nut Lever: Engages the lead screw for threading.
Figure 3.1: Detailed diagram showing the main components and controls of the lathe.
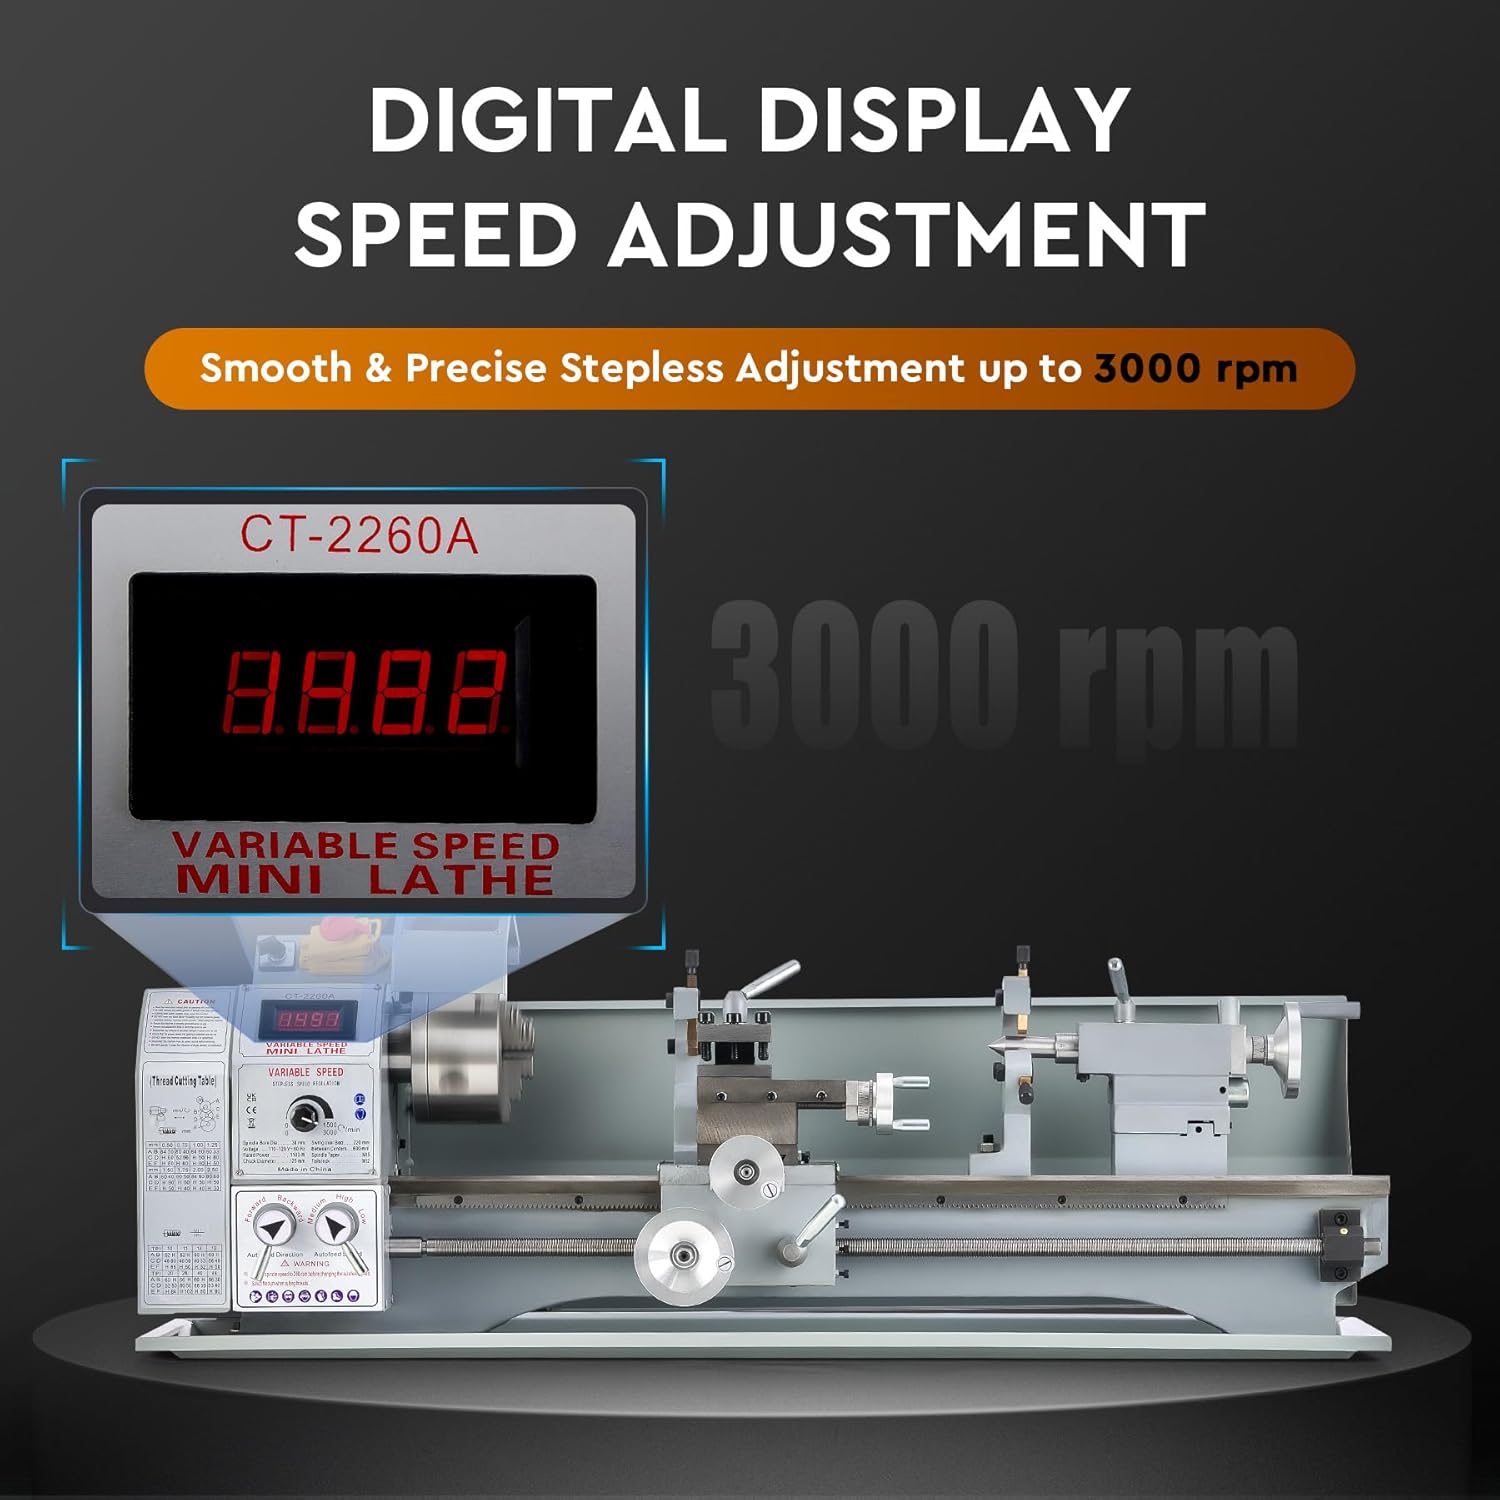
Figure 3.2: The digital display provides real-time spindle speed readings.
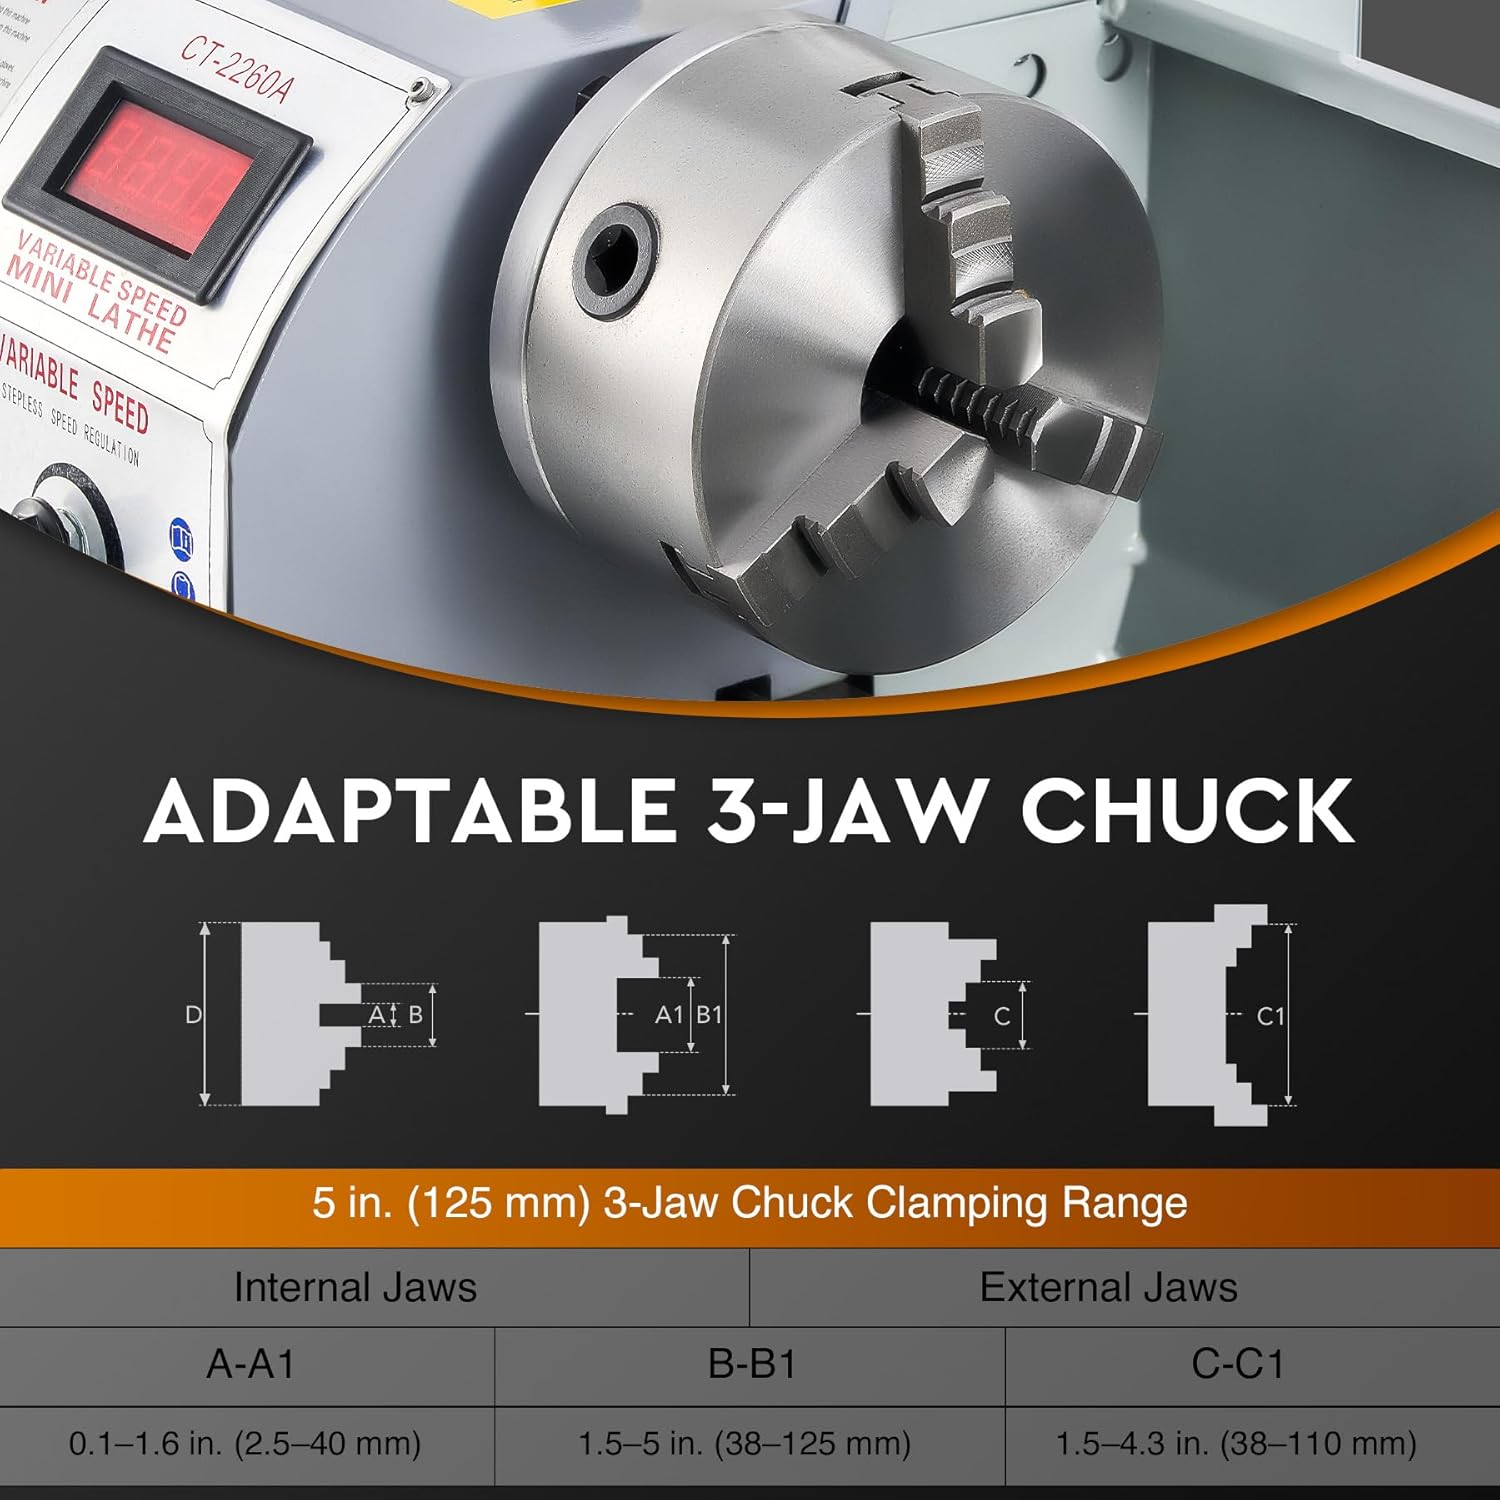
Figure 3.3: The 5-inch 3-jaw chuck is adaptable for various workpiece sizes.
4. Eto
4.1 Ṣiṣii ati Gbe
- Carefully remove the lathe and all accessories from the packaging. Retain packaging for future transport or storage.
- Clean off any protective grease or oil from the machine surfaces using a suitable degreaser.
- Place the lathe on a sturdy, level workbench capable of supporting its weight (approximately 159 lbs / 72 kg). Ensure the workbench is stable and does not wobble.
- Secure the lathe to the workbench using appropriate fasteners through the mounting holes in the base.
4.2 Awọn iṣayẹwo akọkọ
- Verify all moving parts move freely without excessive play or binding.
- Ṣayẹwo pe gbogbo fasteners wa ni ṣinṣin.
- Ensure the chuck guard is properly installed and functions correctly.
- So okun agbara pọ mọ itanna ti ilẹ.
5. Isẹ
5.1 Ipilẹ isẹ
- Agbara Tan: Turn on the main power switch. The digital display should illuminate.
- Workpiece Mounting: Open the chuck jaws using the chuck key. Insert the workpiece, ensuring it is securely centered and clamped. Remove the chuck key before starting the machine.
- Fifi sori ẹrọ: Loosen the tool post locking screw. Insert the cutting tool, ensuring it is at the correct height relative to the workpiece center. Tighten the locking screw.
- Titunṣe Iyara: Use the speed adjustment knob to set the desired spindle RPM. The digital display will show the current speed. The lathe supports speeds from 0 to 3000 rpm.
- Spindle Direction: Select forward or reverse rotation using the direction switch.
- Engage Feed: For manual operation, use the carriage, cross slide, and compound handwheels. For automatic feed or threading, engage the half-nut lever (refer to threading charts for gear setup).
- Ige: Slowly advance the cutting tool into the workpiece. Monitor the cut and adjust feed rate as needed.
- Agbara Pa: After completing the operation, turn off the spindle, then the main power switch.
5.2 Awọn ohun elo
This mini metal lathe is versatile and can perform various operations on materials such as wood, plastics, brass, and aluminum.
- Yipada: Atehinwa awọn iwọn ila opin ti a workpiece.
- Dojuko: Creating a flat surface on the end of a workpiece.
- Liluho: Creating holes along the center axis using the tailstock.
- Titẹ: Cutting external or internal threads.
- Ige: Parting off sections of material.

Figure 5.1: The lathe is suitable for a wide range of metalworking and other material applications.
6. Itọju
Regular maintenance ensures the longevity and precision of your CREWORKS Mini Metal Lathe.
6.1 Ninu
- After each use, clean all chips and debris from the machine, especially from the bedways, lead screw, and chuck. Use a brush or shop vacuum.
- Pa gbogbo awọn oju ilẹ pẹlu asọ mimọ.
6.2 Lubrication
- Regularly apply a thin coat of machine oil to the bedways, lead screw, and other sliding surfaces to prevent rust and ensure smooth operation.
- Consult the lubrication points diagram (if available in a more detailed manual) for specific oiling requirements.
6.3 Adjustments and Inspections
- Periodically check the tension of the drive belts.
- Ayewo Chuck jaws fun yiya tabi bibajẹ.
- Ensure the tailstock is aligned correctly.
- Check the condition of the metal gear set for any signs of wear or damage.
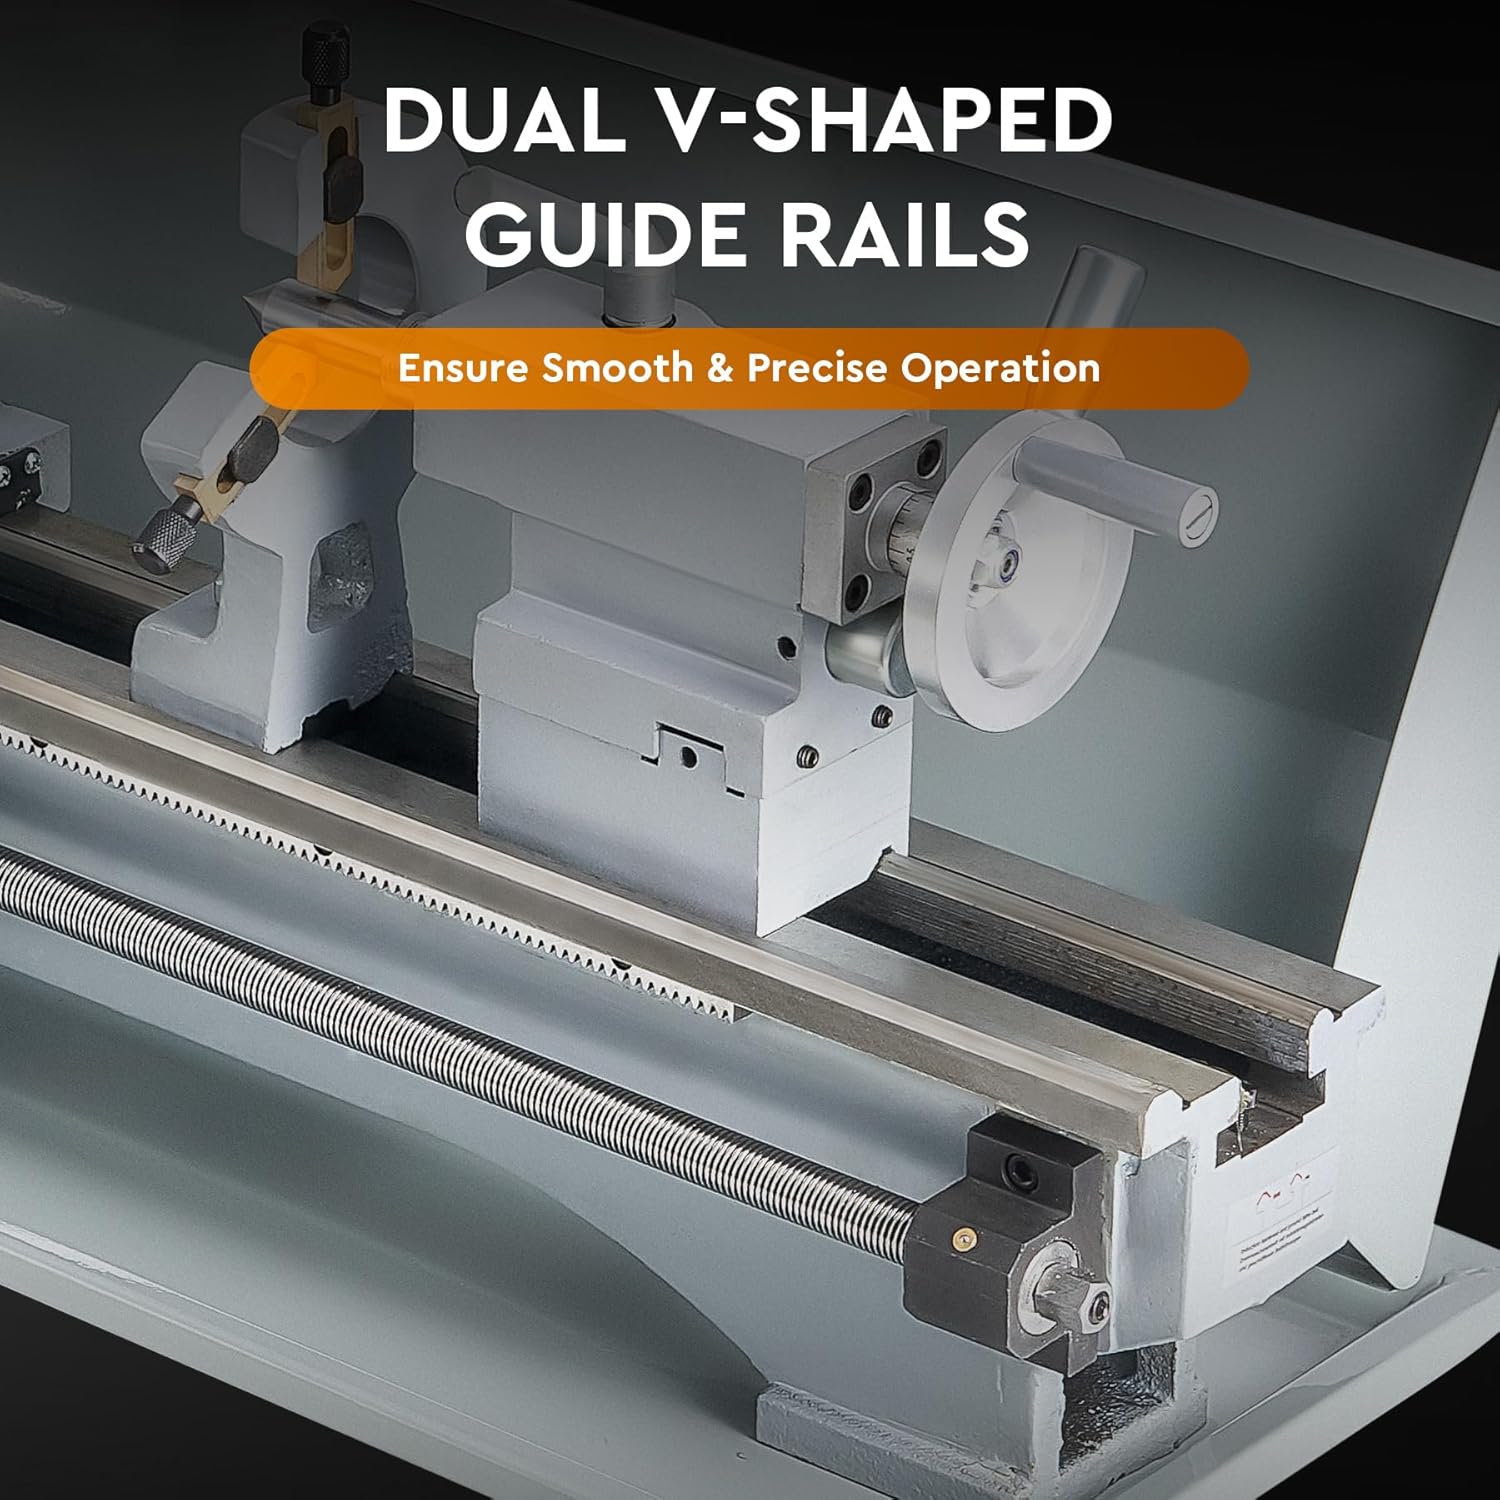
Figure 6.1: The dual V-shaped guide rails require regular cleaning and lubrication for smooth and precise operation.

Figure 6.2: The metal gear set ensures strong and efficient power transmission and should be inspected periodically.
7. Laasigbotitusita
This section addresses common issues you might encounter with your lathe.
| Isoro | Owun to le Fa | Ojutu |
|---|---|---|
| Lathe does not power on. | No power supply; Emergency stop engaged; Loose wiring. | Check power cord and outlet; Disengage emergency stop; Inspect wiring (if qualified). |
| Ẹ̀rọ ìfàmọ́ra kì í yípo. | Speed knob set to zero; Direction switch not engaged; Motor fault. | Increase speed; Select forward/reverse; Contact support if motor fault suspected. |
| Gbigbọn pupọ tabi ariwo. | Unbalanced workpiece; Loose components; Worn bearings; Insufficient lubrication. | Ensure workpiece is balanced and secure; Tighten all fasteners; Lubricate moving parts; Contact support for bearing issues. |
| Poor surface finish on workpiece. | Dull cutting tool; Incorrect speed/feed rate; Workpiece not rigid; Lathe not level. | Sharpen/replace tool; Adjust speed/feed; Ensure workpiece is secure; Level the lathe. |
8. Awọn pato
Technical specifications for the CREWORKS 9" x 24" Mini Metal Lathe.
| Ẹya ara ẹrọ | Sipesifikesonu |
|---|---|
| Awoṣe | 9" x 24" |
| Ti won won Agbara | 1.5 HP (1100W) |
| Golifu Lori Bed | 8.7 inch (220 mm) |
| Ijinna Laarin Awọn ile-iṣẹ | 23.6 inch (600 mm) |
| Spindle Bore | 1.5 inch (38 mm) |
| Chuck Diamita | 5 inch (125 mm) |
| Max. Spindle Speed | 3000 rpm |
| Tailstock Taper | MT#2 |
| Spindle Taper | MT#5 |
| Metric Thread Range | 0.3-3 mm |
| Inch Thread Range | 8–44 tpi |
| Awọn iwọn Ọja (L x W x H) | 39.57 x 13.78 x 16.93 inches |
| Apapọ iwuwo | 158.7 lbs (72 kg) |
| Ohun elo | Cast Iron, Stainless Steel, ABS |

Figure 8.1: Visual representation of key specifications and dimensions.
9. Atilẹyin ọja ati Support
For warranty information or technical support, please refer to the contact details provided at the point of purchase or visit the official CREWORKS webojula.
- Atilẹyin Onibara: For assistance with product issues, setup, or operation, please contact CREWORKS customer service.
- Pada: Ọjà yìí sábà máa ń ní ìlànà ìpadàbọ̀ ọjọ́ 30 tí ó rọrùn. Jọ̀wọ́ ṣàyẹ̀wò àwọn àlàyé ríra rẹ fún àwọn òfin pàtó kan.
Akiyesi: Any unauthorized modifications or repairs to the machine may void the warranty.


