Ọrọ Iṣaaju
The JMDHKK K68+ is an advanced multi-functional detector designed to enhance your privacy and security. It effectively identifies hidden cameras, listening devices, and magnetic trackers across various environments such as homes, offices, hotels, and vehicles. This device provides comprehensive protection against unauthorized surveillance, ensuring your peace of mind.
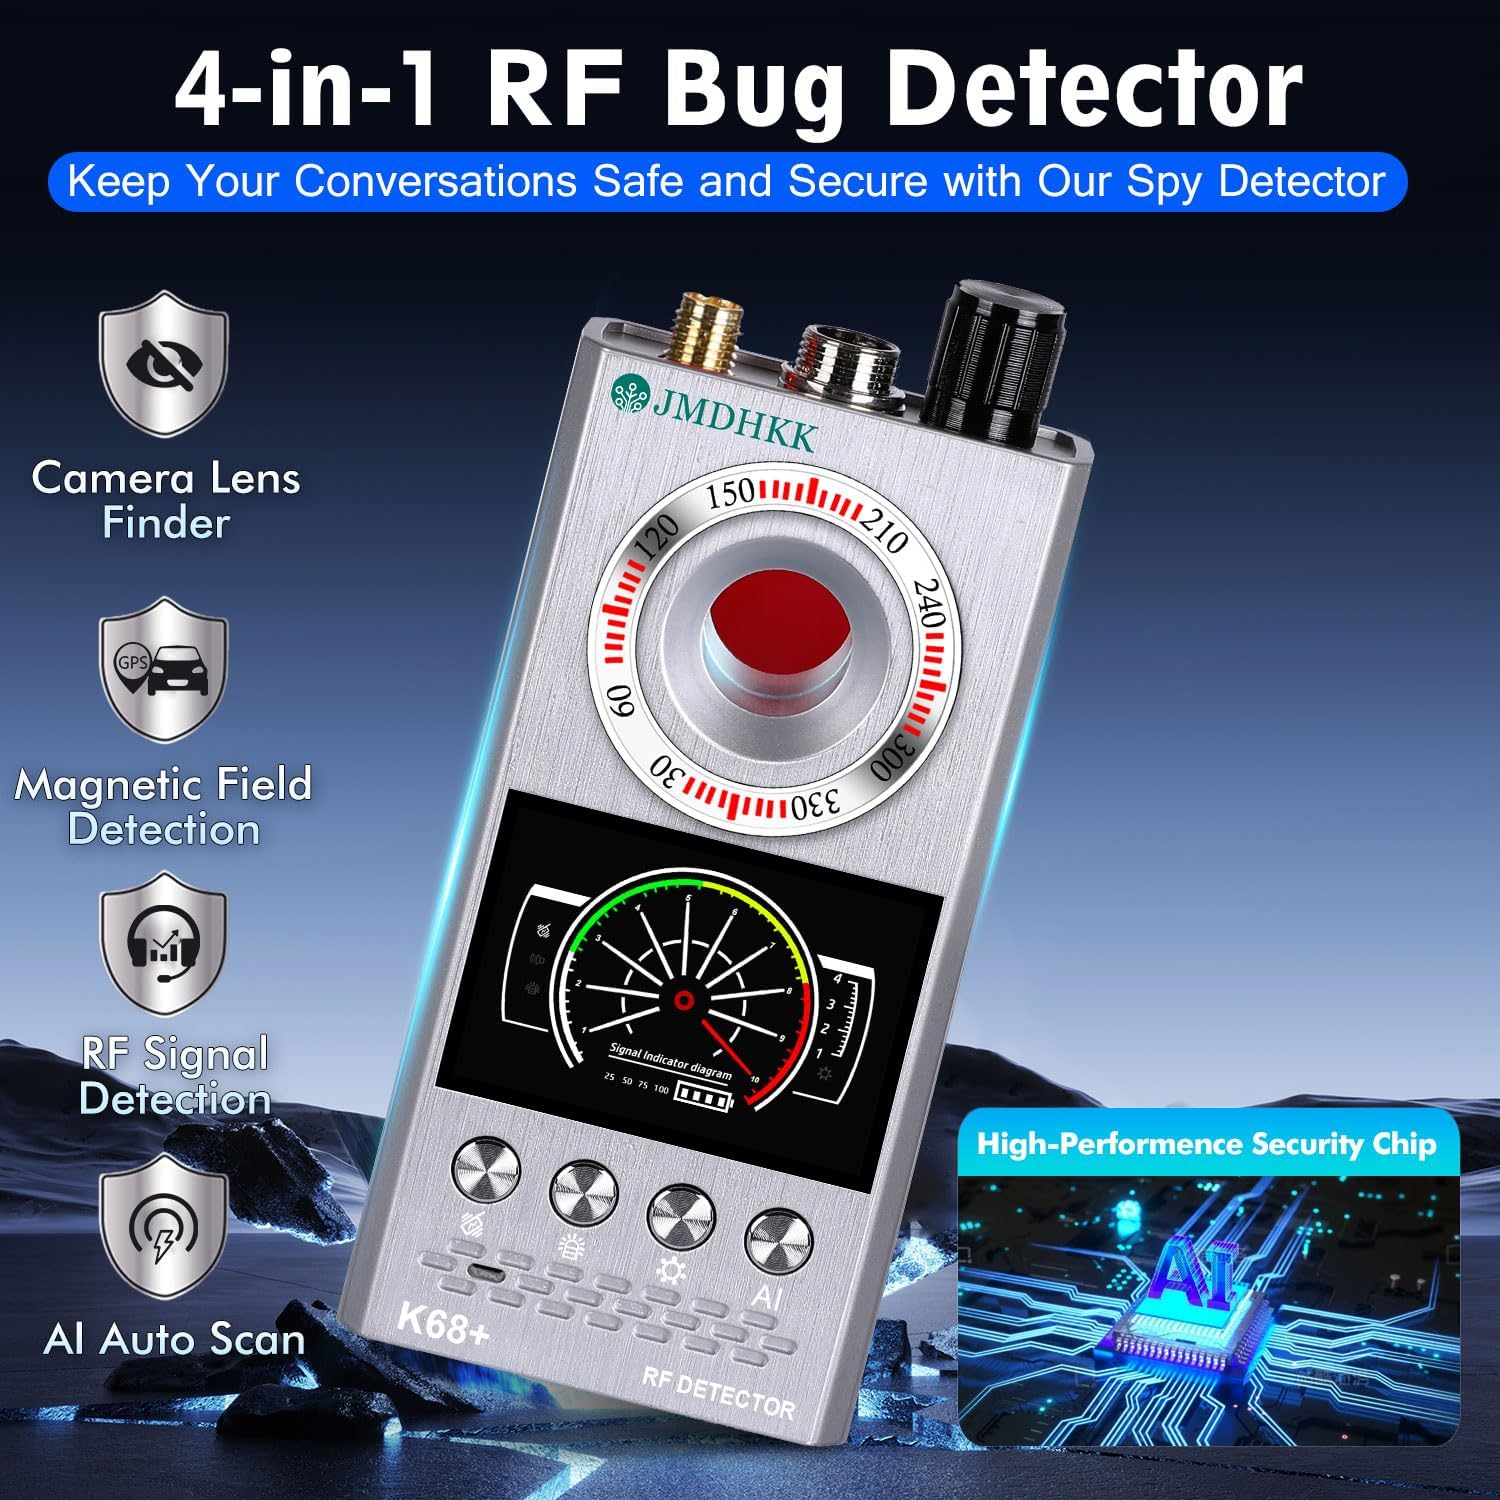
Figure 1: JMDHKK K68+ Detector highlighting its four primary detection functions.
Ohun ti o wa ninu Apoti
Jọ̀wọ́ rí i dájú pé gbogbo àwọn èròjà wà nígbà tí o bá ń yọ àpótí kúrò:
- Ẹgbẹ akọkọ
- Eriali RF
- GS Probe
- Ngba agbara USB
- Itọsọna olumulo

Figure 2: The JMDHKK K68+ detector and its included accessories.
Ṣeto
- Gbigba agbara ẹrọ naa: Connect the provided charging cable to the device's charging port and a compatible USB power source. The device's indicator will show charging status. Ensure the device is fully charged before first use for optimal performance.
- Attaching the RF Antenna: Screw the RF Antenna into the designated port on the top of the main unit. This antenna is crucial for wireless signal detection.
- Attaching the GS Probe: Connect the GS Probe (Magnetic Field Probe) to its dedicated port on the top of the main unit. This probe is used for detecting magnetic trackers.
Awọn ilana Iṣiṣẹ
1. Wireless Signal Detection (RF Detection)
This mode detects radio frequency signals emitted by wireless cameras, listening devices, GPS trackers, and other transmitting bugs. It is ideal for sweeping rooms, offices, or vehicles for active surveillance devices.
- Muu ṣiṣẹ: Turn on the device and select the RF detection mode.
- Atunse ifamọ: Use the sensitivity control knob to adjust the detection range. Start with higher sensitivity in open areas and decrease it as you narrow down a signal source.
- Ṣiṣayẹwo: Slowly sweep the device across the area of interest, paying close attention to walls, furniture, electronic devices, and hidden compartments. The signal strength indicator on the display will increase as you approach a signal source.
- Awọn itaniji: The device will provide visual (LED indicators) and/or audible/vibration alerts when a signal is detected.

Figure 3: Wireless Signal Detection in action, identifying various transmitting devices.
2. Ṣíṣàwárí Ibùdó Oofa
This function is specifically designed to locate magnetic GPS trackers and other devices that attach using magnets, commonly found on vehicles or metallic surfaces.
- Muu ṣiṣẹ: Ensure the GS Probe is attached. Select the magnetic field detection mode.
- Ṣiṣayẹwo: Slowly move the GS Probe along surfaces where magnetic devices might be hidden, such as under car chassis, wheel wells, or metallic furniture.
- Awọn itaniji: The device will indicate the presence of a magnetic field through visual and/or audible alerts. The closer the probe is to a magnetic source, the stronger the indication.

Figure 4: Magnetic Field Detection for locating hidden GPS trackers on vehicles.
3. Hidden Camera Lens Finder (Infrared Scanning)
This mode helps identify hidden pinhole cameras, even if they are not actively transmitting, by detecting their reflective lenses using infrared light.
- Muu ṣiṣẹ: Select the camera lens finder mode. The device will emit a red infrared light.
- Ṣiṣayẹwo: Look through the red viewing window on the device while slowly scanning the area. Pay attention to objects like smoke detectors, air vents, picture frames, electrical outlets, and small holes.
- Idanimọ: A hidden camera lens will appear as a bright, reflective red dot when viewed through the device's window.

Figure 5: Hidden Camera Lens Finder in use, revealing concealed camera lenses.
4. AI Auto Scan Mode
The AI Auto Scan mode provides an intelligent, automated scan for various threats, simplifying the detection process.
- Muu ṣiṣẹ: Select the AI Auto Scan mode. The device will automatically cycle through detection methods.
- Abojuto: Place the device in an area you wish to monitor. It will continuously scan for signals and alerts you to any detected threats.
Itoju
- Ninu: Lo asọ asọ ti o gbẹ lati nu ẹrọ naa. Ma ṣe lo abrasive ose tabi epo.
- Ibi ipamọ: Tọju ẹrọ naa ni itura, aye gbigbẹ kuro lati orun taara ati awọn iwọn otutu to gaju.
- Itọju Batiri: To prolong battery life, avoid fully discharging the battery frequently. Charge the device regularly, even if not in use, to maintain battery health.
- Mu pẹlu Itọju: Avoid dropping the device or subjecting it to strong impacts, as this can damage internal components.
Laasigbotitusita
| Isoro | Owun to le Fa | Ojutu |
|---|---|---|
| Ẹrọ ko tan. | Batiri kekere tabi ko si idiyele. | Charge the device fully using the provided charging cable. |
| Poor RF signal detection. | Antenna not properly attached or low sensitivity setting. | Ensure the RF antenna is securely attached. Increase sensitivity using the control knob. |
| Wiwa oofa ko ṣiṣẹ. | GS Probe not attached or damaged. | Verify the GS Probe is securely connected. If still not working, the probe may be damaged and require replacement. |
| Camera lens finder not showing red dots. | Not scanning correctly or no hidden cameras present. | Ensure you are looking through the red viewing window and slowly scanning the area. Test with a known camera (e.g., phone camera) to verify function. |
Awọn pato
- Awoṣe: K68+
- Awọn iwọn ọja: 4.84 x 2.44 x 0.87 inches
- Ìwọ̀n Nkan: 7.4 iwon
- Awọn batiri: 1 batiri litiumu ion (pẹlu)
- Olupese: Biznlink
- Ilu isenbale: China

Figure 6: Product dimensions for the JMDHKK K68+ detector.
Atilẹyin ọja ati Support
For warranty information and technical support, please refer to the contact details provided on the product packaging or visit the official JMDHKK webojula. Tọju iwe-ẹri rira rẹ fun awọn ẹtọ atilẹyin ọja.
O tun le ri afikun oro ati FAQs lori awọn JMDHKK Store on Amazon.


