1. Awọn Ilana Aabo pataki
Always follow basic safety precautions to reduce the risk of fire, electric shock, and personal injury when operating this power tool. Read all instructions before operating this product.
Gbogbogbo Aabo Ọpa Agbara
- Aabo Agbegbe Iṣẹ: Jẹ ki agbegbe iṣẹ jẹ mimọ ati itanna daradara. Awọn agbegbe idamu tabi awọn agbegbe dudu n pe awọn ijamba. Ma ṣe ṣiṣẹ awọn irinṣẹ agbara ni awọn bugbamu bugbamu, gẹgẹbi niwaju awọn olomi ina, gaasi, tabi eruku.
- Aabo Itanna: Awọn pilogi irinṣẹ agbara gbọdọ baramu iṣan. Maṣe yi plug naa pada ni ọna eyikeyi. Yago fun olubasọrọ ara pẹlu ilẹ tabi ilẹ roboto bi paipu, imooru, awọn sakani, ati firiji.
- Aabo ti ara ẹni: Máa lo ààbò ojú (gilasi ààbò tàbí gíláàsì) àti ààbò ìgbọ́ran nígbà gbogbo. Lo ìbòjú eruku tí iṣẹ́ náà bá ń fa eruku. Wọ aṣọ dáadáa; yẹra fún aṣọ tàbí ohun ọ̀ṣọ́ tí kò wúlò. Pa irun, aṣọ àti ibọ̀wọ́ mọ́ kúrò níbi tí àwọn ẹ̀yà ara ń gbéra.
- Lilo ati Itọju: Maṣe fi agbara mu ohun elo agbara. Lo ohun elo agbara ti o pe fun ohun elo rẹ. Ge asopọ plug lati orisun agbara ṣaaju ṣiṣe eyikeyi awọn atunṣe, yiyipada awọn ẹya ẹrọ, tabi titoju awọn irinṣẹ agbara.
Mitre Saw Specific Safety
- Blade Guards: Ensure all guards are in place and operating correctly before each use. Never operate the saw without guards.
- Atilẹyin iṣẹ iṣẹ: Always support the workpiece firmly against the fence and table. Use clamps or vises when possible.
- Aṣayan abẹfẹlẹ: Use only blades recommended for this saw and suitable for the material being cut. Ensure the blade is sharp and free from damage.
- Tọju Iwontunwonsi: Jeki ẹsẹ to dara ati iwọntunwọnsi ni gbogbo igba. Ma ṣe bori.
- Ikojọpọ eruku: Connect a dust collection device to reduce dust exposure.
2. Ọja Ipariview
The DEWALT DW714-IN is a 10-inch (254 mm) corded compound mitre saw designed for precise cutting of wood, aluminum, and tiles. Familiarize yourself with the components before operation.

Figure 2.1: DEWALT DW714-IN Mitre Saw with dust bag attached.

Figure 2.2: Key components of the DEWALT DW714-IN Mitre Saw. This diagram highlights the Operating Handle (1), Lower Guard (2), Spindle Lock (3), Carrying Handle (4), Lock Down Pin (5), Bevel Clamp Knob (6), Table (7), Mitre Scale (8), and Mitre Lock Knob (9).
Awọn nkan pataki:
- Imudani Iṣiṣẹ: Used to control the cutting process.
- Lower Guard: Protects the user from the spinning blade.
- Titiipa Spindle: Immobilizes the saw's spindle and blade for safe blade changes.
- Ọwọ Gbigbe: Enhances portability and convenience.
- Lock Down Pin: Prevents accidental contact with the blade when not in use.
- Bevel Clamp Ikun: Locks the saw blade at a desired bevel angle.
- Tabili: Provides a sturdy and stable surface for the workpiece.
- Mitre Scale: Displays the angle for cutting.
- Mitre Lock Knob: Ensures the accuracy and safety of the cuts by locking the mitre angle.
- Dust Spout: Connects to the dust bag or a vacuum system for dust collection.
- Odi Clamping Knob: Secures the fence in position.
- Right Side Fence: Provides support for the workpiece.
3. Eto
Unpacking ati ayewo
- Carefully remove the mitre saw and all accessories from the packaging.
- Inspect the tool for any damage that may have occurred during shipping. Do not operate if damaged.
- Verify that all included components are present: 1 Dust bag, 1 Aluminum blade, 1 Insert, 1 Extension clamp.
Iṣagbesori awọn ri
For stable and safe operation, it is recommended to securely mount the mitre saw to a workbench or a dedicated mitre saw stand.
- Use appropriate bolts and nuts to fasten the saw through the mounting holes in its base to a sturdy surface.
- Ensure the mounting surface is level and capable of supporting the saw and workpiece.
Blade Installation/Check
The saw comes with an 80T TCT Aluminum blade. Always ensure the blade is correctly installed and secured before use.

olusin 3.1: Isunmọ view of the installed blade.
- Rí i dájú pé a ti yọ gíláàsì náà kúrò láti orísun agbára.
- Press the spindle lock button to immobilize the blade.
- Use the appropriate wrench to loosen the blade bolt and remove the outer flange.
- Carefully place the blade onto the spindle, ensuring the teeth are pointing in the correct direction (downwards towards the table at the front of the saw).
- Reinstall the outer flange and tighten the blade bolt securely while holding the spindle lock.
Dust Bag Attachment
Attach the included dust bag to the dust spout to collect sawdust during operation.

Figure 3.2: Attaching the dust bag to the saw.
- Slide the dust bag collar over the dust spout until it is firmly seated.
- Ensure the dust bag is securely attached to prevent it from falling off during use.
4. Awọn ilana Iṣiṣẹ
This section details how to perform various cuts and adjustments with your DEWALT DW714-IN mitre saw.
Titan / Pipa agbara
- To turn the saw ON, depress the trigger switch on the operating handle.
- Lati yi ri PA, tu awọn okunfa yipada.
Siṣàtúnṣe iwọn Miter
The mitre saw allows for angle adjustments from 0° to 50° left and 0° to 60° right for various cutting needs.
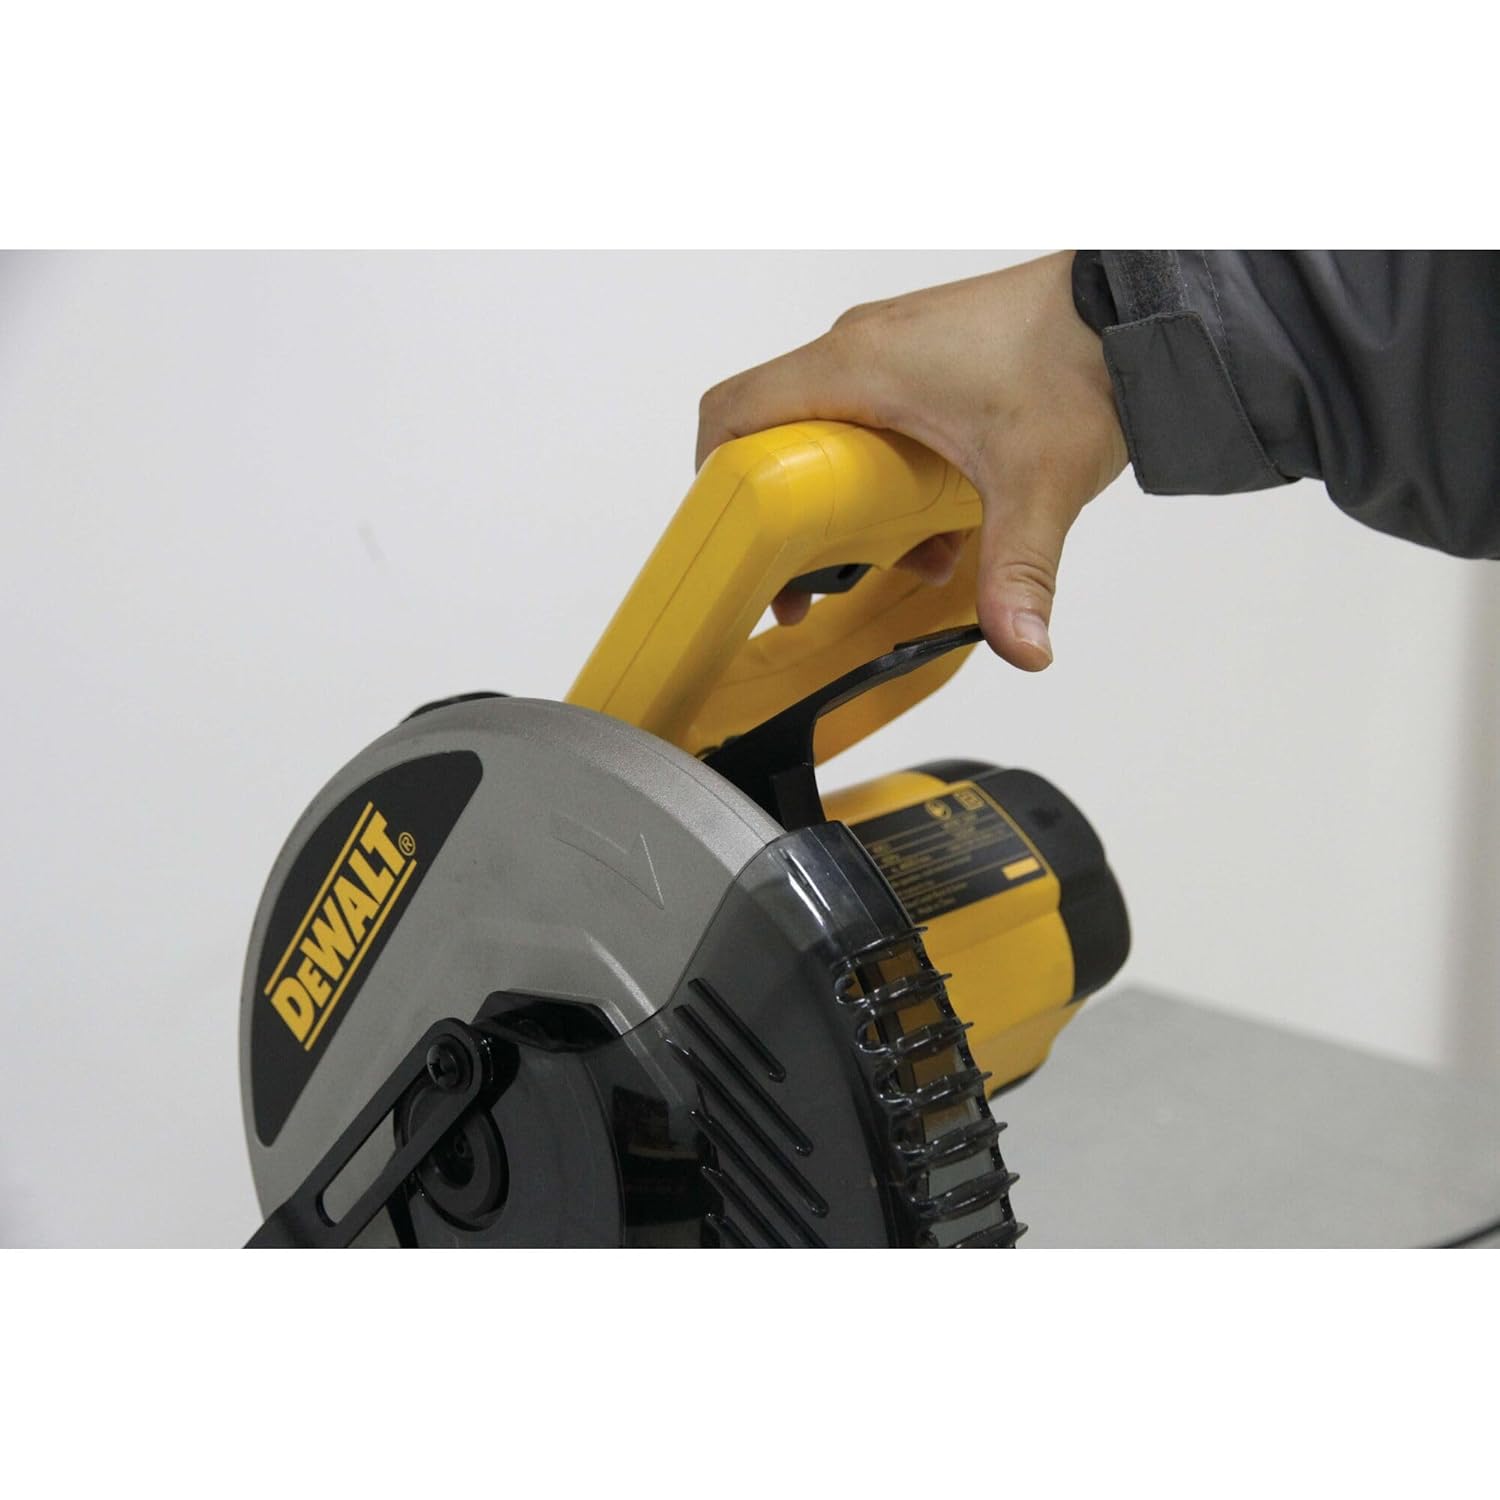
Figure 4.1: Adjusting the mitre angle.
- Loosen the mitre lock knob located at the front of the saw.
- Rotate the turntable to the desired angle indicated on the mitre scale.
- Tighten the mitre lock knob firmly to secure the angle before cutting.
Siṣàtúnṣe iwọn Bevel
The saw can be tilted for bevel cuts, with a maximum depth of bevel cross-cut at 45° of 50 mm.
- Tu bevel clamp koko.
- Tilt the saw head to the desired bevel angle.
- Mu bevel clamp knob to lock the head in position.
Ṣiṣe Ge
Always ensure the workpiece is properly secured and the blade is sharp.

Olusin 4.2: Examples of precision cuts on various materials.
- Place the workpiece firmly against the fence and on the saw table.
- Use the vertical extension clamp to secure the workpiece if necessary.
- Rii daju pe abẹfẹlẹ ko kuro ninu iṣẹ-ṣiṣe ṣaaju ki o to bẹrẹ ọkọ ayọkẹlẹ naa.
- Depress the trigger switch to start the motor and allow the blade to reach full speed.
- Slowly and steadily lower the saw head through the workpiece. Do not force the cut.
- Ni kete ti gige ba ti pari, tu iyipada ti o nfa silẹ ki o jẹ ki abẹfẹlẹ naa duro patapata ṣaaju igbega ori ri.
Using the Extension Clamp and Sliding Fence
The saw includes an extension clamp and a sliding fence for enhanced workpiece support and versatility.

Figure 4.3: Using the sliding fence and extension clamp.
- The sliding fence provides maximum support for large material cuts. Adjust its position as needed for different workpiece sizes.
- The vertical extension clamp helps to hold the workpiece securely against the fence and table, preventing movement during cutting.
5. Itọju
Regular maintenance ensures the longevity and safe operation of your mitre saw.
Cleaning the Dust Bag and Port
A clean dust collection system is crucial for efficient operation and a cleaner work environment.

Figure 5.1: Removing the dust bag for cleaning.
- Ge asopọ ri lati orisun agbara.
- Remove the dust bag from the dust spout.
- Empty the dust bag regularly. For optimal performance, clean the bag by shaking out accumulated dust.
- Inspect the dust spout for any blockages and clear them if necessary.
Blade Inspection and Replacement
A dull or damaged blade can lead to poor cut quality and unsafe operation.
- Regularly inspect the blade for sharpness, cracks, or missing teeth.
- Replace dull or damaged blades immediately with a DEWALT recommended blade of the correct size (10-inch / 254 mm diameter, 25.4 mm arbor).
- Refer to the 'Blade Installation/Check' section for replacement instructions.
Gbogbogbo Cleaning
- Keep the saw clean and free of debris. Use a soft brush or compressed air to remove sawdust from vents and moving parts.
- Maṣe lo awọn kemikali lile tabi awọn afọmọ abrasive.
6. Laasigbotitusita
Abala yii n pese awọn igbesẹ laasigbotitusita ipilẹ fun awọn ọran ti o wọpọ. Fun awọn iṣoro eka sii, kan si atilẹyin alabara.
- Saw ko bẹrẹ: Ṣàyẹ̀wò bóyá okùn agbára náà ti so mọ́ ibi tí ó ń ṣiṣẹ́ dáadáa. Rí i dájú pé ẹ̀rọ ìdènà ìṣiṣẹ́ náà kò tíì yípadà.
- Didara gige ti ko dara: Inspect the blade for sharpness and damage. Ensure the workpiece is securely clamped and the correct blade is used for the material.
- Eruku ti o pọ ju: Check if the dust bag is properly attached and empty. Clear any blockages in the dust spout.
7. Awọn pato
Detailed technical specifications for the DEWALT DW714-IN Mitre Saw.

Olusin 7.1: Pariview of DEWALT DW714-IN specifications.
| Sipesifikesonu | Iye |
|---|---|
| Brand | IWỌ |
| Nọmba awoṣe | DW714-IN |
| Orisun agbara | Okun Itanna |
| Wattage | 1650 Wattis |
| Voltage | 240 Volts |
| Iyara | 4600 RPM |
| Blade Opin | 10 inches (254 mm) |
| Number of Teeth (Blade) | 80 |
| Blade elo | Aluminiomu, Irin |
| Max. Cross-cut Capacity 90° | 130 mm |
| Max. Mitre Capacity 45° | 91 mm |
| O pọju. Ijinle ti Ge 90 ° | 89 mm |
| Max. Depth of Bevel Cross-cut 45° | 50 mm |
| Ige Igun | Awọn iwọn 90 |
| Ọja Mefa | 20L x 5W x 20H centimita |
| Iwọn Nkan | 20 giramu |
| Pataki Ẹya | Bevel Capability, Depth Adjustment, Ergonomic Handle |
| Dada iṣeduro | Igi |
| Awọn irinše to wa | 1 Dust bag, 1 Aluminum blade, 1 Insert, 1 Extension clamp |
8. Atilẹyin ọja ati Support
Your DEWALT DW714-IN Mitre Saw comes with a manufacturer's warranty and dedicated customer support.
Alaye atilẹyin ọja
A 2-year warranty is provided by the manufacturer from the date of purchase. Please retain your proof of purchase for warranty claims.
Onibara Support
For sales, after-sales support, original parts, or any other inquiries, please contact DEWALT customer care.
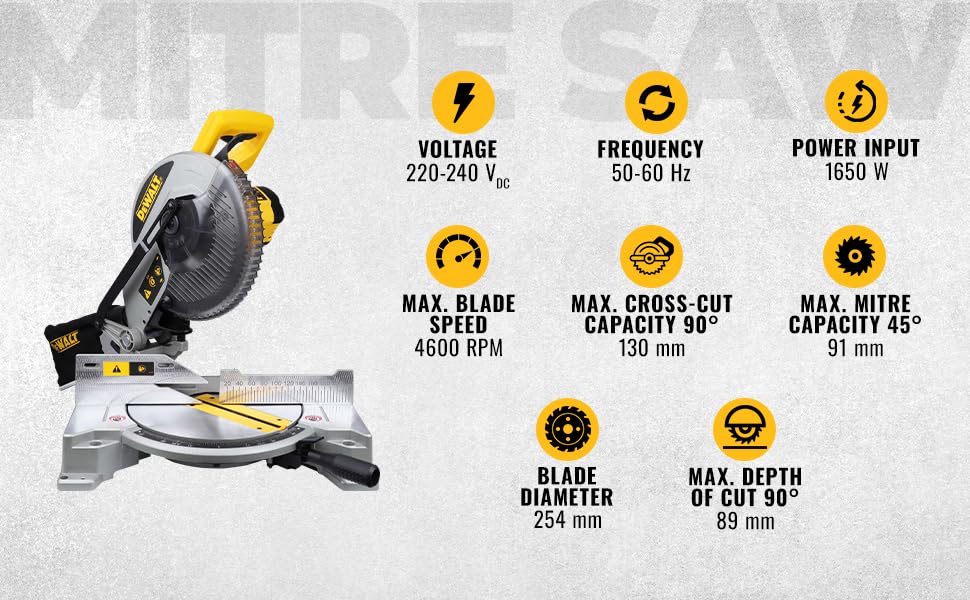
Figure 8.1: DEWALT Total Care customer contact details.
- Foonu: 1800-203-0644 (Aarọ - Ọjọbọ, 09:00 AM - 06:00 PM IST, ayafi awọn isinmi ijọba)
- Imeeli: SBD-CUSTOMERCOMMUNICATIONS@SBDINC.COM
- WhatsApp: +91 96060 55835
- Nẹtiwọọki Iṣẹ: Ju awọn ile-iṣẹ iṣẹ ti a fun ni aṣẹ 500 wa.


