1. Awọn Ilana Aabo pataki
Please read all instructions carefully before operating the Milex Nordic Ice Machine. Retain this manual for future reference.
- Rí i dájú pé a gbé ẹ̀rọ náà sí orí ilẹ̀ tí ó dúró ṣinṣin, tí ó jìnnà sí oòrùn tààrà àti àwọn orísun ooru.
- Ma ṣe fi okun agbara, plug, tabi apakan eyikeyi ohun elo sinu omi tabi awọn olomi miiran.
- Ohun elo yii jẹ fun lilo ile nikan. Maṣe lo ni ita.
- Ṣe abojuto awọn ọmọde nigbati ohun elo ba wa ni lilo.
- Unplug the ice machine from the power outlet before cleaning or when not in use.
- Ma ṣe ṣiṣẹ ohun elo eyikeyi pẹlu okun tabi pulọọgi ti o bajẹ, tabi lẹhin aiṣe ohun elo tabi ti bajẹ ni eyikeyi ọna.
- Allow the unit to stand upright for at least 2 hours before first use if it has been transported horizontally. This allows the refrigerant to settle.
- Lo omi mimu nikan ninu ojò omi.
- Ma ṣe dina awọn ṣiṣi atẹgun. Rii daju pe gbigbe afẹfẹ to peye ni ayika ẹyọ naa.
2. Ọja Ipariview
Familiarize yourself with the components of your Milex Nordic Ice Machine.
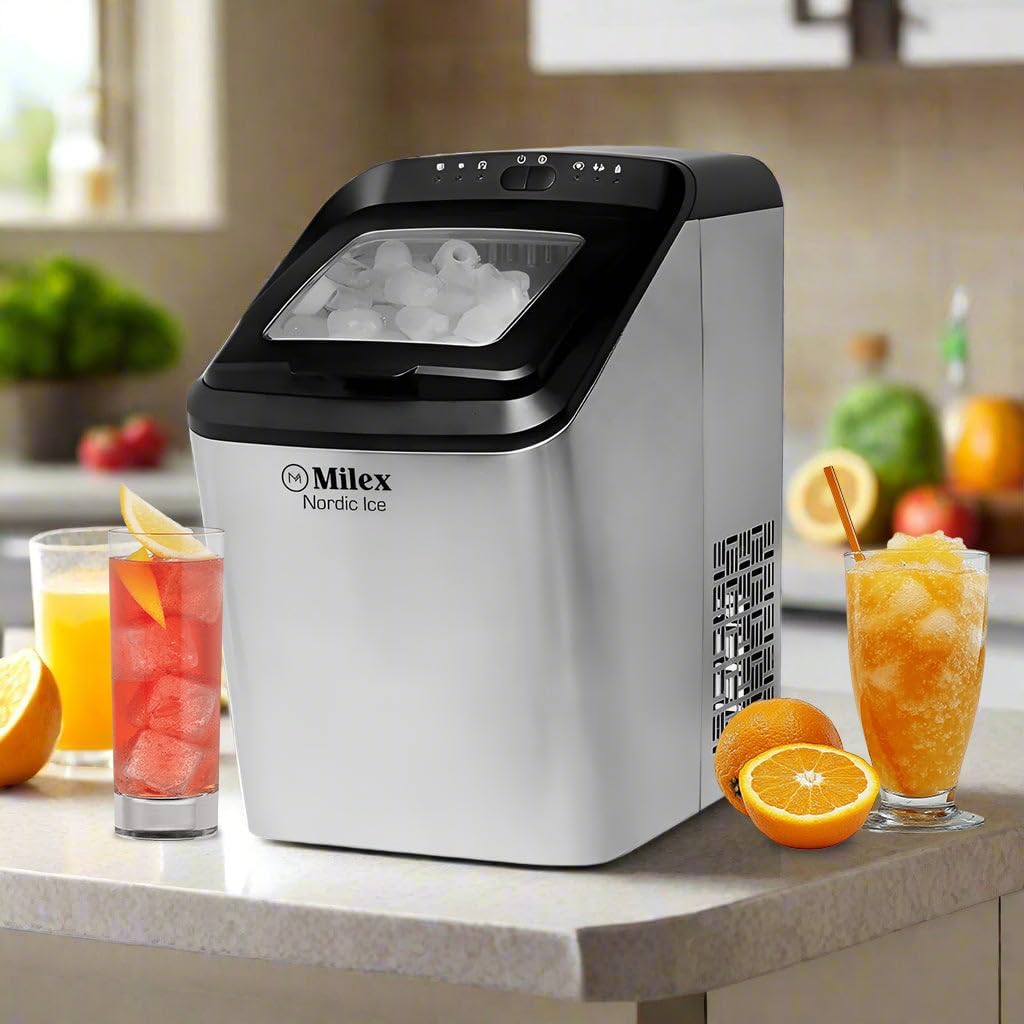
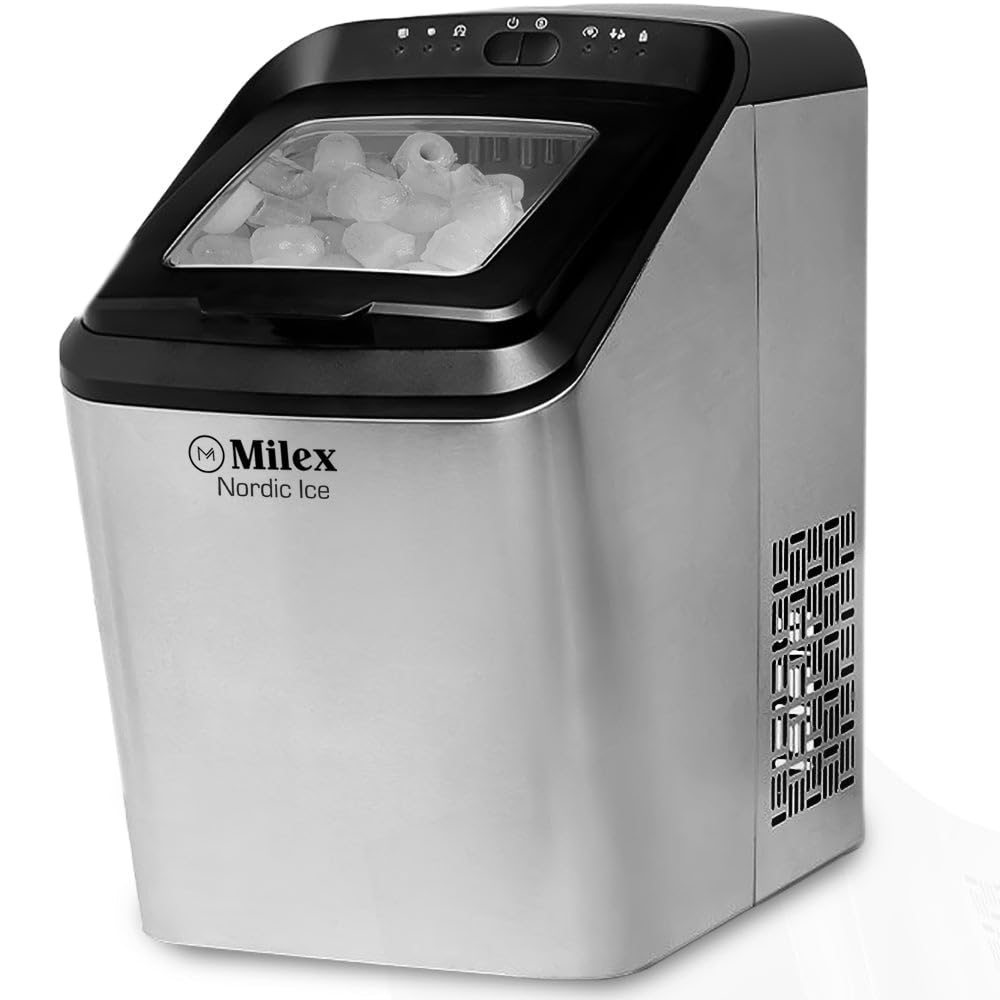
Nọmba 2.1: Iwaju view of the Milex Nordic Ice Machine, showcasing its sleek stainless steel housing and transparent lid.
Awọn nkan pataki:
- Ibi iwaju alabujuto: Located on the top, with indicator lights and buttons for operation.
- Ideri Sihin: Gba laaye viewing of the ice-making process and ice level.
- Agbọn yinyin: Agbọ̀n tí a lè yọ kúrò fún gbígbà àti fífi yìnyín pamọ́.
- Omi omi: Reservoir for water, located beneath the ice basket.
- Omi yinyin: Included for hygienic ice retrieval.
- Pulọọgi Sisan: Be ni isale fun sisan omi.
3. Eto
Follow these steps to set up your ice machine for the first time.
- Yọọ kuro: Carefully remove the ice machine from its packaging. Remove all packing materials, tape, and labels.
- Ipo: Place the ice machine on a flat, stable, and heat-resistant surface. Ensure there is at least 15 cm (6 inches) of space around the unit for proper ventilation.
- Stand Upright: If the unit was transported horizontally, allow it to stand upright for at least 2 hours before plugging it in. This ensures the compressor oil settles correctly.
- Mọ: Before first use, clean the interior of the ice machine as described in the 'Maintenance and Cleaning' section.
- So agbara: Pulọọgi okun agbara sinu iṣan itanna ti ilẹ.
4. Awọn ilana Iṣiṣẹ
Operating your Milex Nordic Ice Machine is straightforward.

Nọmba 4.1: Visual guide showing the three main steps: adding water, selecting ice size, and the ice production process.
4.1 Iṣẹ́jade Yìnyín Àkọ́kọ́
- Fi omi kun: Open the lid and fill the water tank with potable water up to the 'MAX' fill line. Do not overfill.
- Agbara Tan: Press the 'POWER' button on the control panel. The power indicator light will illuminate.
- Yan Iwọn yinyin: Press the 'SELECT' button to choose between small or large ice cubes. The corresponding indicator light will illuminate.
- Ibẹrẹ Yiyika: The machine will automatically begin the ice-making cycle. The first batch of ice may take approximately 8-15 minutes, depending on the selected size and ambient temperature.
- Atẹle: The 'ICE FULL' indicator light will illuminate when the ice basket is full. The machine will pause operation. The 'ADD WATER' indicator light will illuminate when the water tank needs refilling.
- Gba Yìnyín: Use the provided ice scoop to remove ice from the basket. Once ice is removed, the machine will resume operation if water is present.
Nọmba 4.2: Alaye view of the control panel with indicator lights and freshly made bullet-shaped ice cubes.
4.2 Smart titaniji
- Fi Atọka Omi kun: When this light illuminates, the water level in the tank is low. Refill the water tank to continue ice production.
- Atọka kikun Ice: When this light illuminates, the ice basket is full. Remove ice to allow the machine to resume operation.
5. Itọju ati Cleaning
Regular cleaning ensures optimal performance and extends the life of your ice machine.
5.1 Daily Cleaning
- After each use, unplug the unit.
- Drain any remaining water from the water tank by removing the drain plug at the bottom of the unit.
- Wipe the interior with a soft cloth and a mild detergent solution. Rinse thoroughly.
- Dry all surfaces completely before storing.
5.2 Oṣooṣu Cleaning
- Prepare a cleaning solution of water and white vinegar (1:1 ratio) or a commercial ice machine cleaner.
- Tú ojutu naa sinu ojò omi.
- Run a few ice-making cycles (discard the ice produced during this cleaning process).
- Drain the solution completely and rinse the water tank thoroughly with clean water several times.
- Pa ode kuro pẹlu ipolowoamp asọ.
Iṣọra: Do not use abrasive cleaners or sharp objects to clean the ice machine, as this may damage the surfaces.
6. Laasigbotitusita
Tọkasi apakan yii fun awọn ọran ti o wọpọ ati awọn ojutu wọn.
| Isoro | Owun to le Fa | Ojutu |
|---|---|---|
| Ice machine not turning on | Ko si ipese agbara | Ṣayẹwo boya okun agbara ti wa ni edidi ni aabo sinu iṣan iṣẹ kan. |
| Àmì 'FI OMI KAN' ti tan | Water tank is empty or low | Refill the water tank with potable water up to the 'MAX' line. |
| Àmì 'ICE FULL' ti wà nílẹ̀ | Agbọn yinyin ti kun | Remove ice from the basket. The machine will resume operation. |
| Ko si iṣelọpọ yinyin | Insufficient water, high ambient temperature, or air blockage | Ensure water tank is full. Place the machine in a cooler environment. Check for proper ventilation. |
| Àwọn yìnyín kékeré jù tàbí wọ́n wọ́pọ̀ jù | Water temperature too high, or first cycle | Use colder water. The first few cycles may produce smaller ice. Ensure the machine has proper ventilation. |
7. Awọn pato
Technical details for the Milex Nordic Ice Machine MIM003.
- Awoṣe: MIM003
- Agbara: 220-240V, 50Hz
- Agbara Omi Omi: 2.8 lita
- Agbara Ṣiṣejade Ice: Up to 15kg per day
- Agbara Ipamọ Ice: Titi di 1.5kg
- Ice Cycle Time: 8-10 minutes per cycle (9 ice bullets)
- Ice Options: Large or Small bullet-shaped ice
- Ohun elo: Irin alagbara, irin ile
- Dimensions (Box): 458mm x 290mm x 462mm
- Ìwọ̀n Nkan: 12 kg
8. Atilẹyin ọja ati Onibara Support
For warranty information, technical assistance, or customer support, please contact Milex customer service. Refer to your purchase documentation for specific warranty terms and contact details.
O le rii alaye olubasọrọ atilẹyin nigbagbogbo lori osise olupese naa webojula tabi nipasẹ rẹ alagbata.


