1. Ifihan
The KETOTEK WiFi Smart Switch Module KTSSM01 is designed to integrate traditional household appliances into a smart home system. This module enables remote control, scheduling, and voice control of lights, fans, sockets, and other electronic devices via the Smart Life/Tuya application and compatible voice assistants like Amazon Alexa and Google Assistant.
This manual provides essential information for the safe installation, configuration, and operation of your KETOTEK WiFi Smart Switch Module. Please read it thoroughly before installation and retain it for future reference.
2. Alaye Aabo
- Aabo Itanna: Installation must be performed by a qualified electrician or a person with a thorough understanding of electrical wiring. Always disconnect power at the circuit breaker before performing any electrical work.
- Voltage ati fifuye: Ensure the module's voltage and current ratings (100-240V AC, max 16A/3500W, max 300W for LED lamps) are compatible with your electrical system and connected devices.
- Waya Aidaduro: A neutral wire is required for the operation of this device. Verify its presence in your installation location before proceeding.
- Lilo inu ile Nikan: This device is intended for indoor use in dry environments.
- Aabo Awọn ọmọde: Keep the device and its components out of reach of children.
3. Package Awọn akoonu
Nigbati o ba ṣii package, rii daju pe gbogbo awọn nkan wa ati pe ko bajẹ:
- 1 x KETOTEK WiFi Smart Switch Module (KTSSM01)
- 1 x Agekuru iṣagbesori
- 1 x Itọsọna olumulo
4. Awọn pato
| Paramita | Iye |
|---|---|
| Nọmba awoṣe | KTSSM01 |
| Awọn iwọn (L x W x H) | 3.9 x 3.9 x 1.8 cm |
| Iwọn | 30 giramu |
| Ibi ti ina elekitiriki ti nwa | 100-240V AC, 50/60Hz |
| Ikojọpọ ti o pọju | 16A / 3500W @ 240V AC |
| Max Load (LED Lamp) | 300W |
| Asopọmọra | WiFi |
| Ohun elo Iṣakoso | Smart Life / Tuya App |
| Iṣakoso ohun | Alexa, Google Iranlọwọ |
| Ohun elo | Ṣiṣu ati Gilasi |
| Iṣagbesori Iru | Wall Mount (with clip for DIN rail) |
| Olubasọrọ Iru | Pade deede |
| Nọmba ti ebute | 2 |
5. Eto ati fifi sori
5.1 Ọja Loriview ati Awọn iwọn
The KETOTEK WiFi Smart Switch Module is compact, designed for discreet installation.

Image: The KETOTEK WiFi Smart Switch Module, illustrating its compact dimensions of 39mm by 39mm by 18mm. The module is shown in context next to a standard wall socket, highlighting its small size for easy integration.
5.2 iṣagbesori Aw
The module's small size allows for flexible installation:
- Behind existing wall switches or power outlets.
- Inside narrow junction boxes.
- Mounted on a DIN rail using the included mounting clip.
- Screwed directly to a wall.

Image: The KETOTEK Smart Switch Module is shown alongside its detachable mounting clip. This clip facilitates installation on a DIN rail or allows the module to be screwed directly to a wall, providing versatile mounting solutions.
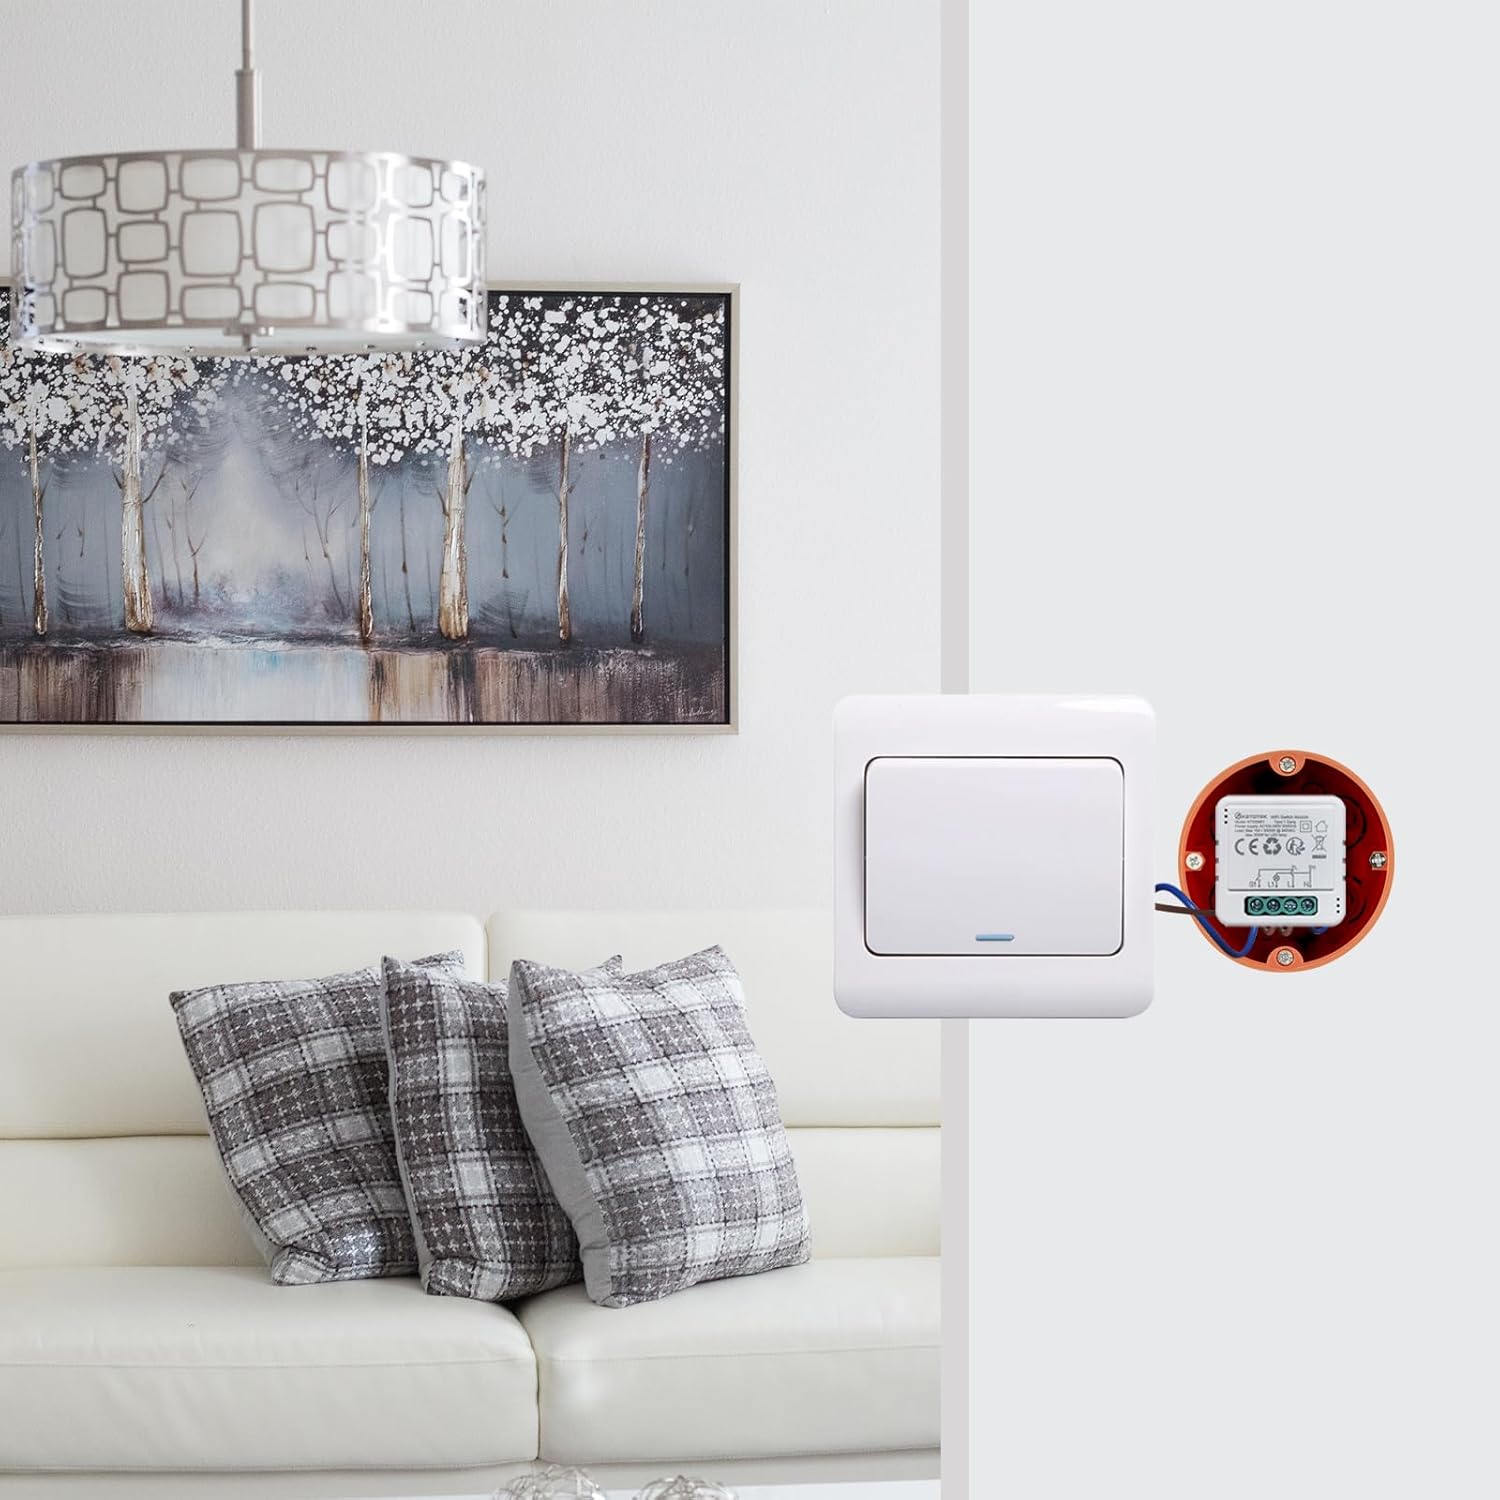
Aworan: Example installation showing the KETOTEK Smart Switch Module discreetly placed behind a standard wall switch, demonstrating its ability to be hidden within existing electrical infrastructure.
5.3 Wiring Awọn aworan atọka
Important: A neutral wire (N) is required for this device. Ensure power is disconnected before wiring.

Image: This diagram illustrates three common wiring configurations for the KETOTEK Smart Switch Module. It shows connections for directly controlling a load, integrating with a 1-way external switch, and integrating with a 2-way external switch. All diagrams emphasize the necessity of a neutral wire connection.
The module has terminals for Live (L), Neutral (N), Switched Live (L1), and external switch inputs (S1).
- Connect to Load Directly: Connect the Live (L) and Neutral (N) wires from your power supply to the module's L and N terminals. Connect the load (e.g., light bulb) between the module's L1 (switched live output) and the Neutral (N) wire.
- Connect to Load and 1-Way External Switch: Connect Live (L) and Neutral (N) from power supply to module's L and N. Connect the load between L1 and N. Connect one terminal of your external 1-way switch to the Live (L) wire and the other terminal to the module's S1 input.
- Connect to Load and 2-Way External Switch: Connect Live (L) and Neutral (N) from power supply to module's L and N. Connect the load between L1 and N. For a 2-way switch setup, connect the common terminal of the first switch to Live (L). Connect the two traveler terminals of the first switch to the two traveler terminals of the second switch. Connect the common terminal of the second switch to the module's S1 input.
6. Awọn ilana Iṣiṣẹ
After successful installation, download the Smart Life or Tuya App from your smartphone's app store and follow the in-app instructions to pair the device.
6.1 App Control (Smart Life/Tuya)
The Smart Life/Tuya app provides comprehensive control over your smart switch module.
- Tan/PA Latọna jijin: Ṣakoso awọn ẹrọ ti a ti sopọ lati ibikibi nipa lilo foonuiyara rẹ.
- Iṣeto: Set specific times for devices to turn on or off automatically.
- Iṣẹda Iworan: Create custom scenes to control multiple devices with a single tap or based on conditions (e.g., 'Good Morning' scene turns on lights and coffee maker).
- Adaṣe: Set up automations based on environmental factors, device status, or time.

Image: A smartphone screen displaying the Smart Life/Tuya application, demonstrating the ability to remotely control the KETOTEK Smart Switch Module from any location at any time.
6.2 Iṣakoso ohun
The module is compatible with Amazon Alexa and Google Assistant. Once integrated, you can control your connected devices using voice commands.
- Ìdàpọ̀: Link your Smart Life/Tuya account with Alexa or Google Home app.
- Awọn aṣẹ: Use commands like "Alexa, turn on the living room light" or "Hey Google, turn off the fan."
6.3 Iṣeto ati Aago
Automate your devices to follow your daily routine and preferences.
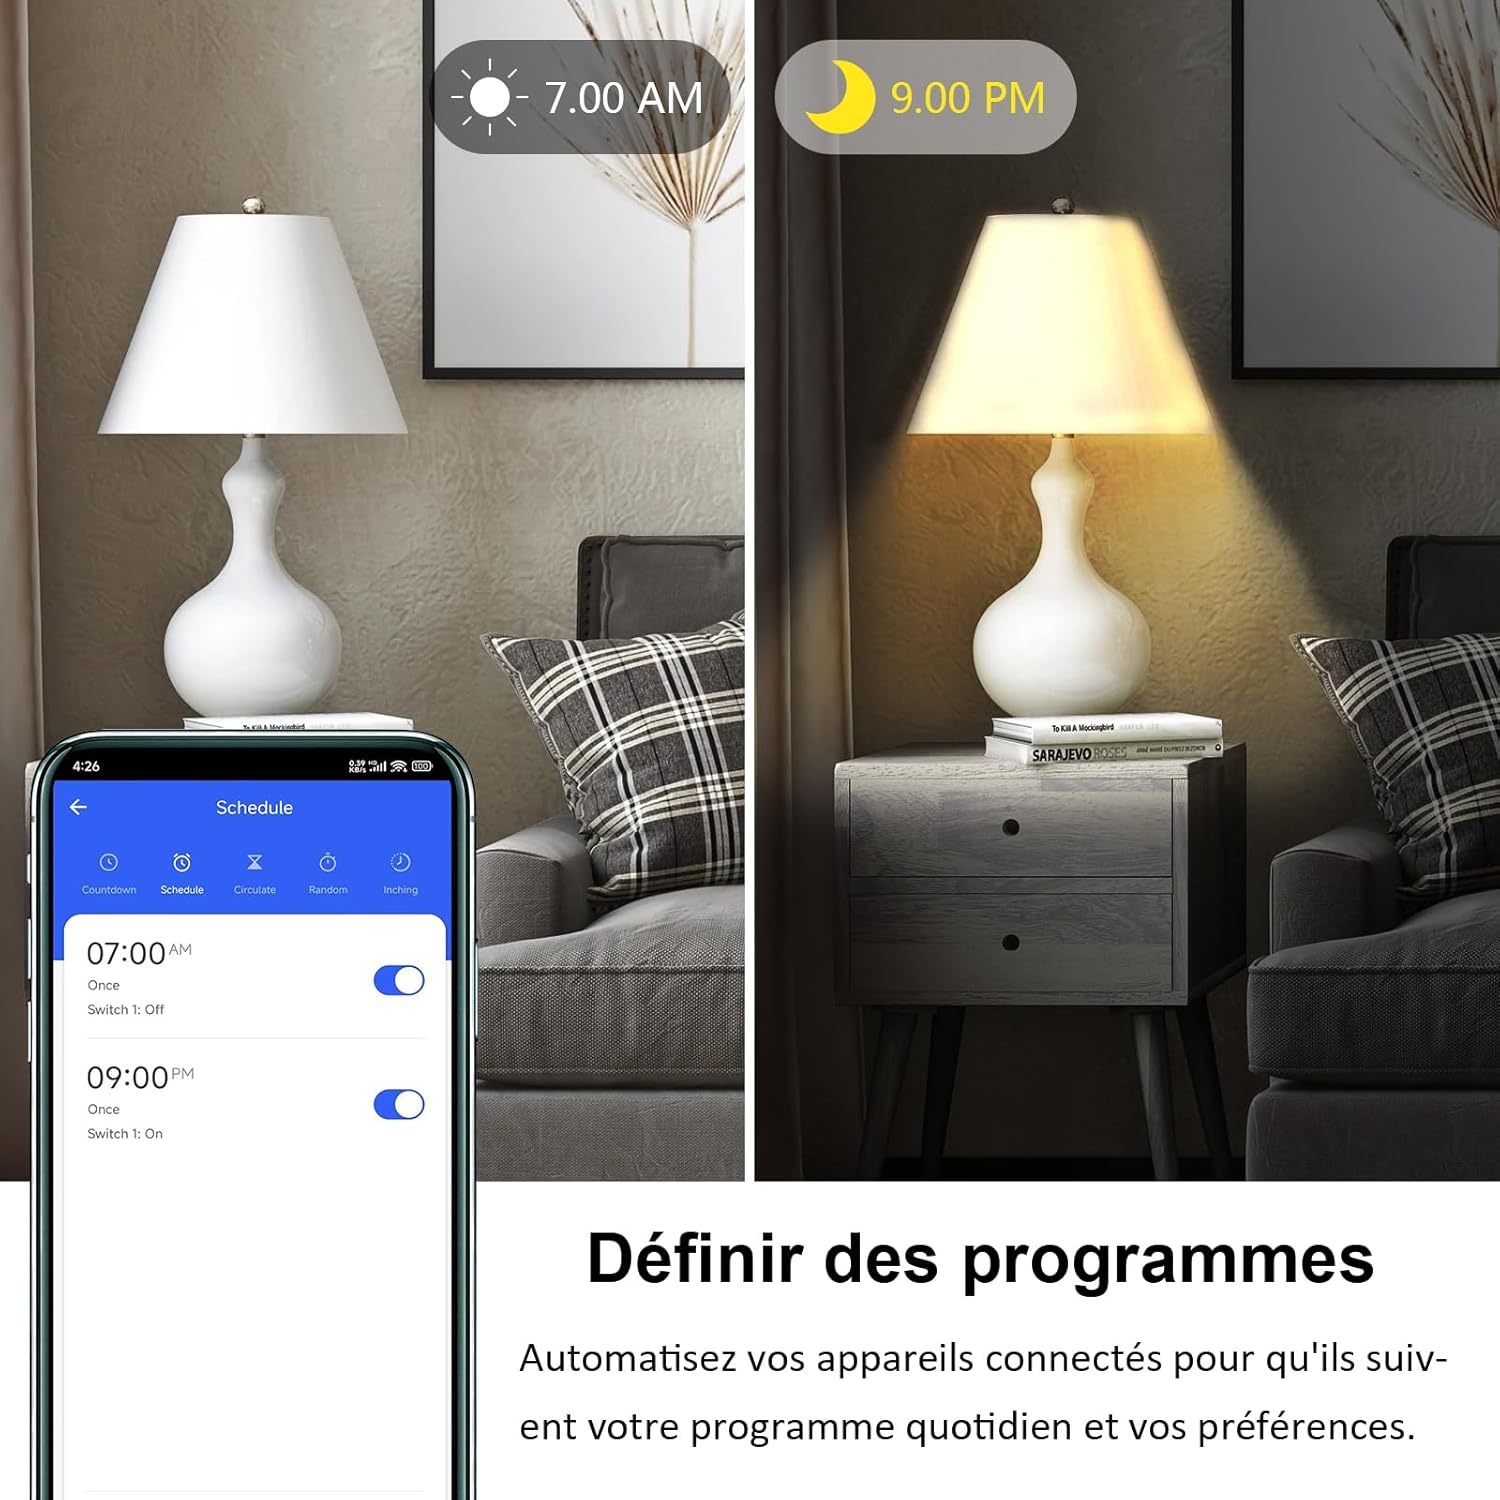
Image: A smartphone displaying the scheduling interface within the Smart Life/Tuya app. It shows a programmed schedule for a light to turn off at 7:00 AM and turn on at 9:00 PM, illustrating how users can automate their connected devices.
6.4 Iṣakoso Ẹgbẹ ati Pinpin Ẹrọ
Enhance convenience by managing multiple devices simultaneously and sharing control with family members.
- Iṣakoso Ẹgbẹ: Create groups within the app to control several KETOTEK smart switches with a single command or schedule. For example, group all living room lights to turn them on/off together.
- Pipin ẹrọ: Share access to your smart switches with family members through the Smart Life/Tuya app, allowing everyone in the household to control the devices.

Image: This graphic depicts several KETOTEK smart switch modules connected to various light fixtures. A smartphone screen overlays the image, showing the 'Create Group' function within the app, illustrating how users can group multiple switches for simultaneous control.

Image: An illustration demonstrating the 'Family Sharing' feature, where a central KETOTEK smart switch module is connected to multiple smartphones, symbolizing that control of the device can be shared among family members.
7. Itọju
- Ninu: Rí i dájú pé ẹ̀rọ náà ti pa kí o tó fọ ọ́. Lo aṣọ rírọrùn tí ó gbẹ láti nu ìta rẹ̀. Má ṣe lo àwọn ohun ìfọṣọ omi tàbí àwọn aerosol.
- Awọn imudojuiwọn famuwia: Periodically check the Smart Life/Tuya app for available firmware updates to ensure optimal performance and security.
- Awọn ipo Ayika: Avoid exposing the module to extreme temperatures, humidity, or direct sunlight.
8. Laasigbotitusita
- Ẹrọ Ko Dahun: Check the power supply to the module. Ensure your Wi-Fi network is active and the module is within range. Try restarting the module by cycling its power.
- Cannot Pair with App: Ensure your phone is connected to a 2.4GHz Wi-Fi network during pairing. Reset the module (refer to app instructions for specific reset procedure, usually involves holding a button or cycling power multiple times).
- Awọn oran Iṣakoso ohun: Verify that the Smart Life/Tuya skill/service is correctly linked in your Alexa or Google Home app. Ensure device names are simple and easily recognizable by the voice assistant.
- Yipada Ita Ko Ṣiṣẹ: Double-check the wiring according to the diagrams in Section 5.3. Ensure the external switch type is correctly configured in the Smart Life/Tuya app (e.g., 'FLIP' mode for traditional switches).
9. Atilẹyin ọja ati Support
Specific warranty details are not provided in the product information. For warranty claims, technical support, or further assistance, please contact KETOTEK customer service or refer to the official KETOTEK webojula fun alaye olubasọrọ.


