Ọrọ Iṣaaju
This manual provides detailed instructions for the assembly, operation, and maintenance of your BLOKEES Transformers Classic Class 12 Megatron action figure. Please read all instructions carefully before beginning assembly to ensure proper construction and safe use of the product.
Ọja osise ti pariview video for BLOKEES Transformers Classic Class figures. This video showcases the figures in action and highlights key features.
Alaye Aabo
- Ọjọ ori ti a ṣeduro: A ṣe iṣeduro ọja yii fun awọn ọmọde ọdun 12 ati si oke.
- Awọn Ẹya Kekere: Contains small parts. Not suitable for children under 3 years due to choking hazard.
- Aabo Batiri: The product includes a nonstandard battery for light-up features. Ensure batteries are inserted correctly and dispose of them responsibly. Do not mix old and new batteries or different types of batteries.
- Apejọ: A ṣe iṣeduro abojuto agbalagba lakoko apejọ, pataki fun awọn olumulo ti o kere ju.
- Mimu: Handle the assembled figure with care to prevent damage to articulated joints or small components.
Package Awọn akoonu
Rii daju pe gbogbo awọn paati wa ṣaaju ki o to bẹrẹ apejọ:
- Megatron Figure Components (multiple runners)
- Character-specific Weapons
- Interchangeable Hands
- Ifihan Iduro
- 1 Nonstandard Battery (pre-installed or included for light-up features)
- Ilana itọnisọna

Image showing the various components of the BLOKEES Transformers Megatron model kit, including plastic runners for parts, weapons, and the display base, as typically found in the package.
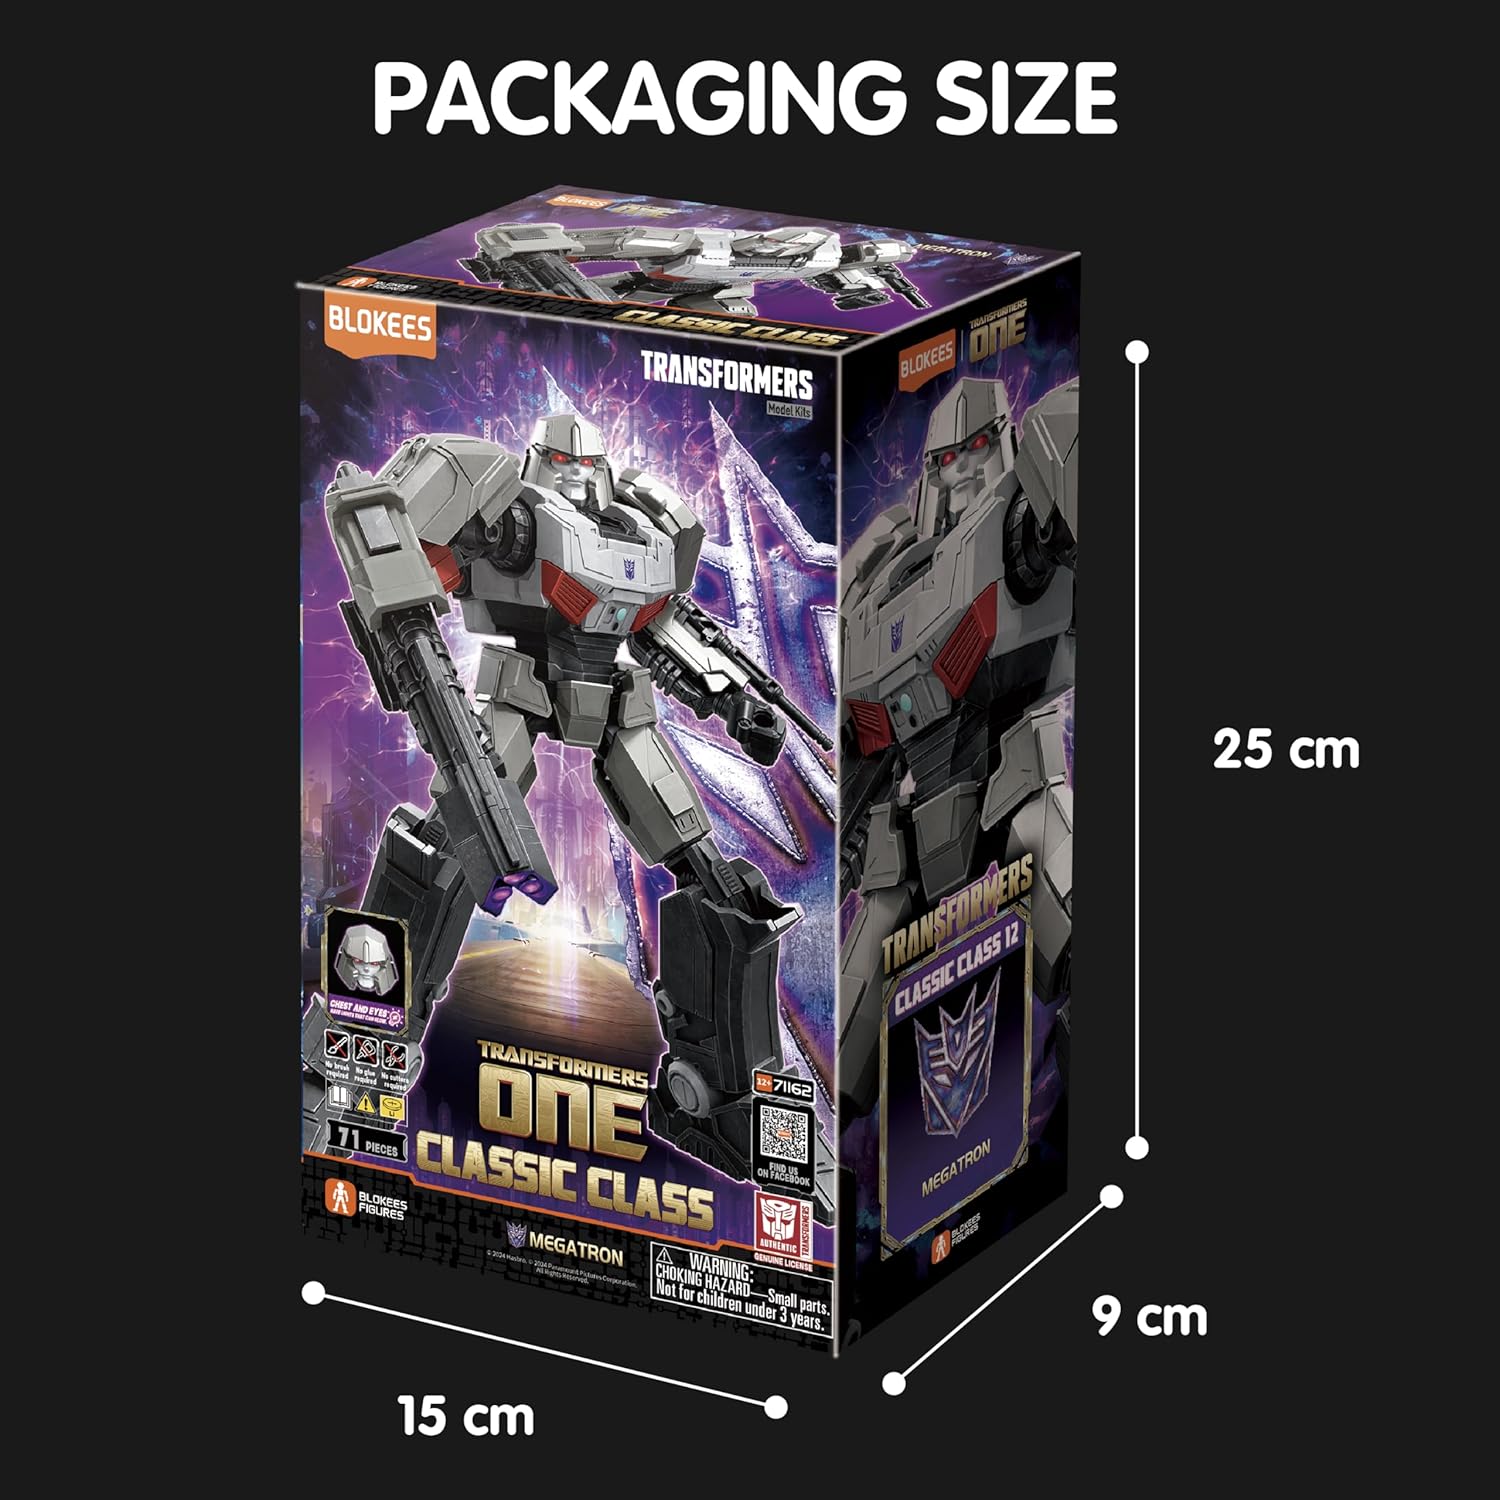
Product packaging displaying the Megatron figure and its dimensions: 25 cm (height), 15 cm (width), 9 cm (depth).
Awọn ilana Apejọ
The BLOKEES Megatron figure features a tool-free, snap-together design. No glue or paint is required. Follow the step-by-step diagrams provided in the included instruction booklet for detailed assembly. Ensure each piece is securely connected.
- Igbaradi: Carefully detach all parts from the plastic runners. Use a hobby knife or clippers if necessary for clean removal, though the design is intended for tool-free separation.
- Apejọ ara: Begin by assembling the core body, torso, and head sections as indicated in the diagrams.
- Limb Assembly: Attach the arms and legs, ensuring all joints are correctly aligned for full articulation.
- Awọn ẹya Imọlẹ: The figure includes built-in LED effects for the eyes and chest. Ensure the battery is correctly installed (if not pre-installed) and the connections are secure.
- Weapon and Hand Attachment: Attach the character-specific weapons and interchangeable hands as desired.
- Iduro Ifihan: Assemble the display stand and attach the completed figure for premium presentation.

Alaye view of the assembled Megatron figure, highlighting its fully posable body and glowing eyes and chest features.
Awọn ilana Iṣiṣẹ
- Ọ̀rọ̀ àsọyé: The Megatron figure features over 20 points of articulation, allowing for dynamic action stances. Carefully move joints to achieve desired poses. Avoid excessive force to prevent breakage.
- Awọn ẹya Imọlẹ: Activate the LED effects in Megatron's eyes and chest using the designated switch (refer to the assembly booklet for exact location).
- Ohun ìjà: The included character-specific weapons can be securely held by the figure's interchangeable hands.
- Ifihan: Utilize the provided display stand to showcase your Megatron figure in various poses.
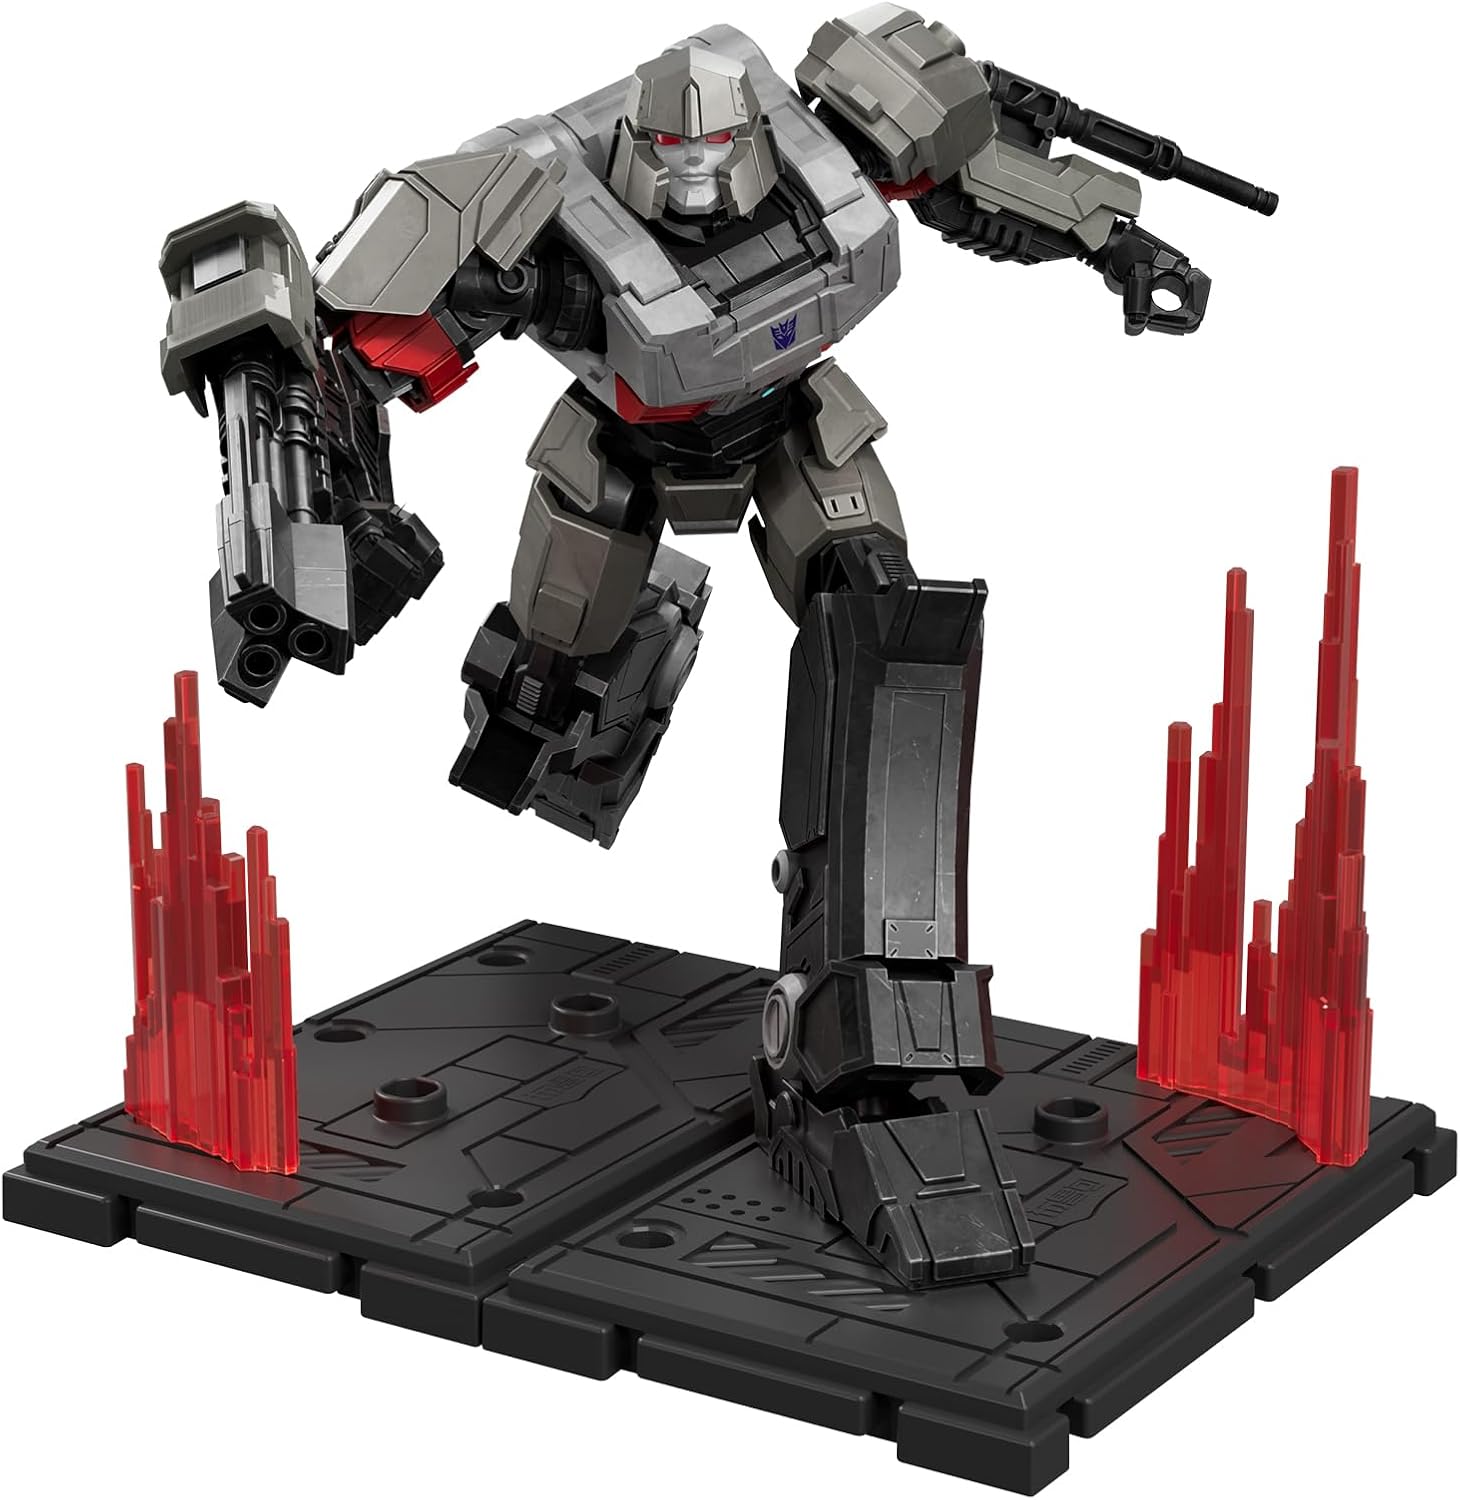
The Megatron figure displayed in an action pose on its included stand, demonstrating its articulation and display capabilities.

Iwaju view of the Megatron figure holding its two distinct weapons, showcasing its detailed design and weapon compatibility.
Itoju
- Ninu: Wipe the figure gently with a soft, dry cloth to remove dust. Avoid using harsh chemicals or abrasive materials, which may damage the paint or plastic.
- Ibi ipamọ: Store the figure away from direct sunlight, extreme temperatures, and high humidity to prevent material degradation or discoloration.
- Itọju Apapọ: If joints become stiff, gently work them back and forth. Do not apply lubricants unless specifically recommended by the manufacturer.
Laasigbotitusita
| Isoro | Owun to le Fa | Ojutu |
|---|---|---|
| Light-up features not working. | Battery incorrectly installed or depleted. | Check battery orientation. Replace with a new nonstandard battery if necessary. Ensure the power switch is in the "ON" position. |
| Àwọn ẹ̀yà ara kò bá ara wọn mu. | Incorrect part orientation or excess plastic on connection points. | Refer to the instruction diagrams to verify correct part orientation. Carefully trim any excess plastic from connection points if obstructing fit. |
| Joints are too loose or too tight. | Normal variation in plastic molding or assembly. | For loose joints, a small amount of clear nail polish or a thin layer of super glue (applied carefully and allowed to dry completely) can add friction. For tight joints, gently work them back and forth. |
Awọn pato
- Nọmba awoṣe: CC12
- Awọn iwọn ọja: 4 x 3 x 6 inches (isunmọ)
- Ìwọ̀n Nkan: 6.4 iwon
- Ọjọ ori Ti a ṣeduro Olupese: 12 ọdun ati si oke
- Awọn batiri: 1 Batiri ti kii ṣe deede (pẹlu)
- Ọ̀rọ̀ àsọyé: 20+ points
- Apejọ: Apẹrẹ snap-together laisi irinṣẹ
Atilẹyin ọja ati Support
For warranty information or technical support, please refer to the contact details provided on the product packaging or visit the official BLOKEES webojula. Tọju iwe-ẹri rira rẹ fun awọn ẹtọ atilẹyin ọja.


