Ọrọ Iṣaaju
This manual provides detailed instructions for the CUIPPWRJ FPV Drone Camera, Model MN01 2000B. This camera is designed for racing drones and offers high-quality video capture with a wide field of view. Please read this manual thoroughly before installation and operation to ensure proper use and longevity of your device.
Atokọ ikojọpọ
Upon opening the package, verify that all components are present and in good condition. The contents may vary slightly depending on the specific variant (Baby Ratel 2, Ratel 2, Caddx Ant, Caddx Ant Lite).
Awọn eroja ti o wọpọ:
- Kamẹra x1
- Menu Board x1 (for some models)
- 2pin Silicon Cable x1 (for some models)
- 3Pin Silicon Cable x1
- Screw Pack/Set x1
- 1.5mm Allen Wrench x1 (for some models)
- 14mm-19mm Bracket x1 (for some models)
- 19mm Case x1 (for Caddx Ant)
Ṣeto
1. Fifi sori ti ara
Mount the camera securely onto your racing drone frame. Use the provided bracket or case as appropriate for your drone model. Ensure the camera is oriented correctly, typically with the lens facing forward and level with the drone's flight path.
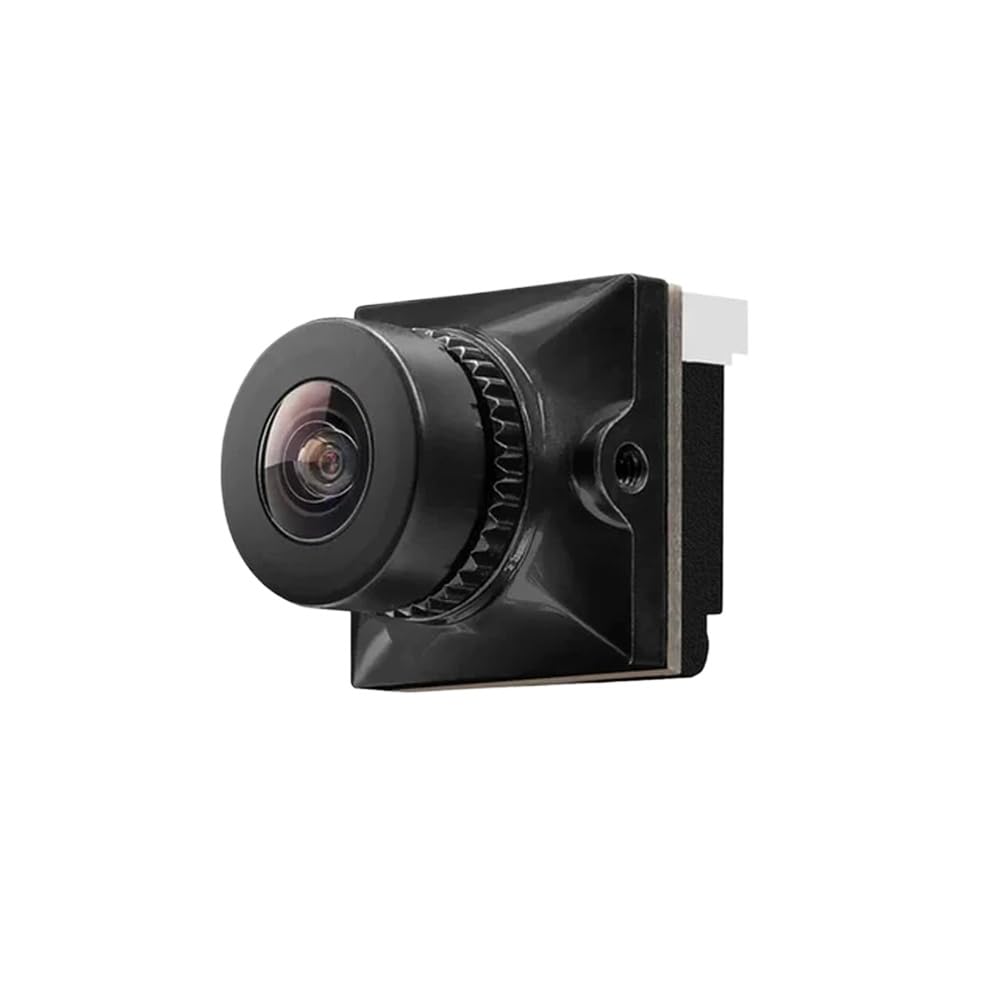
Image: The CUIPPWRJ FPV Drone Camera, illustrating its compact design suitable for racing drones.
2. Wiring Awọn isopọ
Connect the camera to your drone's flight controller or video transmitter (VTX) according to the pinout diagram provided with your drone or VTX. Typical connections include:
- VCC (Power): Connect to a stable 5V-12V power source from your flight controller or VTX. Refer to your camera's specific voltage ibeere.
- GND (Ilẹ): Connect to a common ground point on your flight controller or VTX.
- Fidio Fidio: Connect to the Video In (VI) pin on your VTX.
- OSD (Optional): If your camera supports OSD (On-Screen Display) control, connect the OSD pin to a UART TX pad on your flight controller for configuration via Betaflight/INAV, or to the provided menu board.
Iṣọra: Incorrect wiring can damage the camera or other drone components. Always double-check connections before applying power.
Isẹ
1. Agbara Lori
Once wired correctly, power on your drone. The camera will activate and begin transmitting video to your FPV goggles or monitor via the VTX.
2. OSD Menu Navigation (if applicable)
If your camera includes a menu board, connect it to the camera's OSD port. Use the buttons on the menu board to navigate and adjust camera settings such as brightness, contrast, saturation, and WDR (Wide Dynamic Range). Disconnect the menu board after configuration.
For cameras supporting OSD control via flight controller, refer to your flight controller's firmware documentation (e.g., Betaflight OSD) for joystick control commands to access and modify camera settings.
3. Atunse lẹnsi
The camera lens may require focus adjustment for optimal clarity. Gently rotate the lens clockwise or counter-clockwise until the image in your FPV goggles appears sharp. Secure the lens with the locking ring (if present) once focused.
Itoju
1. Ninu
Regularly clean the camera lens using a soft, lint-free cloth and a specialized lens cleaning solution. Avoid abrasive materials or harsh chemicals that could scratch the lens coating.
2. Ibi ipamọ
When not in use, store the camera in a dry, dust-free environment. Protect the lens from direct impact or scratches.
3. Awọn imudojuiwọn famuwia
Lorekore ṣayẹwo olupese ká website for any available firmware updates. Follow the provided instructions carefully if an update is necessary.
Laasigbotitusita
| Isoro | Owun to le Fa | Ojutu |
|---|---|---|
| Ko si fidio ifihan agbara | Incorrect wiring (power/video), VTX not powered, camera faulty. | Verify all wiring connections. Check VTX power and channel. Test camera with a known good setup. |
| Poor image quality (blurry) | Lens out of focus, dirty lens, damaged lens. | Adjust lens focus. Clean the lens. Inspect for physical damage. |
| Image flickering/lines | Power interference, loose connection, VTX/RX channel mismatch. | Ensure stable power supply. Check all connections. Verify VTX and RX are on the same channel and band. |
| OSD not appearing | OSD not enabled, incorrect OSD wiring, menu board not connected. | Check camera settings via menu board or flight controller. Verify OSD wiring. |
Awọn pato
- Awoṣe: MN01 2000B (Compatible with Ratel 2, Baby Ratel 2, Caddx Ant, Caddx Ant Lite variants)
- Ipinnu: 1200TVL
- Aaye ti View (FOV): 165°
- Awọn aṣayan lẹnsi: 1.8mm / 2.1mm
- Ìwọ̀n Nkan: Isunmọ 14.1 iwon (400 giramu)
- Awọn iwọn idii: 1.18 x 0.79 x 0.39 inches
- Olupese: CUIPPWRJ
Atilẹyin ọja ati Support
For warranty information, technical support, or service inquiries, please contact CUIPPWRJ directly through their official website or the retailer where the product was purchased. Keep your proof of purchase for any warranty claims.


