Ọrọ Iṣaaju
This manual provides essential instructions for the assembly, painting, and care of your Tamiya 1/35 German King Tiger (Königstiger) with Porsche Turret plastic model kit. Please read all instructions carefully before beginning assembly to ensure a successful and enjoyable building experience.
Awọn iṣọra Aabo
- Awọn Ẹya Kekere: Àpò yìí ní àwọn ẹ̀yà kékeré tó lè fa ewu fífúnni ní ìfúnpá. Pa á mọ́ kúrò lọ́wọ́ àwọn ọmọdé.
- Àwọn Irinṣẹ́ Mímú: Assembly requires the use of sharp tools such as hobby knives and nippers. Exercise caution to prevent injury.
- Adhesives and Paints: Use plastic cement and paints in a well-ventilated area. Avoid inhaling fumes. Follow the safety instructions provided with your chosen adhesives and paints.
- Idaabobo Oju: Consider wearing eye protection when cutting or sanding plastic parts.
Awọn ẹya Akojọ
Before starting, verify that all components are present. Your kit should include:
- Multiple plastic sprues (frames) containing various tank components.
- Poly caps for movable parts (e.g., turret rotation, road wheels).
- Decal sheet for markings and insignia.
- Instruction booklet with detailed assembly diagrams.
- Possibly a small length of string or wire for specific details.
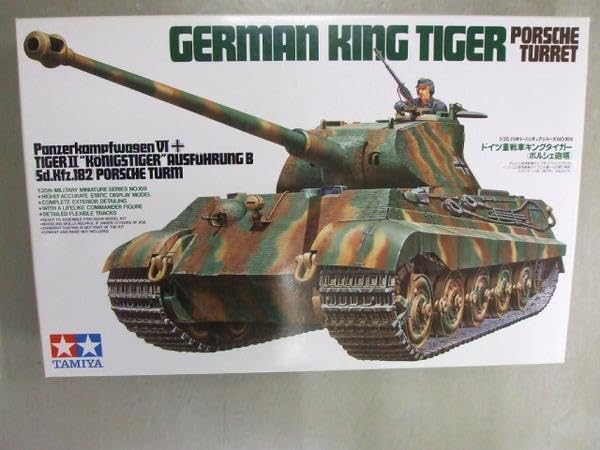
This image displays the packaging box for the Tamiya 1/35 German King Tiger Porsche Turret model kit, featuring detailed artwork of the tank. Alongside the box, the kit's plastic sprues, containing various parts for assembly, are visible within their protective plastic bag.
Awọn ilana Apejọ
Follow the numbered steps in the included instruction booklet for precise assembly. The general process involves:
- Igbaradi: Carefully cut parts from the sprues using nippers. Clean any excess plastic (flash) with a hobby knife or sanding stick.
- Àwọn Ìpínlẹ̀ Àpéjọ: Begin by assembling smaller components such as road wheels, suspension units, and the turret interior.
- Àkójọpọ̀ Hull: Construct the lower and upper hull sections, attaching suspension arms and other details as indicated.
- Apejọ Tọpinpin: Assemble the track links. This kit may feature individual link tracks or flexible rubber band tracks. Refer to the instructions for the specific method.
- Turret Assembly: Assemble the main gun, breech, and turret shell. Ensure the turret can rotate freely if poly caps are used.
- Apejọ ipari: Attach the turret to the hull, add external tools, hatches, and other small details.
- Dry Fitting: Always dry-fit parts before applying cement to ensure proper alignment and fit.
Yiya Itọsọna
Painting is a crucial step to bring your model to life. Consider the following:
- Igbaradi Ilẹ: Ensure the model is clean and free of dust, grease, or fingerprints before painting. A light wash with mild soap and water, followed by thorough drying, is recommended.
- Alakoko: Apply a thin, even coat of primer. This helps paint adhere better and provides a uniform base color.
- Base Coats: Apply the primary camouflage colors according to historical references or your preferred scheme. Use thin coats to preserve detail.
- Detail Painting: Paint smaller details such as tools, machine guns, and tracks.
- Weathering (Optional): Techniques like washes, dry-brushing, and pigments can add realism by simulating dirt, rust, and wear.
- Àwọn Irú Àwọ̀: Tamiya offers a range of acrylic, enamel, and lacquer paints suitable for model kits. Choose the type that best suits your experience and desired finish.
Ohun elo Decal
Applying decals correctly enhances the model's authenticity:
- Gloss Coat: Apply a gloss clear coat over the areas where decals will be placed. This provides a smooth surface and helps prevent 'silvering' (air trapped under the decal).
- Cut Decals: Carefully cut out each decal from the sheet using a sharp hobby knife or scissors.
- Ohun elo omi: Dip the decal in lukewarm water for 10-20 seconds until it slides freely on its backing paper.
- Ipo: Gently slide the decal onto the model surface using a wet brush or tweezers. Position it accurately.
- Setting Solution: Apply a decal setting solution (e.g., Tamiya Mark Fit) to help the decal conform to surface details and eliminate air bubbles.
- Aso oke: Once decals are dry and setting solution has worked, apply a final clear coat (gloss, satin, or matte) to seal and protect them.
Itoju
To preserve the appearance of your finished model:
- Ninu: Dust your model regularly with a soft brush or a can of compressed air. Avoid harsh chemicals or abrasive materials.
- Ibi ipamọ: Store the model in a display case or an area free from direct sunlight, extreme temperatures, and high humidity to prevent fading or damage.
- Mimu: Handle the model by its base or sturdy sections to avoid breaking delicate parts.
Laasigbotitusita
Common issues and solutions during model assembly:
- Awọn ẹya Ko Dara: Ensure all flash is removed. Dry-fit parts before gluing. If necessary, gently sand or trim mating surfaces.
- Gaps Between Parts: Use plastic filler putty to fill any noticeable gaps after gluing. Sand smooth once dry.
- Àwọn Ìṣòro Àwọ̀: If paint is uneven or peels, ensure the surface was clean and primed. Apply paint in thin, even coats. Allow sufficient drying time between coats.
- Ṣíṣe Àmì Ẹ̀rọ Fadaka: This occurs when air is trapped under the decal. Apply a gloss coat before decals and use a decal setting solution. Puncture small bubbles with a sharp needle and apply more setting solution.
Awọn pato
| Iwa | Ẹ̀kúnrẹ́rẹ́ |
|---|---|
| Orukọ awoṣe | German King Tiger (Königstiger) Porsche Turret |
| Nọmba awoṣe | MM169 35169 |
| Brand | Tamiya |
| Iwọn | 1/35 |
| Iru | Ṣiṣu awoṣe Apo |
| Approximate Length (assembled) | ~29 cm (11.4 inches) |
| Ohun elo | Ṣíṣítíkì Pọ́sítírínì |
Atilẹyin ọja ati Support
Tamiya model kits are manufactured to high standards. If you encounter any missing or defective parts, please contact the retailer where you purchased the kit or Tamiya customer support directly. Keep your proof of purchase for warranty claims. For further assistance or technical questions, refer to the contact information provided in the original kit packaging or on the official Tamiya webojula.


