1. Ọja Ipariview
The Plaud Note is a compact AI voice recorder designed for capturing audio, transcribing it into text, and generating summaries using advanced AI technology. It features 64GB of internal memory and supports various recording modes.

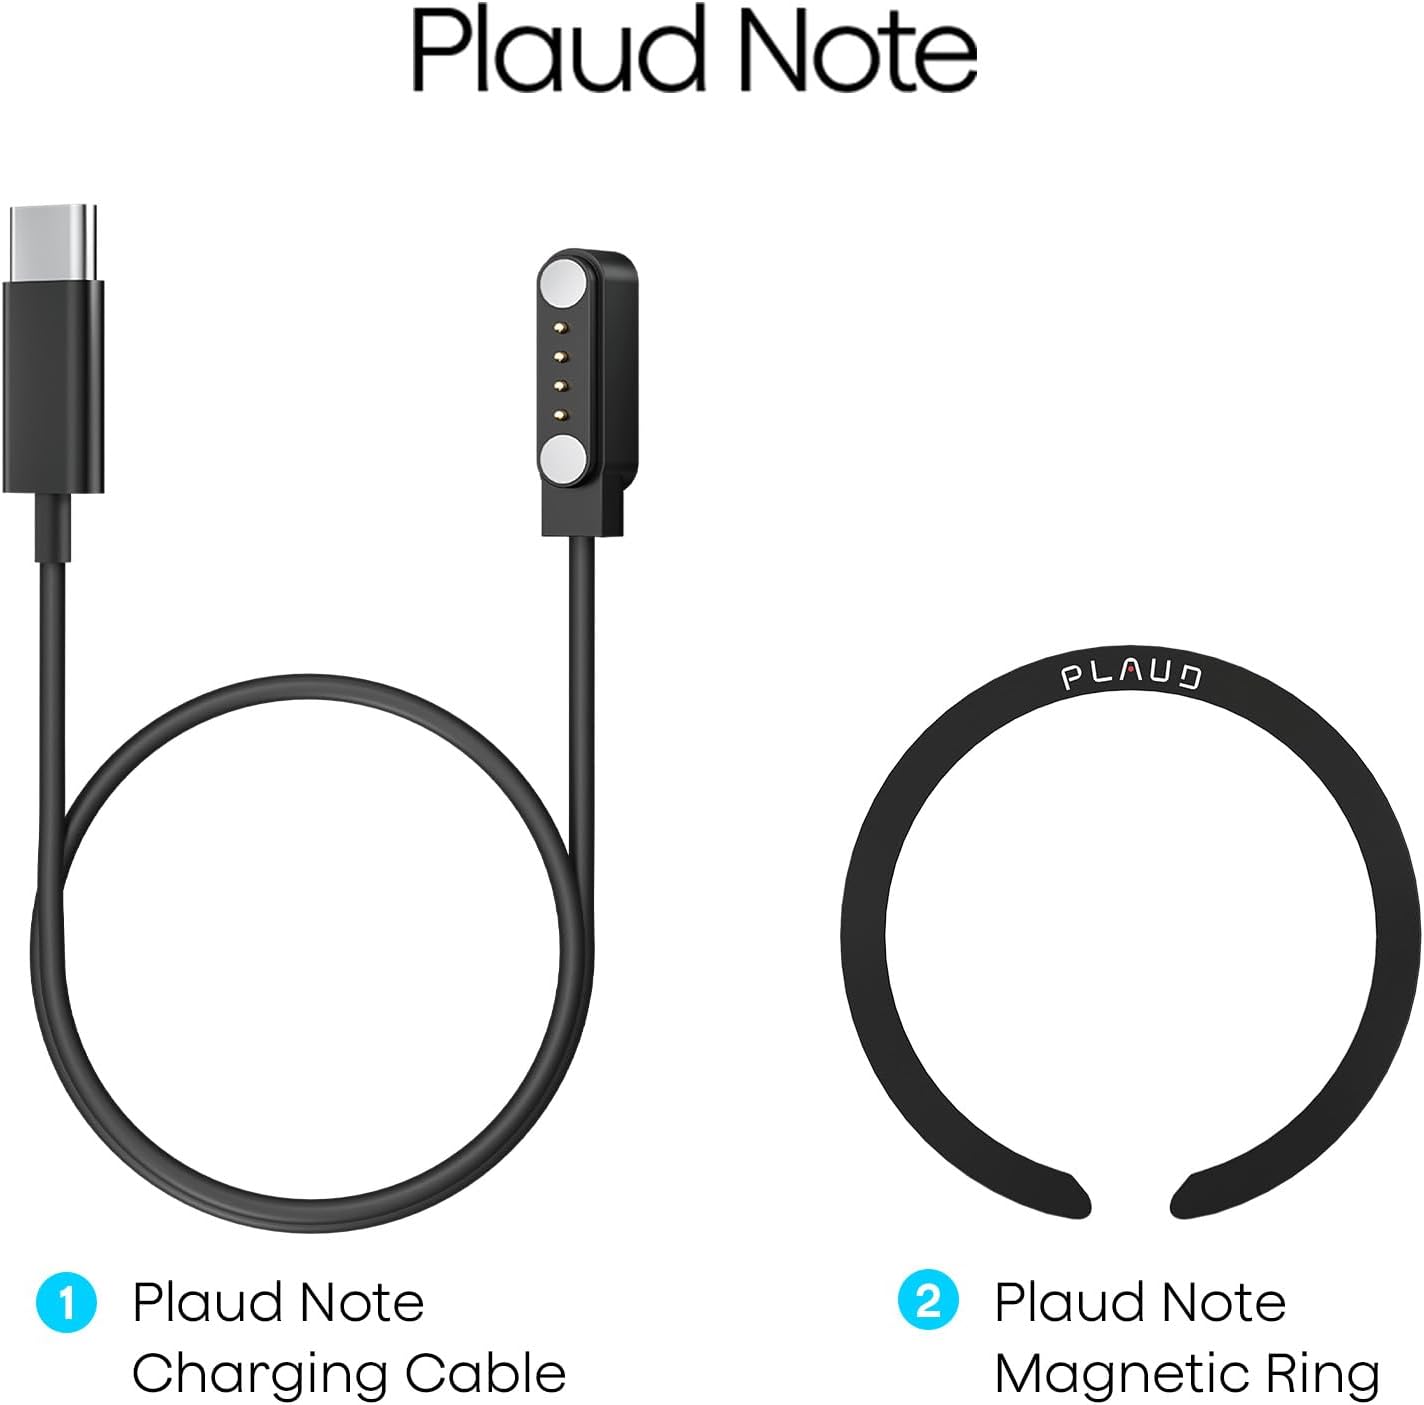
2. Ohun ti o wa ninu Apoti
Upon unboxing your Plaud Note, verify that all components are present:
- Plaud Note AI Voice Recorder
- USB-C oofa Ngba agbara Cable
- Magnetic Ring (for phone attachment)
- Quick Bẹrẹ Itọsọna
Fidio Unboxing
Video 2.1: This video demonstrates the unboxing process of the Plaud Note AI Voice Recorder, showing all included items and initial presentation.
3. Eto
3.1 Ngba agbara si Ẹrọ
Before first use, fully charge your Plaud Note. Connect the magnetic charging cable to the charging port on the back of the device and plug the USB-C end into a power source. A full charge typically takes approximately 2 hours.

3.2 Installing the Magnetic Ring (Optional)
The included magnetic ring allows the Plaud Note to securely attach to your smartphone, facilitating call recording and convenient placement. Follow the instructions provided with the magnetic ring for proper installation on your phone or phone case.

3.3 App Download ati Asopọ
Download the official Plaud app from your smartphone's app store (iOS or Android). Once installed, open the app and follow the on-screen instructions to bind and connect your Plaud Note via Bluetooth. The device's indicator light will flash white during the binding process.
4. Operating the Plaud Note
4.1 Awọn ọna Gbigbasilẹ
The Plaud Note supports two primary recording modes:
- Ipo Gbigbasilẹ ipe: Attach the Plaud Note to the back of your smartphone using the magnetic ring. Ensure the device is positioned near the phone's speaker for optimal audio capture during calls.
- Note Recording Mode: For in-person meetings, lectures, or personal notes, the Plaud Note can be placed independently on a surface to capture ambient audio.

4.2 Starting and Stopping Recording
There are two ways to initiate recording:
- Bọtini Ẹrọ: Long-press the designated record button on the Plaud Note. A solid red light indicates that recording has started.
- Plaud App: Open the Plaud app and tap the 'Start Recording' option.
To stop recording, long-press the record button on the device again or tap 'Stop Recording' in the app.
4.3 Transcription and Summarization
After recording, sync your audio files to the Plaud app. The app utilizes advanced AI (GPT-4o & Claude 3.5 Sonnet) to:
- Ṣàkọsílẹ̀: Convert audio into text in 112 languages with high accuracy.
- Ṣe akopọ: Generate concise summaries, meeting minutes, and to-do lists from your transcriptions.
- Speaker Labels: Automatically identify and label different speakers in your recordings.
- Audio Trimming: Edit and remove unwanted segments from your audio files.
- Audio Import: Import external audio files for transcription and summarization.
All transcribed and summarized data can be managed within the Plaud App and Web portal, with unlimited cloud storage available.
5. Itọju
5.1 Ninu
Wipe the Plaud Note with a soft, dry cloth. Avoid using harsh chemicals or abrasive materials, which can damage the device's surface.
5.2 Ibi ipamọ
Store the device in a cool, dry place away from direct sunlight and extreme temperatures. When storing for extended periods, ensure the battery is partially charged (around 50%) to prolong its lifespan.
5.3 batiri Life
The Plaud Note offers up to 30 hours of continuous recording and up to 60 days of standby time on a full charge. Battery performance may vary based on usage patterns and environmental conditions.
5.4 Data Management
The device includes 64GB of local memory. For additional storage and accessibility, utilize the unlimited cloud storage provided through the Plaud App and Web portal. Regularly back up important recordings.
6. Laasigbotitusita
6.1 Atọka Light Meaning
- Imọlẹ funfun: Ready to Connect / Binding
- Pupa ti o lagbara: Gbigbasilẹ
- Pọ́ọ̀lù Ìtànṣán Batiri kekere
- Dile Eleyika: Gbigba agbara
- Alawọ ewe ri to: Gba agbara ni kikun
- Yellow Dile: Ko si Ibi ipamọ
6.2 wọpọ oran
- Ẹrọ ti ko sopọ: Ensure Bluetooth is enabled on your phone and the Plaud Note is in binding mode (flashing white light). Restart both devices if necessary.
- Didara ohun ti ko dara: Check the placement of the Plaud Note. For call recording, ensure it's close to the phone's speaker. For in-person recording, place it on a stable surface in the center of the conversation.
- Transcription errors: Ensure clear audio input. Background noise or multiple overlapping speakers can affect accuracy. Utilize the speaker labeling feature for better organization.
- Ohun elo ko muṣiṣẹpọ: Verify your internet connection and ensure the Plaud app is updated to the latest version.
For further assistance, refer to the official Plaud support webojula tabi olubasọrọ onibara iṣẹ.
7. Awọn pato
| Ẹya ara ẹrọ | Ẹ̀kúnrẹ́rẹ́ |
|---|---|
| Brand | Plaud |
| Awoṣe | Plaud Note |
| Ni wiwo Hardware | USB Iru C |
| Gbohungbo Fọọmù ifosiwewe | Ti a ṣe sinu |
| Ohun kika | MP3 Ohun |
| Awọn agbekọri Jack | Ko si agbekọri jaketi |
| Digital Gbigbasilẹ Time | 120 hours (total capacity) |
| Ipo Isẹ gbohungbohun | Speech Recognition, Stereo |
| Ti abẹnu Memory | 64GB |
| Gbigbasilẹ Tesiwaju | Titi di wakati 30 |
| Akoko Iduro | Titi di ọjọ mẹwa 60 |
8. Atilẹyin ọja ati Support
Plaud products are covered by a limited warranty. For specific warranty terms and conditions, please refer to the warranty card included with your product or visit the official Plaud website. For technical support, troubleshooting, or customer service inquiries, please contact Plaud customer support through their official channels.
Atilẹyin Ayelujara: Ṣabẹwo www.plaud.ai for FAQs, user guides, and contact information.
9. Alaye Aabo
Please read and follow these safety guidelines to ensure safe operation of your Plaud Note:
- Ma ṣe fi ẹrọ naa han si omi, ọrinrin, tabi awọn iwọn otutu to gaju.
- Yago fun sisọ silẹ tabi tẹriba ẹrọ si awọn ipa to lagbara.
- Lo okun gbigba agbara ti a pese nikan tabi okun USB-C ti a fọwọsi fun gbigba agbara.
- Do not attempt to disassemble, repair, or modify the device yourself. Contact authorized service personnel for any repairs.
- Jeki ẹrọ naa kuro ni arọwọto awọn ọmọde.


