1. Ifihan
This manual provides detailed instructions for the installation, operation, and maintenance of your Jennov 5MP Wireless Security Camera System P48. This system includes an 8-channel NVR with a built-in monitor and four 5MP wireless cameras, designed for both indoor and outdoor surveillance. Please read this manual thoroughly before using the product to ensure proper setup and functionality.
2. Package Awọn akoonu
Verify that all items listed below are included in your package. If any items are missing or damaged, please contact Jennov customer support.
- 4 x Security Cameras (Outdoor Wireless)
- 1 x NVR Monitor
- 1 x P48 Security System (Integrated NVR with Monitor)
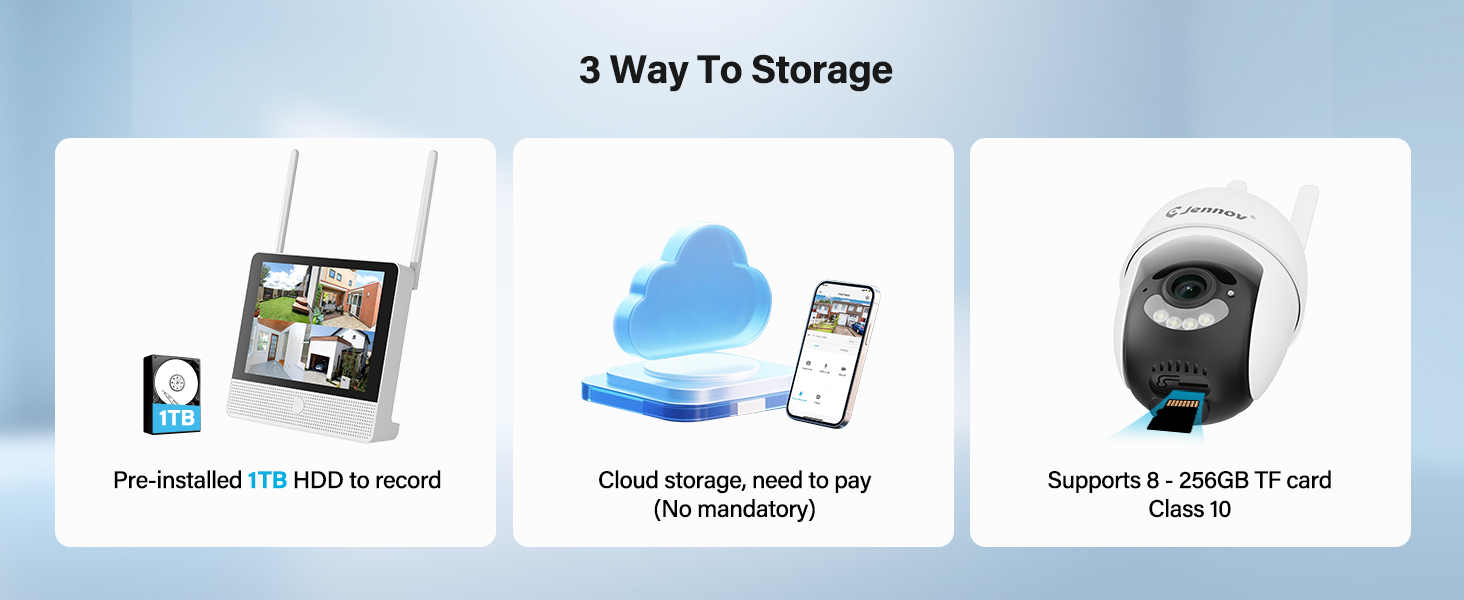
- 1 x 1TB Hard Disk (Pre-installed)
- 1 x Okun Ethernet
- 1 x Asin
- 4 x Hole Stickers (for camera mounting)
- 4 x Camera Bases
- 1 x NVR Power Ipese
- 4 x Camera Power Supplies
- 1 x HDMI Okun
- 1 x Sitika Ikilo
- 1 x Itọsọna olumulo (iwe yii)
- 1 x Screws Pack (for mounting)
3. Ọja Ipariview
The Jennov P48 system is a comprehensive wireless security solution designed for ease of use and reliable performance. Key features include:
- 5MP HD Resolution: Cameras capture clear, detailed video.
- Asopọ Alailowaya: Cameras connect to the NVR wirelessly, simplifying installation.
- Ibi ipamọ HDD 1TB: Pre-installed hard drive for local recording without subscription fees.
- Iran Alẹ: Enhanced visibility in low-light conditions up to 15 meters.
- Iwari išipopada: Triggers recording and alerts upon detecting movement.
- IP66 Oju ojo: Cameras are designed to withstand various outdoor weather conditions.
- Plug-and-Play: Simple setup with cameras pre-paired to the NVR.
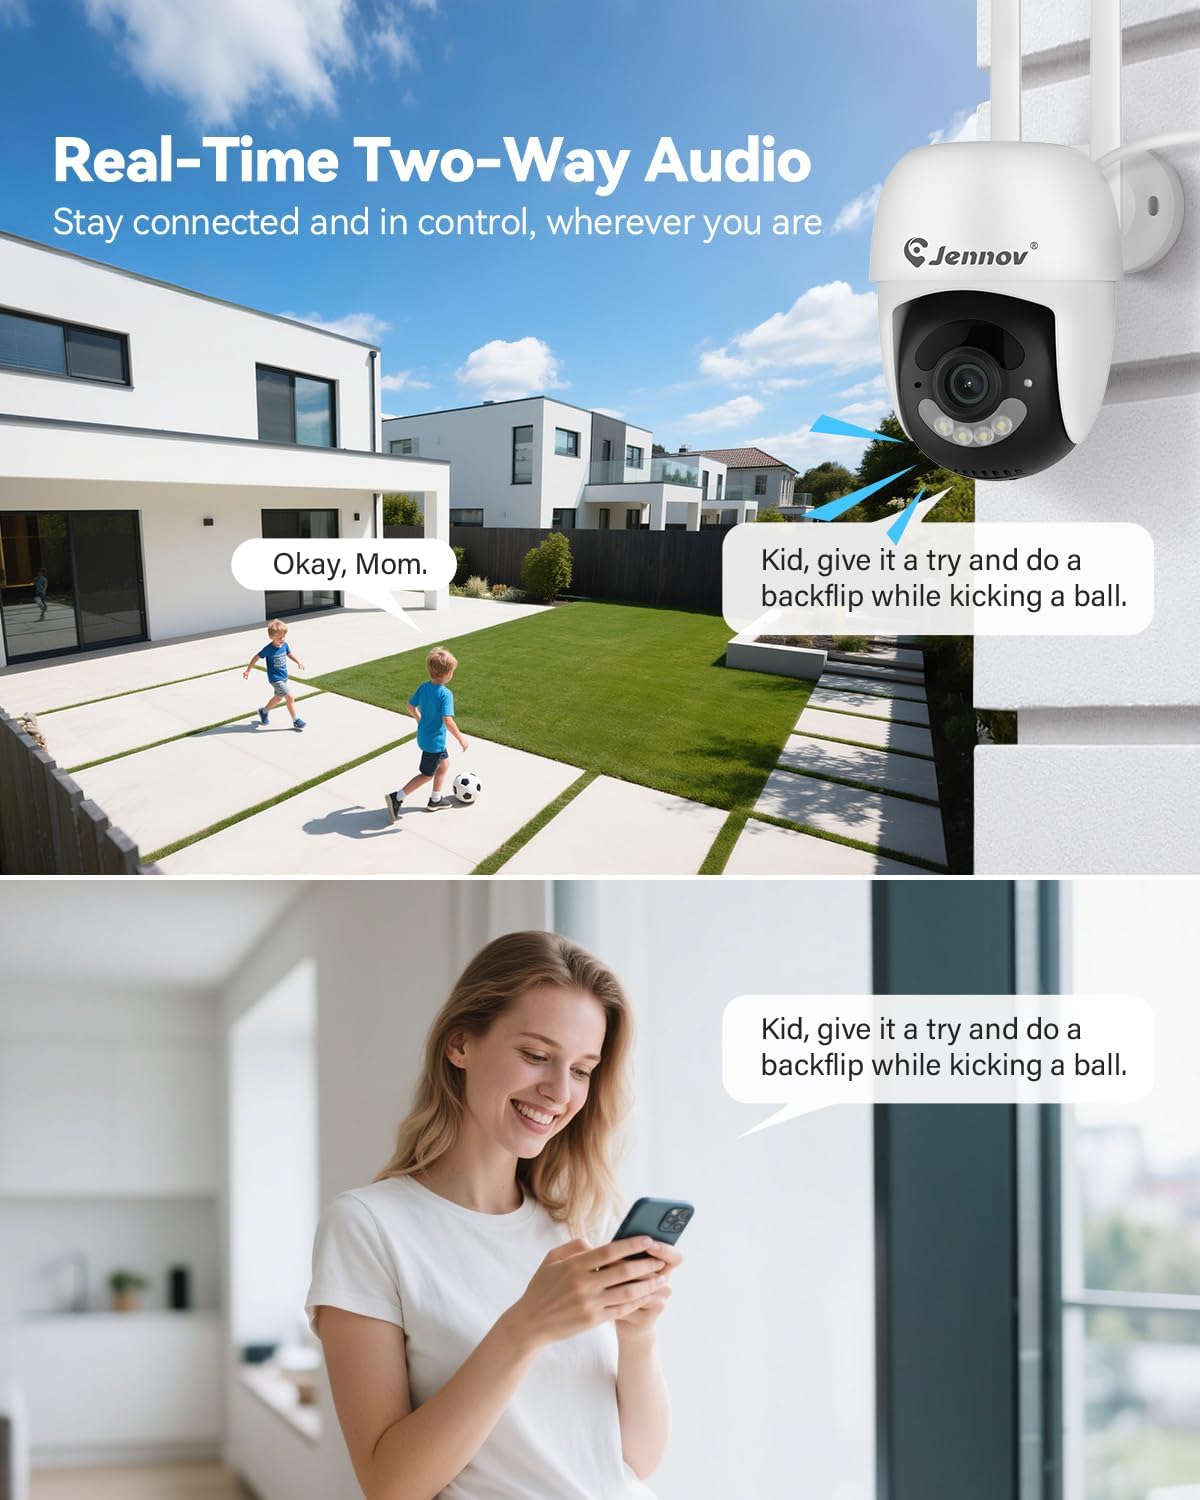
- Audio Ọna Meji: Communicate through the cameras using the mobile app.
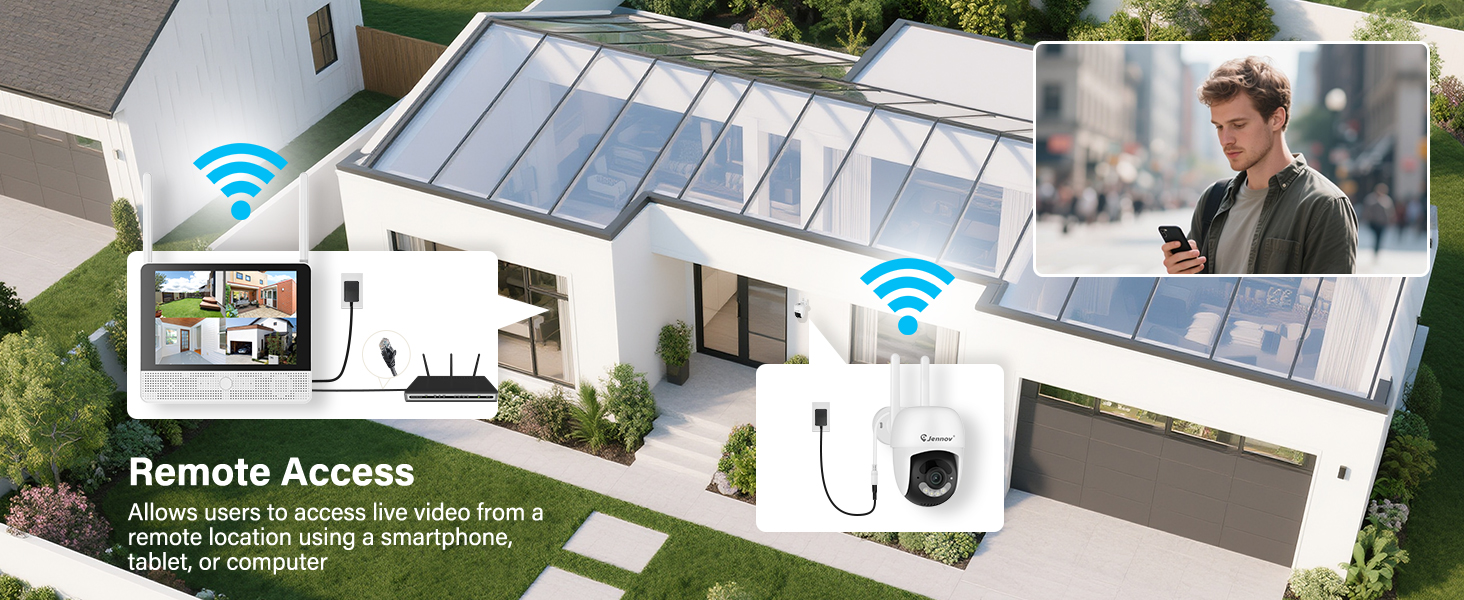
- Wiwọle Latọna jijin: View live feeds and recordings from anywhere via the Jennov app.
3.1 System irinše

The system consists of a Network Video Recorder (NVR) with an integrated monitor and four wireless IP cameras. The NVR manages video recording, storage, and provides a local viewing interface. The cameras capture video and transmit it wirelessly to the NVR.
3.2 NVR Ports and Connections
- Ibudo Agbara: Connect the NVR power adapter.
- Ibudo USB: For connecting the included mouse or a USB drive for backup.
- Ibudo HDMI: Connect to an external monitor for larger display (optional).
- Ibudo LAN: Connect to your router for internet access and remote viewing.
- Bọtini atunto: Used to reset the NVR to factory settings.
- Iho kaadi SD: For additional local storage (supports up to 256GB TF card, Class 10).
4. Eto Itọsọna
4.1 Eto NVR Ibẹrẹ
- So agbara: Connect the NVR power adapter to the Power Port and plug it into an electrical outlet. The NVR will power on automatically.
- So Asin: Plug the included USB mouse into the USB Port on the NVR.
- Bata Ibẹrẹ: The NVR will boot up and display the live view from the pre-paired cameras on its integrated monitor.
- Network Connection (Optional for Remote Access): Fun latọna jijin viewing via the mobile app, connect the NVR's LAN Port to your internet router using the provided Ethernet cable.
4.2 Fifi sori ẹrọ Kamẹra
The cameras are designed for both indoor and outdoor use (IP66 rated). Choose mounting locations that provide optimal coverage and are within range of a power outlet.
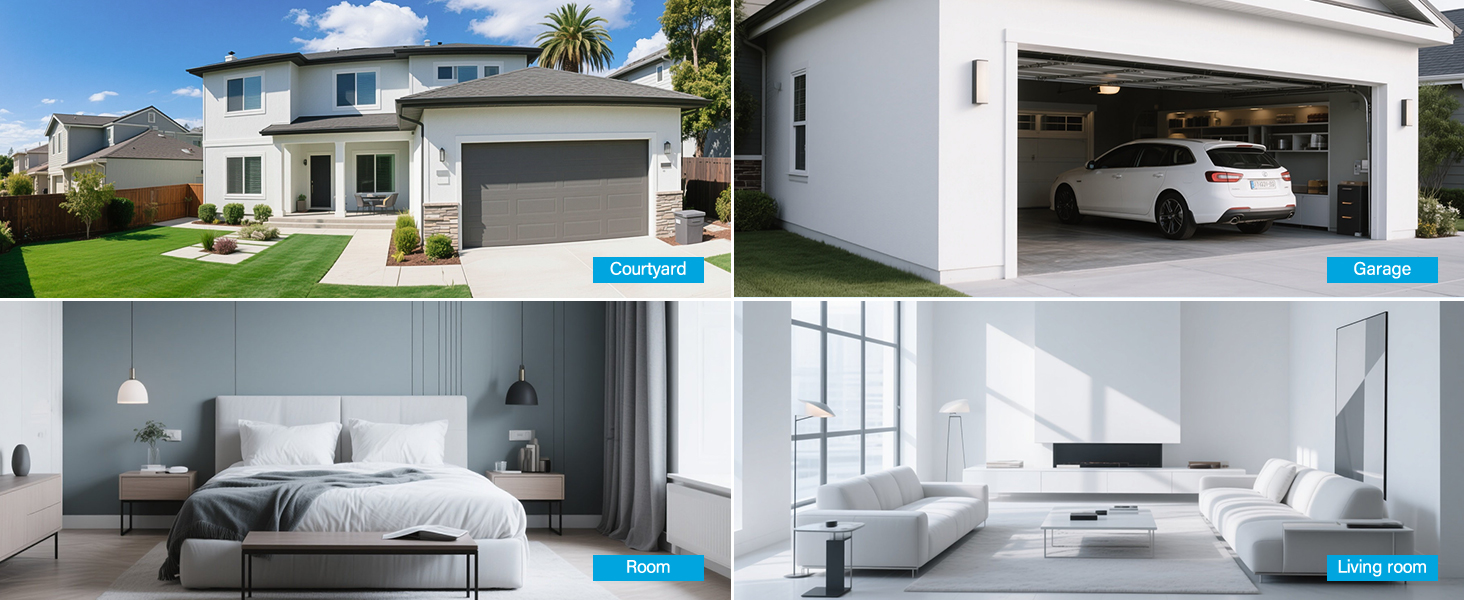
- Yan Ibi: Identify suitable locations for each camera. Consider areas like entryways, driveways, garages, and backyards. Ensure the camera has a clear line of sight to the area you wish to monitor.
- Iṣagbesori:
- Use the included hole stickers to mark drilling points on the wall or ceiling.
- Lu awọn ihò awaoko ki o si fi awọn ìdákọró odi ti o ba jẹ dandan.
- Secure the camera base using the provided screws.
- Attach the camera to the base and adjust its angle.
- So agbara: Connect each camera to its individual power adapter and plug it into an electrical outlet. The cameras will power on and automatically connect to the NVR.
Akiyesi: The cameras are pre-paired to the NVR. If a camera does not display a live feed, ensure it is powered on and within wireless range of the NVR. You may need to re-pair it if issues persist (refer to Troubleshooting section).
5. Awọn ilana Iṣiṣẹ
5.1 Live View ati Lilọ kiri
Once the system is powered on, the NVR's integrated monitor will display the live feeds from all connected cameras. Use the included mouse to navigate the NVR interface.
- Akojọ akọkọ: Tẹ-ọtun nibikibi lori ifiwe view screen to access the main menu.
- Iyipada ikanni: Click on a specific camera feed to view it in full screen, or use the layout options to change the multi-camera display.
5.2 Gbigbasilẹ ati Sisisẹsẹhin
The system records continuously to the pre-installed 1TB HDD. Recording settings can be adjusted via the NVR's menu.
- Igbasilẹ Gbigbawọle: The system is configured for 24/7 continuous recording by default.
- Gbigbasilẹ ti a mu ṣiṣẹ nipasẹ išipopada: You can configure cameras to record only when motion is detected, saving storage space.
- Sisisẹsẹhin: From the main menu, select "Playback" to review foo ti o ti gbasilẹtage. You can search by date, time, and event type (e.g., motion detection).
5.3 Išipopada erin ati titaniji
The cameras feature smart motion detection to alert you to activity.
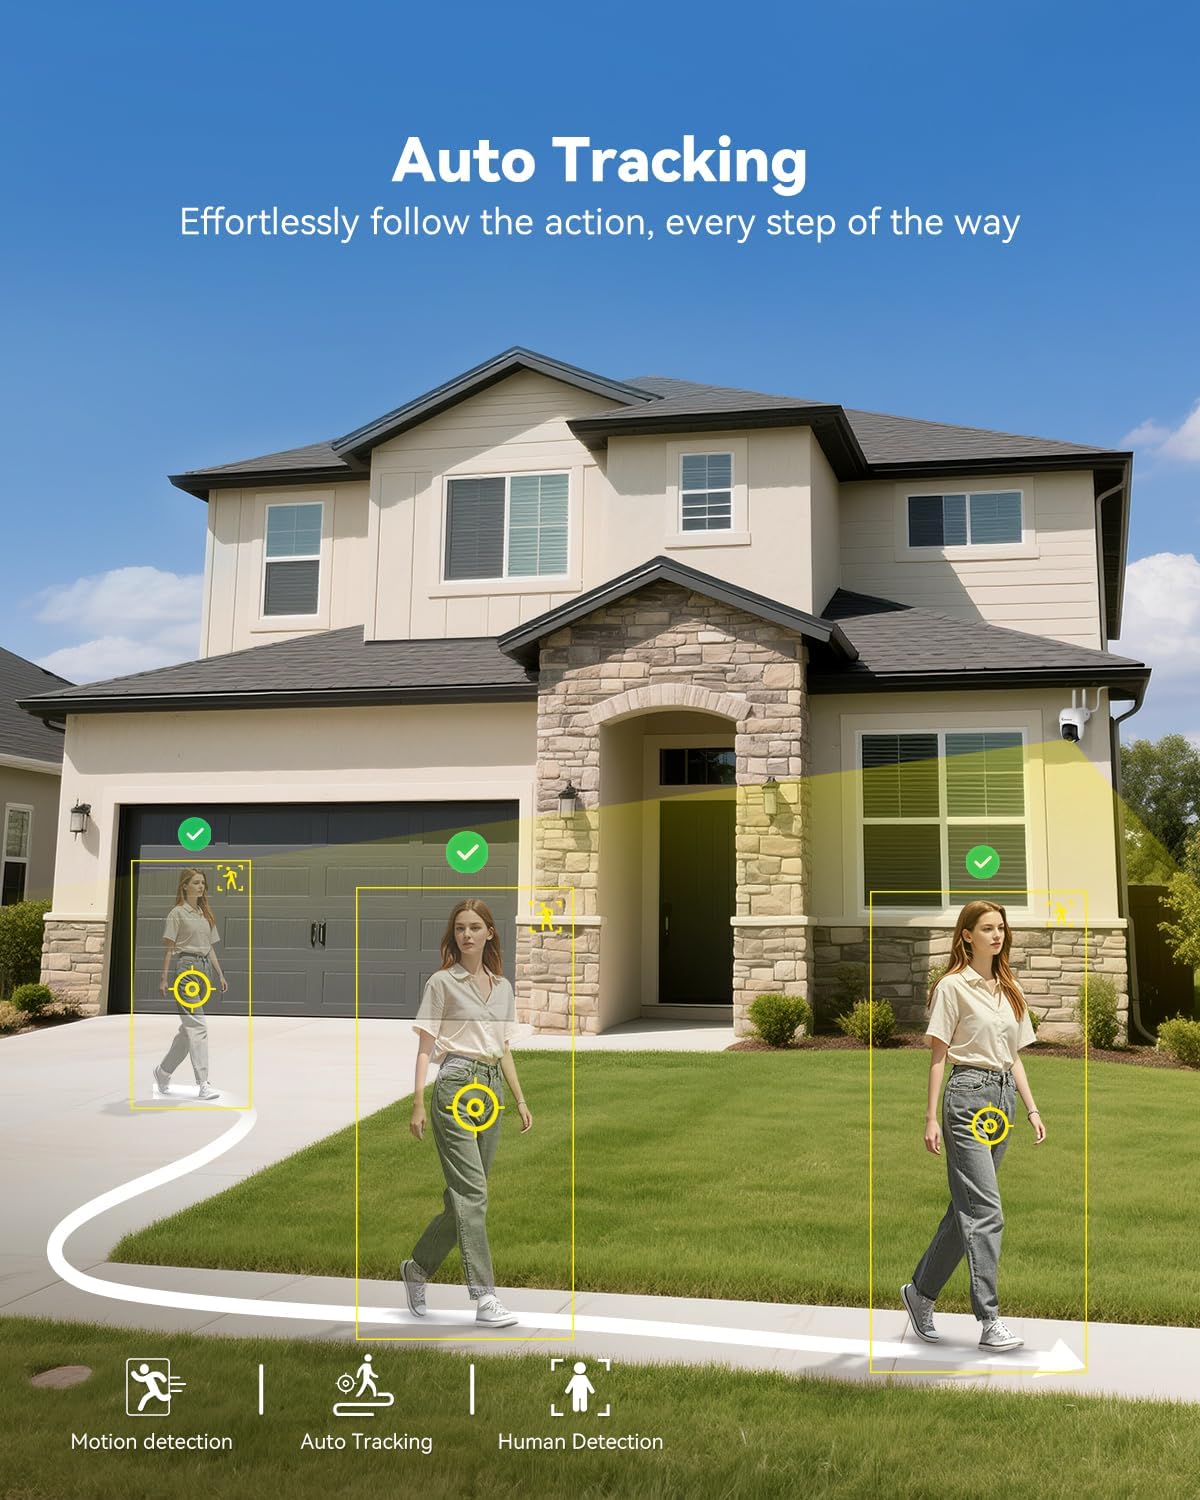
- Iṣeto: Access motion detection settings from the NVR's main menu. You can define detection zones and sensitivity levels for each camera.
- Awọn itaniji: When motion is detected, the system can trigger recordings, send push notifications to your mobile app (if configured), and activate audible alarms or spotlights on the camera (if supported and enabled).

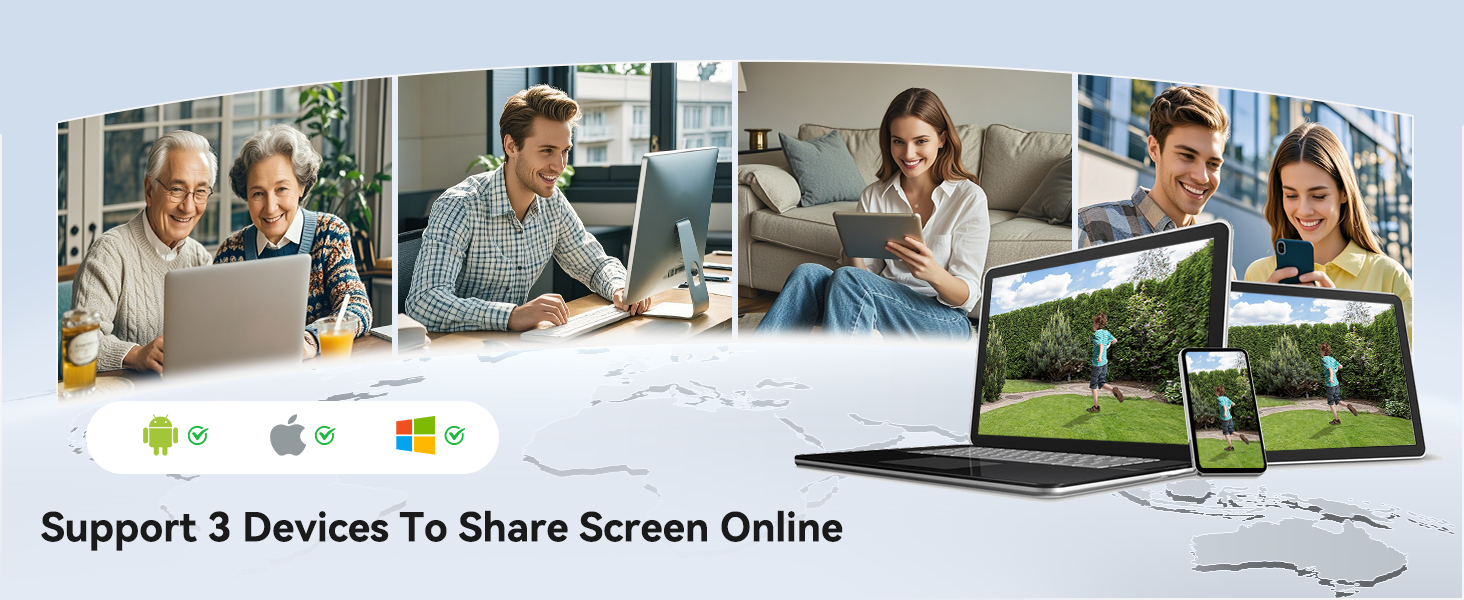
5.4 Remote Access (Jennov App)
Si view your cameras remotely, download the Jennov app on your smartphone or tablet.
- Ṣe igbasilẹ Ohun elo: Wa fun "Jennov" in your device's app store (iOS or Android).
- Iwe akọọlẹ iforukọsilẹ: Ṣẹda akọọlẹ olumulo tuntun kan laarin ohun elo naa.
- Fi ẹrọ kun: Follow the in-app instructions to add your NVR system. This typically involves scanning a QR code displayed on the NVR's monitor or entering the device ID manually.
- Gbe View & Sisisẹsẹhin: Ni kete ti o ba ṣafikun, o le view Àwọn ìfọ̀rọ̀wérọ̀ láyè, ṣe àtúnṣe àwọn ìgbasílẹ̀, àti gba àwọn ìkìlọ̀ tààrà lórí ẹ̀rọ alágbèéká rẹ.
5.5 Meji-Ona Audio
Each camera is equipped with a microphone and speaker, enabling two-way communication through the Jennov app.
- Mu ṣiṣẹ: Ninu aye view of a specific camera on the app, locate the microphone icon. Tap it to speak, and your voice will be transmitted through the camera's speaker.
- Gbọ: The camera's microphone will pick up audio from its surroundings, which you can hear through the app.
5.6 Night Vision
The cameras automatically switch to night vision mode in low-light conditions, providing clear surveillance even in darkness.

- Ṣiṣẹ Aifọwọyi: Infrared (IR) LEDs enable black-and-white night vision. Some models may also offer color night vision under certain conditions (e.g., with ambient light or activated spotlight).
- Ibiti: Night vision is effective up to 15 meters (50 feet).
6. Itọju
6.1 Lile wakọ Management
The 1TB HDD will automatically overwrite the oldest footage when full. No manual intervention is typically required for continuous recording.
- Afẹyinti Footage: If you need to save specific recordings, use the NVR's backup function (via USB port) or download from the mobile app.
- Ṣayẹwo Ilera HDD: Periodically check the HDD status in the NVR's system settings to ensure proper functioning.
6.2 Ninu
- Awọn kamẹra: rọra nu awọn lẹnsi kamẹra nu pẹlu asọ, damp cloth to remove dust or smudges. Do not use harsh chemicals.
- NVR: Keep the NVR monitor and unit free from dust. Use a dry, soft cloth for cleaning.
6.3 famuwia imudojuiwọn
Periodically check the Jennov website or contact customer support for available firmware updates. Updates can improve system performance, add new features, or address security vulnerabilities. Follow the provided instructions carefully when performing updates.
7. Laasigbotitusita
| Isoro | Owun to le Fa | Ojutu |
|---|---|---|
| No image on NVR monitor | NVR not powered on; Power adapter faulty; Monitor cable loose. | Ensure NVR power adapter is securely connected and plugged in. Check power outlet. If using external monitor, ensure HDMI cable is connected properly. |
| Camera not displaying live feed | Camera not powered; Out of wireless range; Not paired with NVR. | Ensure camera power adapter is connected and plugged in. Move camera closer to NVR. If still no feed, re-pair the camera: access NVR menu, go to "Camera Management" and follow instructions to add/re-pair cameras. |
| Cannot access system via mobile app | NVR ko sopọ si intanẹẹti; Awọn eto app ti ko tọ; Awọn oran ogiriina. | Ensure NVR is connected to your router via Ethernet cable. Verify your phone has internet access. Double-check device ID/QR code in the app. Ensure router firewall is not blocking NVR access. |
| Poor video quality or lag | Weak wireless signal; Obstructions; Interference. | Relocate camera or NVR to improve signal strength. Minimize obstructions (thick walls, metal objects). Avoid placing near other wireless devices that may cause interference. |
| Wiwa išipopada ko ṣiṣẹ | Settings incorrect; Sensitivity too low; Detection zone not set. | Access NVR menu, go to "Motion Detection" settings. Adjust sensitivity, define detection zones, and ensure motion recording/alerts are enabled. |
8. Awọn pato
| Ẹya ara ẹrọ | Ẹ̀kúnrẹ́rẹ́ |
|---|---|
| Brand | Jennov |
| Nọmba awoṣe | K4-P48HC55AS-V2108-1F2 (P48 System) |
| Asopọmọra Technology | Ailokun |
| Ipinnu Yaworan fidio | 5MP (Ultra-HD) |
| Nọmba ti awọn ikanni | 8 (System includes 4 cameras, expandable) |
| Agbara Ibi ipamọ Iranti | 1 TB HDD (pre-installed), supports up to 256GB TF card |
| Orisun agbara | Corded Electric (Outlet-Powered Cameras) |
| Awọn Iwọn Nkan (L x W x H) | 13.39 x 7.48 x 11.42 inches |
| Niyanju Lilo | Indoor, Outdoor Surveillance |
| Ibiti Iran Night | 10-15 Meters (approx. 33-50 feet) |
| Iboju ojo | IP66 won won |
| Awọn iwọn otutu ti nṣiṣẹ | -20°C si 60°C (-4°F si 140°F) |
9. Atilẹyin ọja ati Support
For warranty information, technical support, or any questions regarding your Jennov P48 Wireless Security Camera System, please refer to the warranty card included in your package or visit the official Jennov website. You can also contact Jennov customer service directly for assistance.
Jennov Official Webojula: Visit Jennov Store on Amazon


