Ọrọ Iṣaaju
The AQQA Aquarium Protein Skimmer is designed to efficiently remove organic waste, proteins, and impurities from saltwater, reef, and marine fish tanks. This process helps maintain crystal clear and healthy water conditions for your aquatic life. This manual provides comprehensive instructions for proper installation, operation, and maintenance of your protein skimmer.
Awọn Itọsọna Aabo
- Nigbagbogbo ge asopọ agbara ṣaaju ṣiṣe eyikeyi itọju tabi fifi sori ẹrọ.
- Ensure hands are dry when plugging or unplugging the unit.
- Ma ṣe ṣiṣẹ ti okun tabi plug ba bajẹ.
- Ohun elo yii jẹ ipinnu fun lilo inu ile nikan.
- Jeki kuro ni arọwọto awọn ọmọde.
- Ensure the skimmer is securely mounted to prevent accidental displacement.
Ọja Pariview ati irinše
The AQQA Protein Skimmer (Model GUS-AQ178) is a high-efficiency unit designed for aquariums ranging from 50 to 80 gallons. It features a compact design, adjustable height, and transparent body for easy monitoring.
Awọn ẹya pataki:
- High-Efficiency Protein Skimming: Generates dense micro-bubbles to remove organic waste, proteins, and impurities.
- Adjustable Height: Allows for optimal placement in various tank sizes (50-80 gallons).
- Compact Design: Space-saving, suitable for nano tanks, reef tanks, and other marine systems.
- Transparent Body: Enables easy monitoring of foam production and waste collection.
- Adjustable Flow & Overflow Protection: Fine-tune water flow and prevents spills.
Idanimọ eroja:

The image above details the protein skimmer's working principle, showing how air and water mix to form microbubbles, which then bind to organic waste and collect in the foam cup.
Awọn ilana iṣeto
Follow these steps for proper installation of your AQQA Protein Skimmer.
Igbesẹ 1: Apejọ akọkọ
- Attach the suction cups or mounting bracket to the skimmer body. Ensure they are securely fastened.
- Connect the air pipe to the regulating valve on the skimmer.
- Insert the pump into the designated slot at the bottom of the skimmer.
- Place the filter sponge into the skimmer body.
- Assemble the collection cup onto the top of the skimmer body.
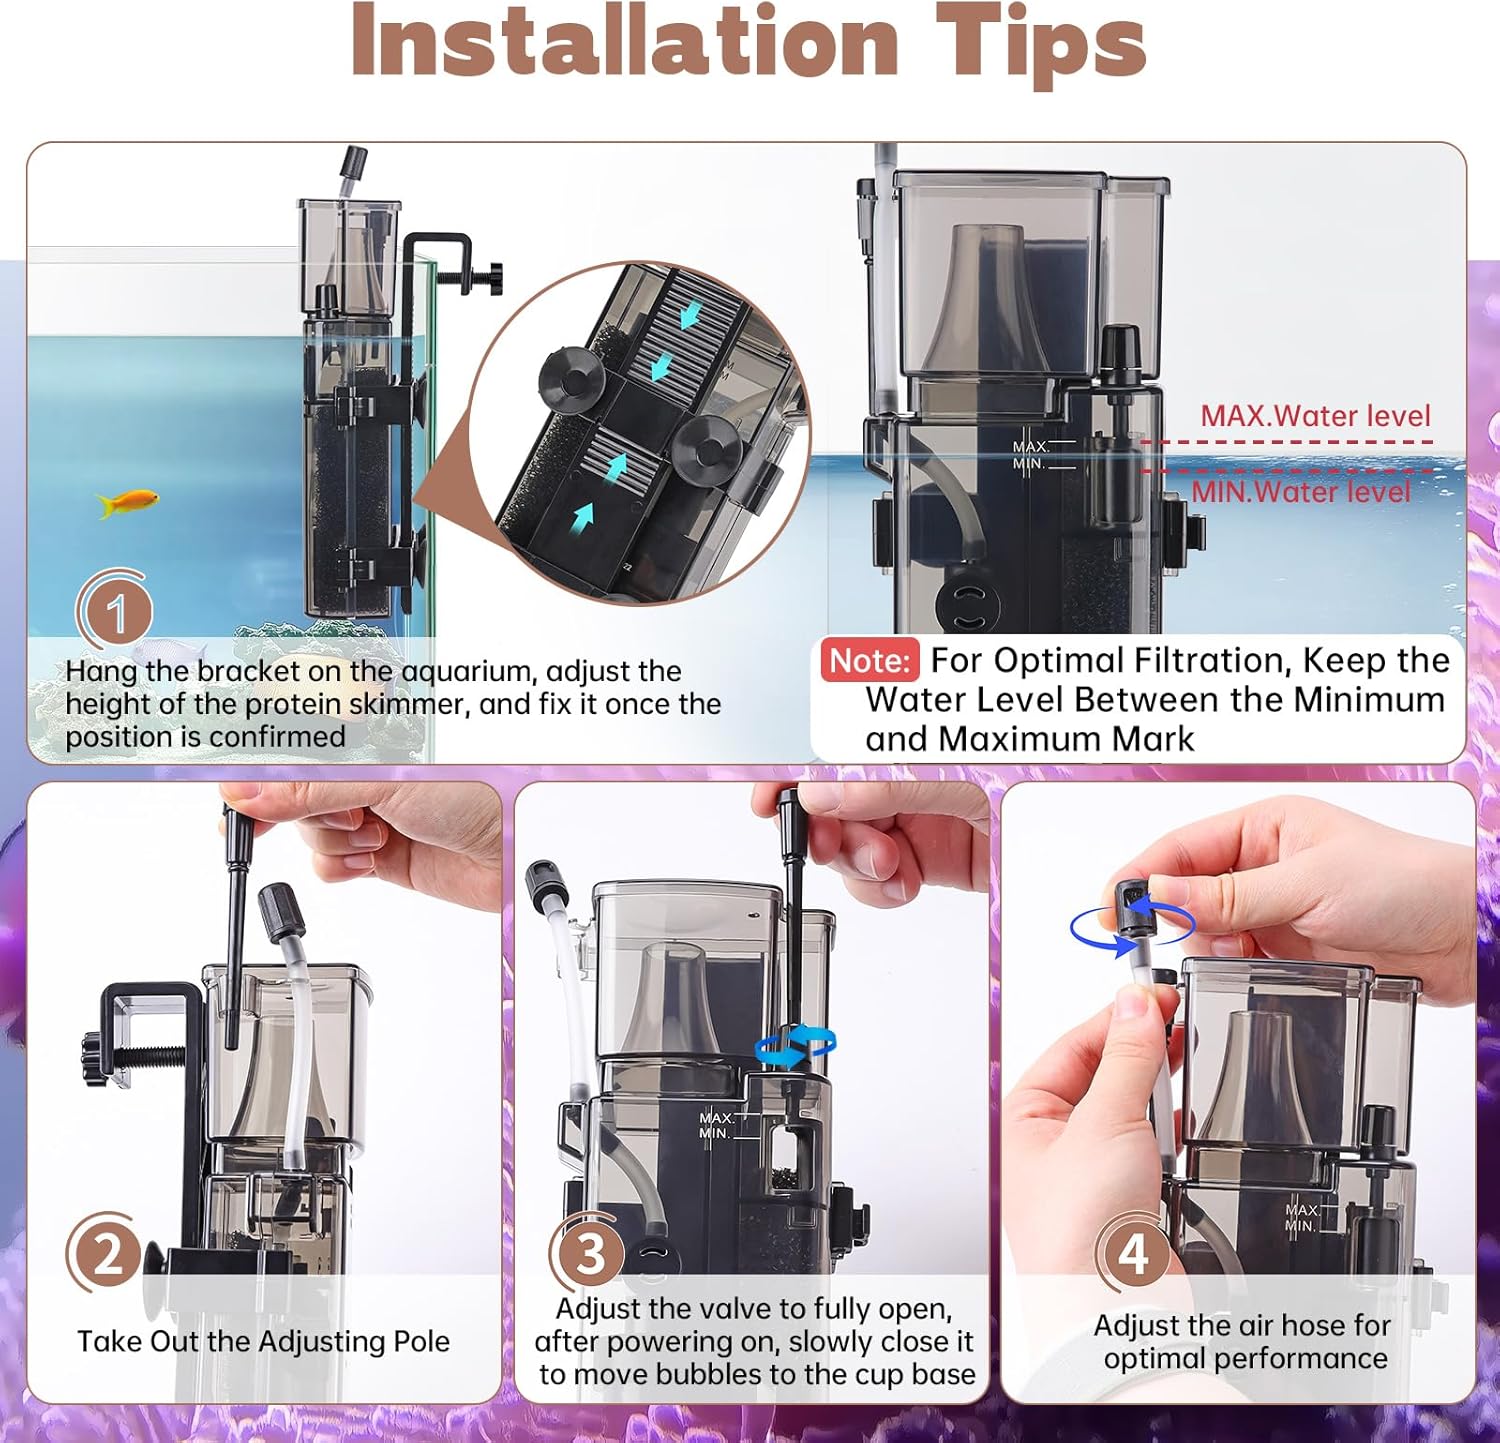
The image above illustrates the installation process, from hanging the bracket to adjusting the air hose for optimal performance.
Step 2: Placement in Aquarium
- Hang the skimmer on the inside of your aquarium using the bracket.
- Adjust the height of the protein skimmer so that the water level is between the MIN and MAX marks indicated on the unit. Optimal filtration requires the water level to be maintained within this range.
- Ensure the motor is fully immersed in water when in use. The air pipe should be exposed above the water surface to prevent water from entering the air pump.
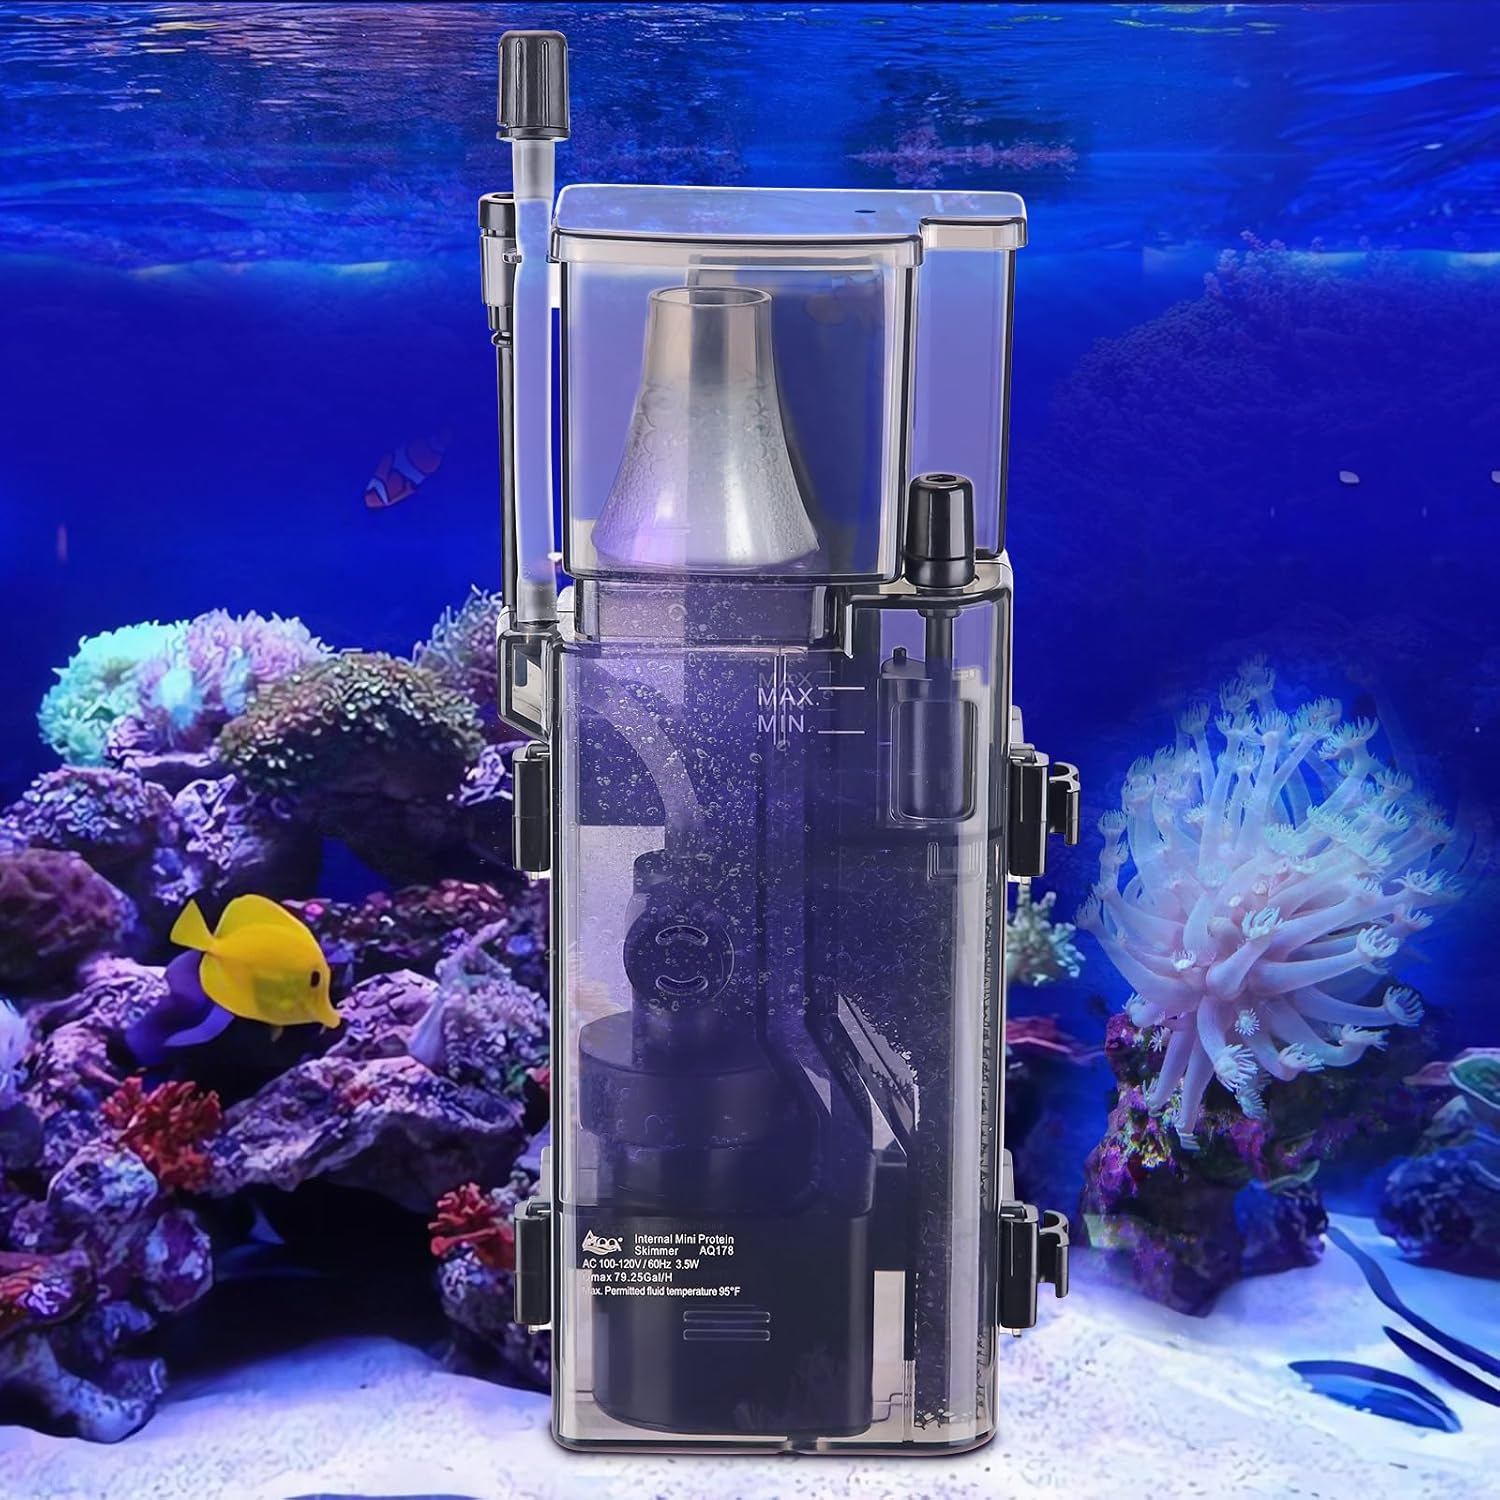
This image shows the skimmer correctly positioned within an aquarium, highlighting its compact size and transparent design.
Step 3: Connecting the Air Pipe
Connect the air pipe to the regulating valve. Ensure the air pipe is exposed above the water surface to prevent water from entering the air pump.
This video provides a visual guide for the initial setup, including securing the skimmer and adjusting its components.
Awọn ilana Iṣiṣẹ
Once installed, the protein skimmer is ready for operation. Adjustments may be necessary to achieve optimal performance.
Adjusting Water Flow and Skimmate Production
- Plug in the skimmer. It will begin to draw water and produce bubbles.
- Adjust the flow control knob to regulate the amount of skimmate produced. For initial setup, open the dial fully.
- Adjust the collection cup and O-ring so that bubbles reach the top of the side channel but do not overflow into the collection cup immediately.
- Run the skimmer for several hours. If no skimmate is collected, gradually close the control dial until skimmate begins to fill the collection cup.

This image shows the skimmer effectively removing organic waste, with foam accumulating in the collection cup.
Awọn ilana Itọju
Regular maintenance is crucial for the longevity and optimal performance of your protein skimmer. It is recommended to clean the skimmer at least once every 2-3 weeks.
- Disconnect the skimmer from power.
- Pull out the collection cup upwards, pour out the foamy effluent inside, and rinse it thoroughly with water.
- Remove the brackets and carefully detach the skimmer from the aquarium.
- Disassemble the skimmer components, including the pump and filter sponge. Rinse the motor thoroughly and clean the filter sponge.
- Reassemble all components after cleaning.

The image above visually guides you through the cleaning process for the skimmer.
Pump Disassembly and Cleaning Video:
This video demonstrates the disassembly and cleaning of a water pump, which is a key component of your protein skimmer, ensuring proper maintenance.
Laasigbotitusita
| Isoro | Owun to le Fa | Ojutu |
|---|---|---|
| No bubbles or insufficient bubbles | Air intake blocked, pump clogged, water level too low/high. | Check and clear air intake. Clean pump impeller. Adjust skimmer height to correct water level. |
| Skimmer overflowing | Water level too high, air intake too open, new tank syndrome. | Lower skimmer height. Adjust flow control knob to reduce air. Allow new tanks to cycle. |
| Excessive microbubbles in tank | Skimmer not broken in, water level too low, air intake too high. | Allow 1-2 weeks for break-in period. Raise skimmer height slightly. Adjust air intake. |
| Fifa ko nṣiṣẹ | No power, impeller jammed, damaged pump. | Check power connection. Disassemble and clean impeller. Replace pump if damaged. |
Awọn pato
| Iwa | Iye |
|---|---|
| Awoṣe | GUS-AQ178 |
| Brand | AQQA |
| Orisun agbara | Okun Itanna |
| Ohun elo | Acrylonitrile Butadiene Styrene (ABS) |
| Ọja Mefa | 22 x 5 x 8 cm |
| Iwọn Nkan | 689 g |
| Max Akueriomu Iwon | 50-80 ládugbó |
| Oṣuwọn Sisan ti o pọju | 79.25 GPH |
| Agbara to pọju | 3.5W |
| Voltage/Igbohunsafẹfẹ | AC 100-120V / 60Hz |

The image above visually presents the key technical specifications of the AQQA Protein Skimmer.
Atilẹyin ọja ati Support
For warranty information or technical support, please refer to the product packaging or contact AQQA customer service directly. Keep your purchase receipt for warranty claims.


