1. Ifihan
This manual provides comprehensive instructions for the Jennov 5MP Wireless Security Camera System P48 Add-On Camera. This camera is designed for both outdoor and indoor surveillance, offering 5MP ultra-HD resolution, night vision, motion detection, and IP66 weatherproofing. It operates as an add-on unit for the Jennov P48 System (ASIN: B0FC22WYKN) and requires a dedicated outlet power source for continuous operation. Please read this manual thoroughly before installation and use to ensure optimal performance and safety.
2. Ohun ti o wa ninu Apoti
Ṣọra si apoti naa ki o rii daju pe gbogbo awọn nkan wa ati ni ipo ti o dara. Ti awọn ohun kan ba nsọnu tabi bajẹ, jọwọ kan si atilẹyin alabara.
- 1 x Security Camera Outdoor Wireless
- 1 x Power Adapter for Camera
- Iṣagbesori skru Pack
- Itọsọna olumulo
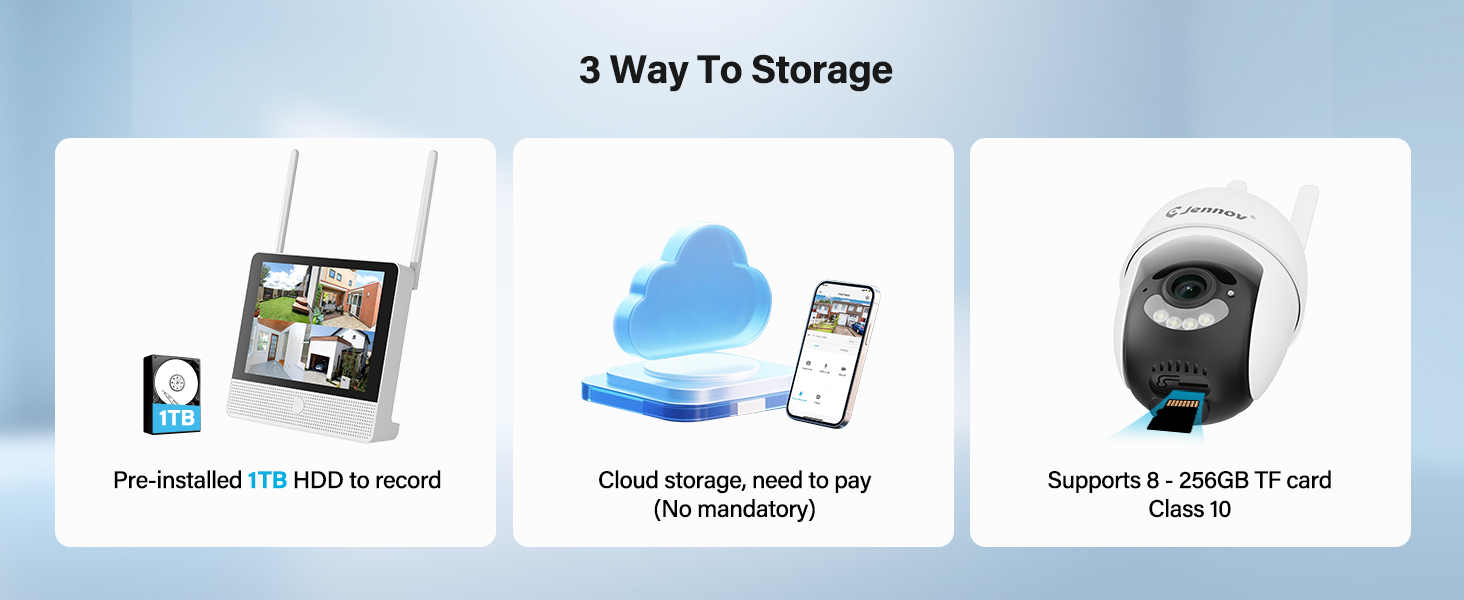
Figure 2.1: Included Components (Note: This product is an add-on camera, not the full system shown.)
3. Ọja Ipariview
The Jennov P48 Add-On Camera is a high-performance wireless security camera designed to expand your existing Jennov P48 NVR system. It features advanced imaging and connectivity for reliable surveillance.
3.1 Key Awọn ẹya ara ẹrọ
- 5MP Ultra-HD Resolution: Delivers clear and detailed video footage.
- Asopọ Alailowaya: Connects to the NVR without complex wiring.
- Plug-and-Play Power: Each camera is powered by an independent outlet adapter for uninterrupted operation.
- Wiwa Smart: Motion detection with instant alerts and recording.
- Iran Alẹ: Pese foo ko otage in low-light conditions up to 15 meters.
- IP66 Oju ojo: Designed to withstand various outdoor weather conditions (-20°C to 60°C).
- Audio Ọna Meji: Gba laaye fun ibaraẹnisọrọ akoko gidi nipasẹ kamẹra.
- Iṣẹ-ṣiṣe Pan/Tilt: Ó n pese iyipo inaro 355° petele ati 90° fun agbegbe kikun.
3.2 Awọn ohun elo kamẹra

Figure 3.1: Jennov P48 Add-On Camera
- Lẹnsi kamẹra: Ya fidio footage.
- Awọn LED infurarẹẹdi: Pèsè ìmọ́lẹ̀ fún ìran alẹ́.
- Spotlight LEDs: Enhance color night vision and act as a deterrent.
- Gbohungbohun: Ó máa ń gba ohùn fún ìbánisọ̀rọ̀ ọ̀nà méjì.
- Agbọrọsọ: Awọn abajade ohun afetigbọ fun ibaraẹnisọrọ ọna meji.
- Eriali: Fun gbigbe ifihan agbara alailowaya.
- Ibudo Agbara: Sopọ si ohun ti nmu badọgba agbara.
- Ipilẹ iṣagbesori: For wall or ceiling installation.
4. Awọn ilana iṣeto
This section guides you through the physical installation and initial connection of your add-on camera to the Jennov P48 NVR system.
4.1 Aye Yiyan
Yan ipo ti o pese ohun ti o fẹ viewing angle and is within range of your Jennov P48 NVR's wireless signal. Ensure a power outlet is accessible for the camera's power adapter. The camera is IP66 weatherproof, suitable for outdoor use.
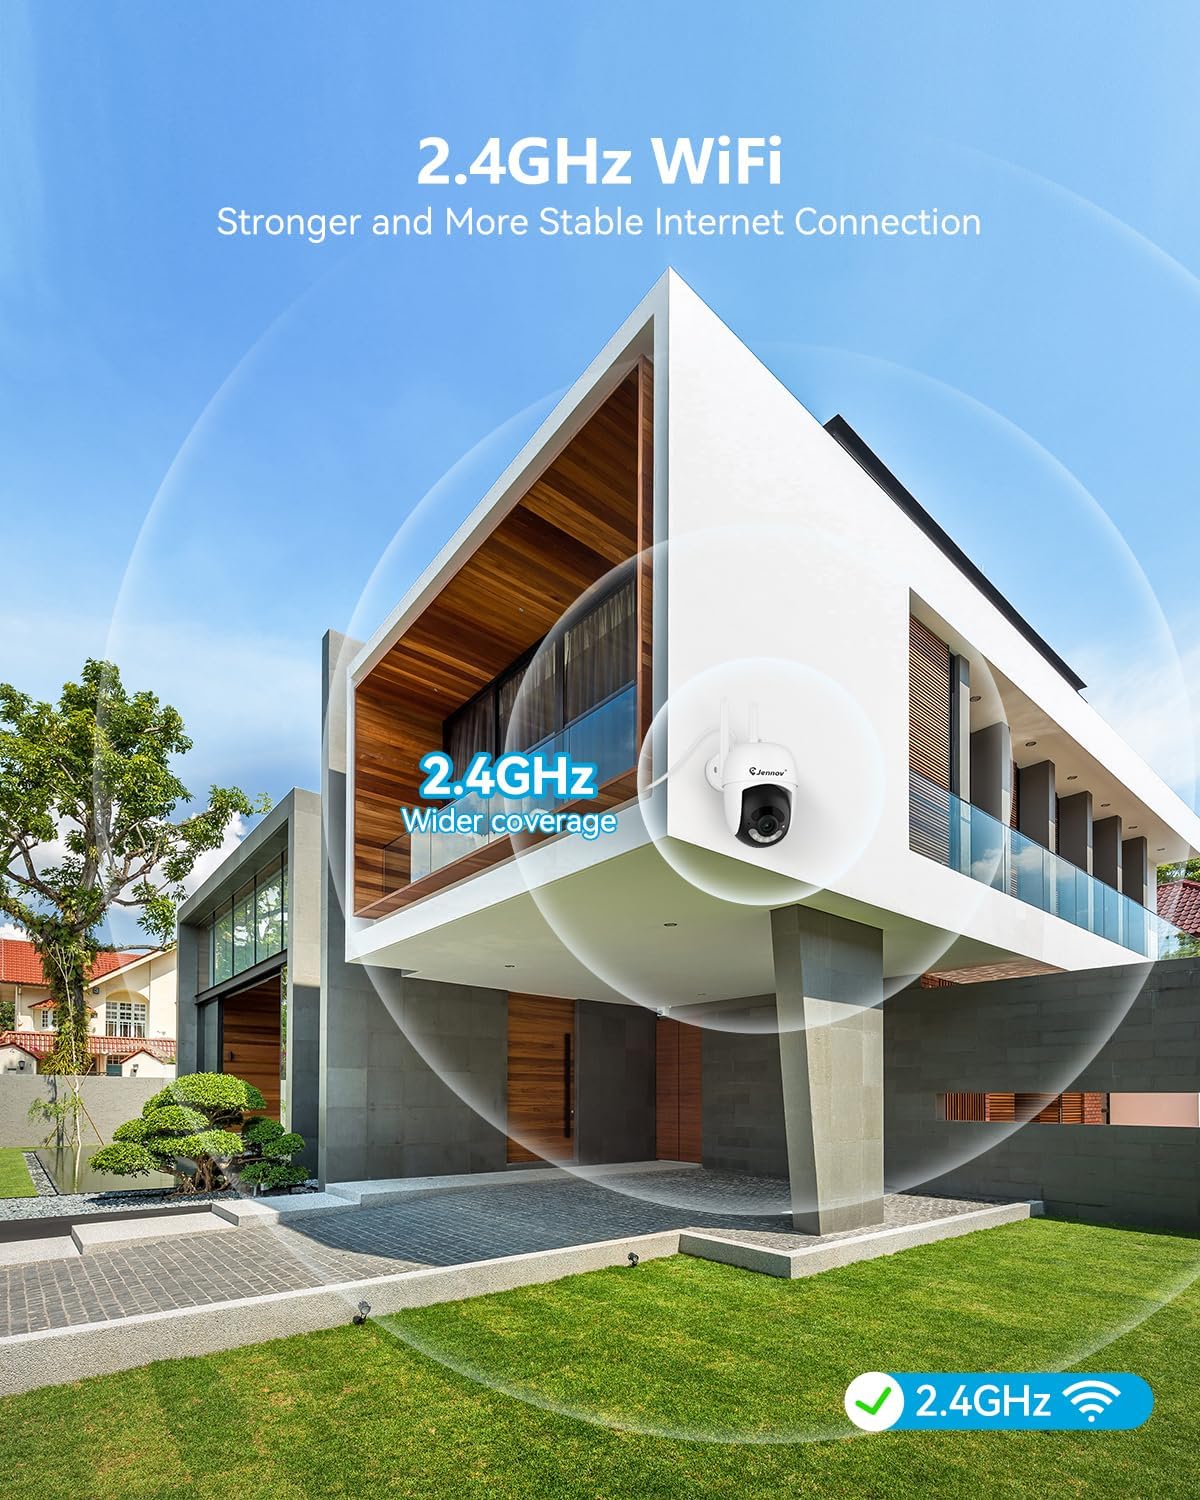
Figure 4.1: Optimal Camera Placement for 2.4GHz WiFi Coverage
4.2 Fifi sori ti ara
- Samisi Awọn aaye Liluho: Use the provided hole sticker or camera base as a template to mark the screw positions on the wall or ceiling.
- Awọn iho iho: Drill pilot holes at the marked positions. Insert wall anchors if installing on masonry or drywall.
- Kamẹra Oke: Fi àwọn skru tí a pèsè so ìpìlẹ̀ ìfìkọ́lé kámẹ́rà mọ́ ojú rẹ̀.
- Ṣatunṣe Igun: Loosen the adjustment screws on the camera body to set the desired viewing angle, then tighten them to secure the position.

Figure 4.2: Installation Options (Ceiling-mounted and Wall-mounted)
4.3 Asopọ agbara
Connect the camera's power adapter to the camera's power port, then plug the adapter into a standard electrical outlet. The camera will power on automatically.
4.4 Pairing with NVR (Add-On Camera)
The Jennov P48 Add-On Camera is designed to automatically pair with your existing Jennov P48 NVR system. Once powered on, the camera should establish a wireless connection with the NVR. If the camera does not appear on your NVR monitor:
- Access the NVR's menu and navigate to the 'Camera Management' or 'Channel Setup' section.
- Select an unused channel and initiate the 'Add Camera' or 'Wireless Pairing' function.
- The NVR will search for available cameras. Once detected, select your camera to add it to the system.
Àwòrán 4.3: Àwòrán Ìsopọ̀ Ètò NVR
5. Awọn ilana Iṣiṣẹ
This section details how to utilize the various features of your Jennov P48 Add-On Camera through the NVR system and the mobile application.
5.1 Live View ati Gbigbasilẹ
Once connected to the NVR, you can view the live feed from your camera on the NVR's connected monitor. The system will automatically record footage based on your NVR's settings (e.g., continuous, motion-triggered).
Àwòrán 5.1: Àwọn Kámẹ́rà Onílọ́pọ̀ Lóòrèkóòrè View lori NVR
5.2 Išipopada erin ati titaniji
The camera features smart motion detection. When motion is detected, the system can trigger recording, send alerts to your mobile device, and activate the camera's spotlight and siren.
- Setting Detection Zones: Through the NVR or mobile app, you can define specific areas within the camera's view for motion detection, minimizing false alarms.
- Alert Configuration: Customize alert types (push notifications, email) and schedules.

Figure 5.2: Customized Detection Areas
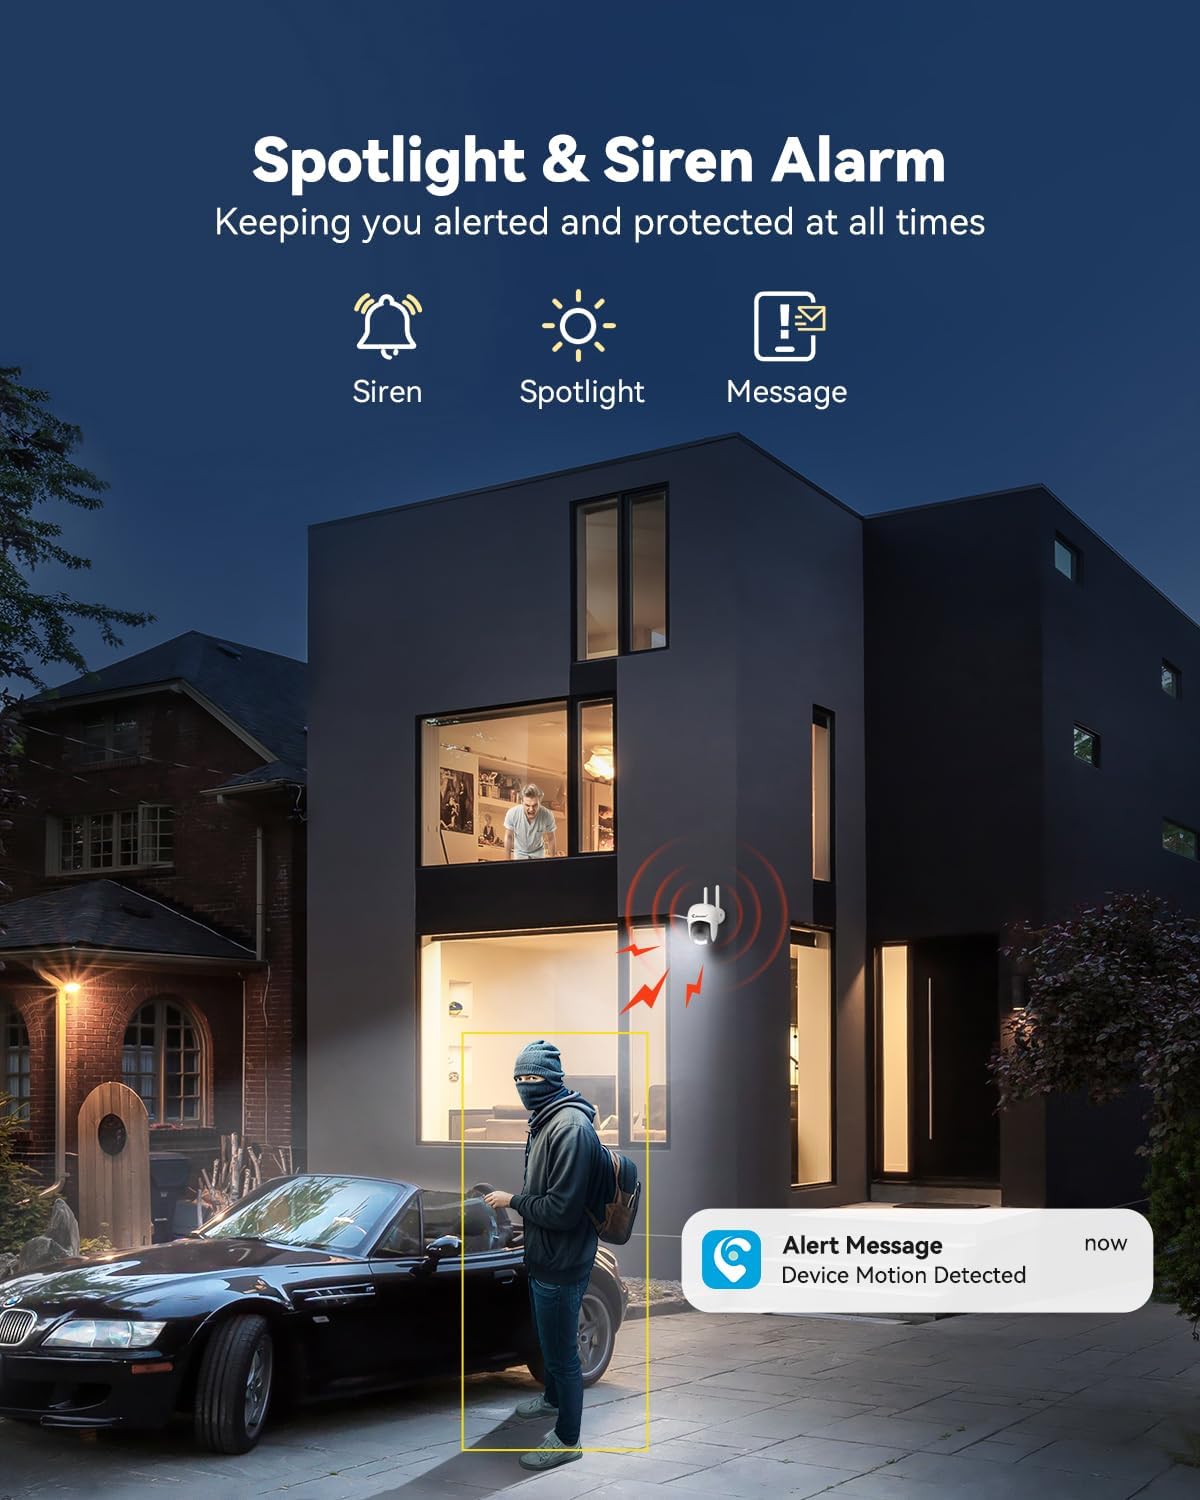
Figure 5.3: Spotlight and Siren Alarm in Action
5.3 Night Vision
The camera automatically switches to night vision in low-light conditions. It supports both infrared (black and white) and color night vision, enhanced by its built-in spotlights.

Figure 5.4: Color Night Vision vs. IR Night Vision
5.4 Meji-Ona Audio
Utilize the built-in microphone and speaker for real-time two-way communication. This feature is accessible through the NVR interface or the Jennov mobile application.

Figure 5.5: Real-Time Two-Way Audio
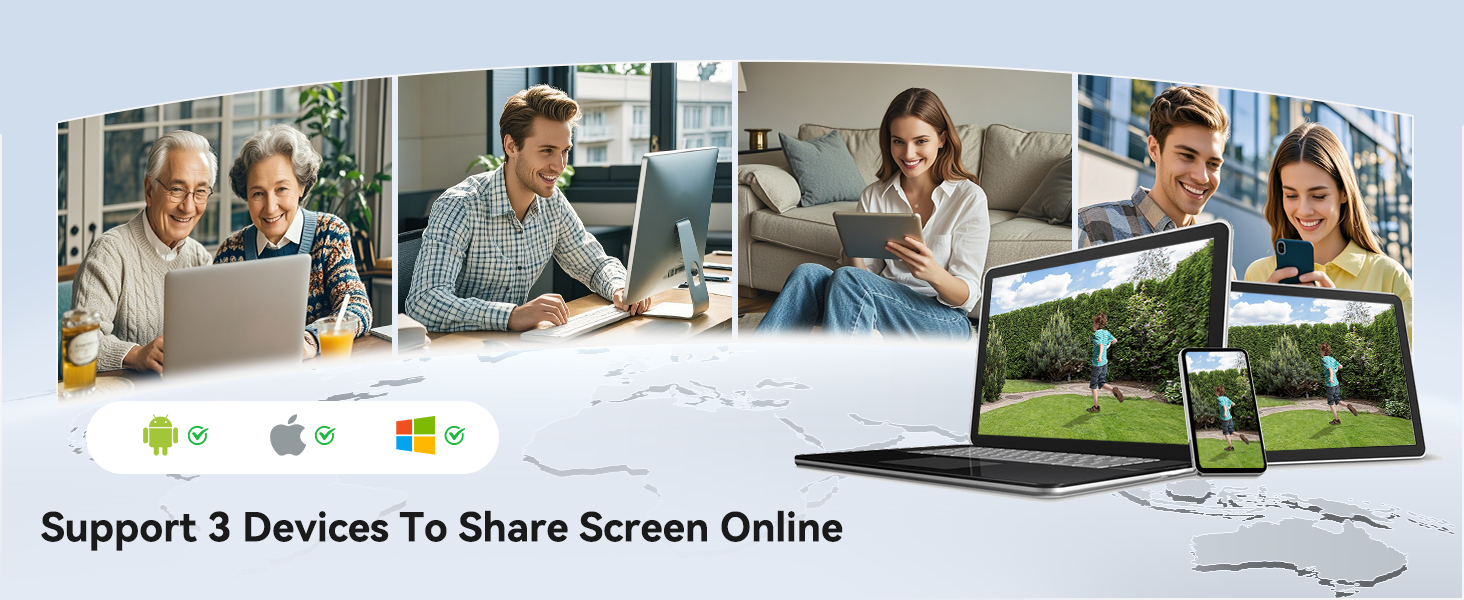
5.5 Remote Access (Jennov App)
Download the Jennov app on your smartphone or tablet to access live feeds, playback recordings, and manage camera settings remotely. The app supports multiple users and devices for screen sharing.
- Igbasilẹ ohun elo: Wa fun "Jennov" in your device's app store.
- Ohun elo Pipọ: Follow the in-app instructions to add your NVR system and connected cameras.

Figure 5.6: Remote Access via Jennov App
5.6 Ibi ipamọ Aw
Your Jennov P48 system offers multiple storage solutions for recorded footage:
- HDD 1TB ti a ti fi sori ẹrọ tẹlẹ: The NVR comes with a 1TB hard disk drive for local storage.
- Ibi ipamọ awọsanma: Optional cloud storage plans are available for off-site backup (subscription may be required).
- Kaadi TF: The camera supports 8-256GB TF cards (Class 10) for local edge recording.
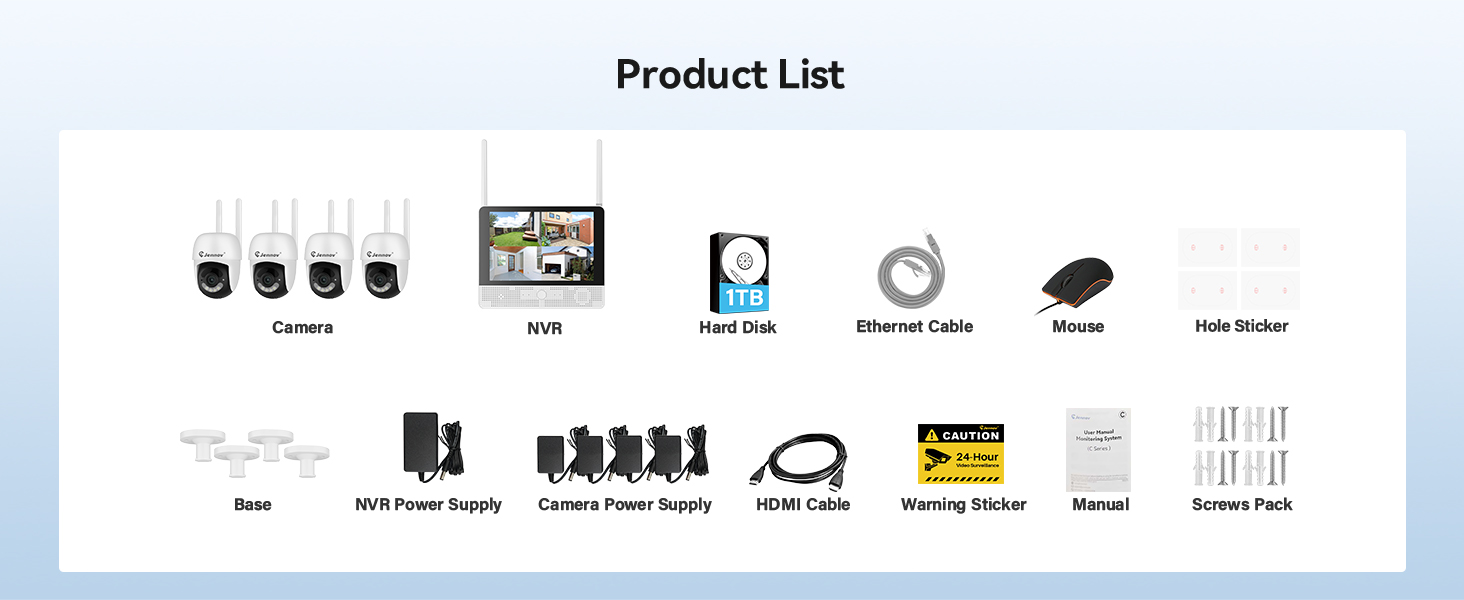
Figure 5.7: Available Storage Options
6. Itọju
Regular maintenance ensures the longevity and optimal performance of your security camera.
- Ninu: Máa fọ lẹ́ńsì kámẹ́rà lẹ́ẹ̀kọ̀ọ̀kan pẹ̀lú aṣọ gbígbẹ tó rọ láti mú eruku àti ìdọ̀tí kúrò. Má ṣe lo àwọn kẹ́míkà líle.
- Awọn imudojuiwọn famuwia: Check the Jennov website or app for available firmware updates for your NVR and cameras. Keeping firmware updated ensures access to the latest features and security enhancements.
- Ṣayẹwo Ipese Agbara: Ensure the power adapter and cable are free from damage and securely connected.
- Ṣayẹwo Ayika: For outdoor cameras, periodically check for obstructions to the camera's view, such as overgrown foliage, and ensure the mounting is secure.
7. Laasigbotitusita
If you encounter issues with your Jennov P48 Add-On Camera, refer to the following common problems and solutions.
| Isoro | Owun to le Fa | Ojutu |
|---|---|---|
| Camera not displaying on NVR | No power; Out of wireless range; Not paired; NVR channel limit reached. | Check power connection; Relocate camera closer to NVR; Manually pair camera via NVR settings; Ensure NVR has available channels (max 8). |
| Didara aworan ti ko dara | Dirty lens; Low light conditions; Poor wireless signal. | Clean the camera lens; Ensure sufficient lighting or check night vision settings; Improve wireless signal by reducing distance or obstructions. |
| Wiwa išipopada ko ṣiṣẹ | Detection sensitivity too low; Detection zones not set correctly; Schedule not active. | Adjust motion detection sensitivity; Configure detection zones; Check motion detection schedule. |
| Cannot access camera on mobile app | NVR not connected to internet; App not configured correctly; Incorrect login credentials. | Ensure NVR is connected to your router via Ethernet; Verify app settings and NVR pairing; Double-check login information. |
| Ohun afetigbọ ọna meji ko ṣiṣẹ | Microphone/speaker blocked; Volume settings too low; App permissions. | Check for obstructions on microphone/speaker; Adjust volume settings on NVR/app; Grant necessary microphone permissions to the app on your mobile device. |
8. Awọn pato
| Ẹya ara ẹrọ | Ẹ̀kúnrẹ́rẹ́ |
|---|---|
| Brand | Jennov |
| Nọmba awoṣe | P48HC55-3-FAS |
| Asopọmọra Technology | Ailokun |
| Ipinnu Yaworan fidio | 5MP Ultra-HD |
| Pataki Awọn ẹya ara ẹrọ | Easy to Install, Image Sensor, Night Vision, Video Recording, Weatherproof, Two-Way Audio, Motion Detection |
| Àwọ̀ | Funfun |
| Orisun agbara | Okun Itanna |
| Awọn Iwọn Nkan (L x W x H) | 4.96 x 3.15 x 4.61 inches |
| Iwọn Nkan | 15.5 iwon |
| Niyanju Lilo | Ita gbangba |
| Low Light Technology | Night Awọ |
| Resistance Oju ojo | IP66 |
| Awọn iwọn otutu ti nṣiṣẹ | -20°C si 60°C |
9. Atilẹyin ọja ati Support
Jennov is committed to providing reliable products and responsive customer support. While specific warranty details are not provided in this manual, Jennov products typically come with a manufacturer's warranty covering defects in materials and workmanship.
9.1 Onibara Support
For technical assistance, troubleshooting, or warranty inquiries, please contact Jennov customer support through the following channels:
- Jennov Official Webojula: Visit the official Jennov webaaye fun awọn FAQ, awọn orisun atilẹyin, ati alaye olubasọrọ.
- Imeeli Atilẹyin: Refer to your product packaging or the Jennov webojú-òpó wẹ́ẹ̀bù fún àdírẹ́sì ìmeeli ìrànlọ́wọ́ tí a yà sọ́tọ̀.
- Iwiregbe lori Ayelujara: Some regions may offer online chat support via the Jennov webojula.
Please have your product model number (P48HC55-3-FAS) and purchase information ready when contacting support.


