1. Ifihan
This manual provides detailed instructions for the assembly, operation, and maintenance of your KAMABOKO 120 Gallon Outdoor Resin Deck Storage Box. Please read this manual thoroughly before assembly and use to ensure proper function and longevity of your product.
The KAMABOKO 120 Gallon Deck Box is designed for outdoor storage, offering a spacious and weather-resistant solution for various items. Its robust resin construction prevents rust, peeling, and denting, ensuring durability against outdoor elements. The box features a lockable lid for security and can be used to store garden tools, pool supplies, patio cushions, and more.

Image: The KAMABOKO 120 Gallon Outdoor Resin Deck Storage Box, closed, situated on a patio.
2. Alaye Aabo
Jọwọ ṣe akiyesi awọn iṣọra ailewu wọnyi lati yago fun ipalara tabi ibajẹ ọja naa:
- Do not allow children to play inside the storage box. This is not a toy.
- Ensure the lid is securely closed when not in use to prevent accidental entrapment.
- Do not climb or stand on the storage box, especially when the lid is open, unless specifically using it as a seat as intended (refer to operating instructions).
- Jẹ́ kí ọwọ́ àti ìka rẹ jìnnà sí àwọn ìdè àti àwọn ọ̀nà ìpade nígbà tí o bá ń ṣí tàbí tí o bá ń ti ìbòrí náà.
- Fi àpótí ìpamọ́ sí orí ilẹ̀ tí ó tẹ́jú tí ó sì dúró ṣinṣin láti dènà kí ó má baà rì.
- Do not store flammable or hazardous materials inside the box.
- Distribute contents evenly to maintain stability.
3. Package Awọn akoonu
Before assembly, verify that all parts are present and undamaged. If any parts are missing or damaged, contact customer support.
- Awọn panẹli ẹgbẹ (2)
- Igbimo iwaju (1)
- Paali Pada (1)
- Igbimọ Isalẹ (1)
- Ideri (1)
- Hydraulic Lifting Rods/Hinges (2 sets)
- Àwọn ohun èlò ìṣàkójọpọ̀ (àwọn skru, àwọn pin, àti bẹ́ẹ̀ bẹ́ẹ̀ lọ)
- Ilana itọnisọna (1)

Image: Visual representation of the deck box components and assembly steps.
4. Eto ati Apejọ Awọn ilana
Assembly is designed to be straightforward. Follow these steps carefully:
- Igbesẹ 1: Mura Ipilẹ naa
Lay the bottom panel on a clean, flat surface. Identify the side panels and attach them to the bottom panel by aligning the grooves and pressing firmly until they click into place. - Step 2: Attach Front and Back Panels
Connect the front and back panels to the assembled side and bottom panels. Ensure all connections are secure. - Igbesẹ 3: Awọn isopọ to ni aabo
Use the provided hardware (if any, typically screws or pins) to reinforce the panel connections. Refer to the detailed diagrams in the included PDF manual for specific hardware placement. - Step 4: Install the Lid and Hydraulic Rods
Carefully place the lid onto the assembled box. Attach the hydraulic lifting rods to the designated points on the lid and the back panel of the box. Ensure they are securely fastened to allow for smooth opening and closing.
Note: Disassembling the panels violently may result in product damage. Exercise care during assembly.

Image: Step-by-step visual guide for assembling the KAMABOKO deck box.
5. Awọn ilana Iṣiṣẹ
5.1 Ṣíṣí àti pípa ìbòrí náà
To open the lid, gently lift it. The hydraulic lifting rods will assist in holding the lid open. To close, gently pull the lid down until it rests securely on the box. Ensure no items are obstructing the closing path.
5.2 Using the Lockable Feature
The deck box features a lockable lid for enhanced security. A padlock (not included) can be attached through the designated hole on the front of the lid to secure your belongings.
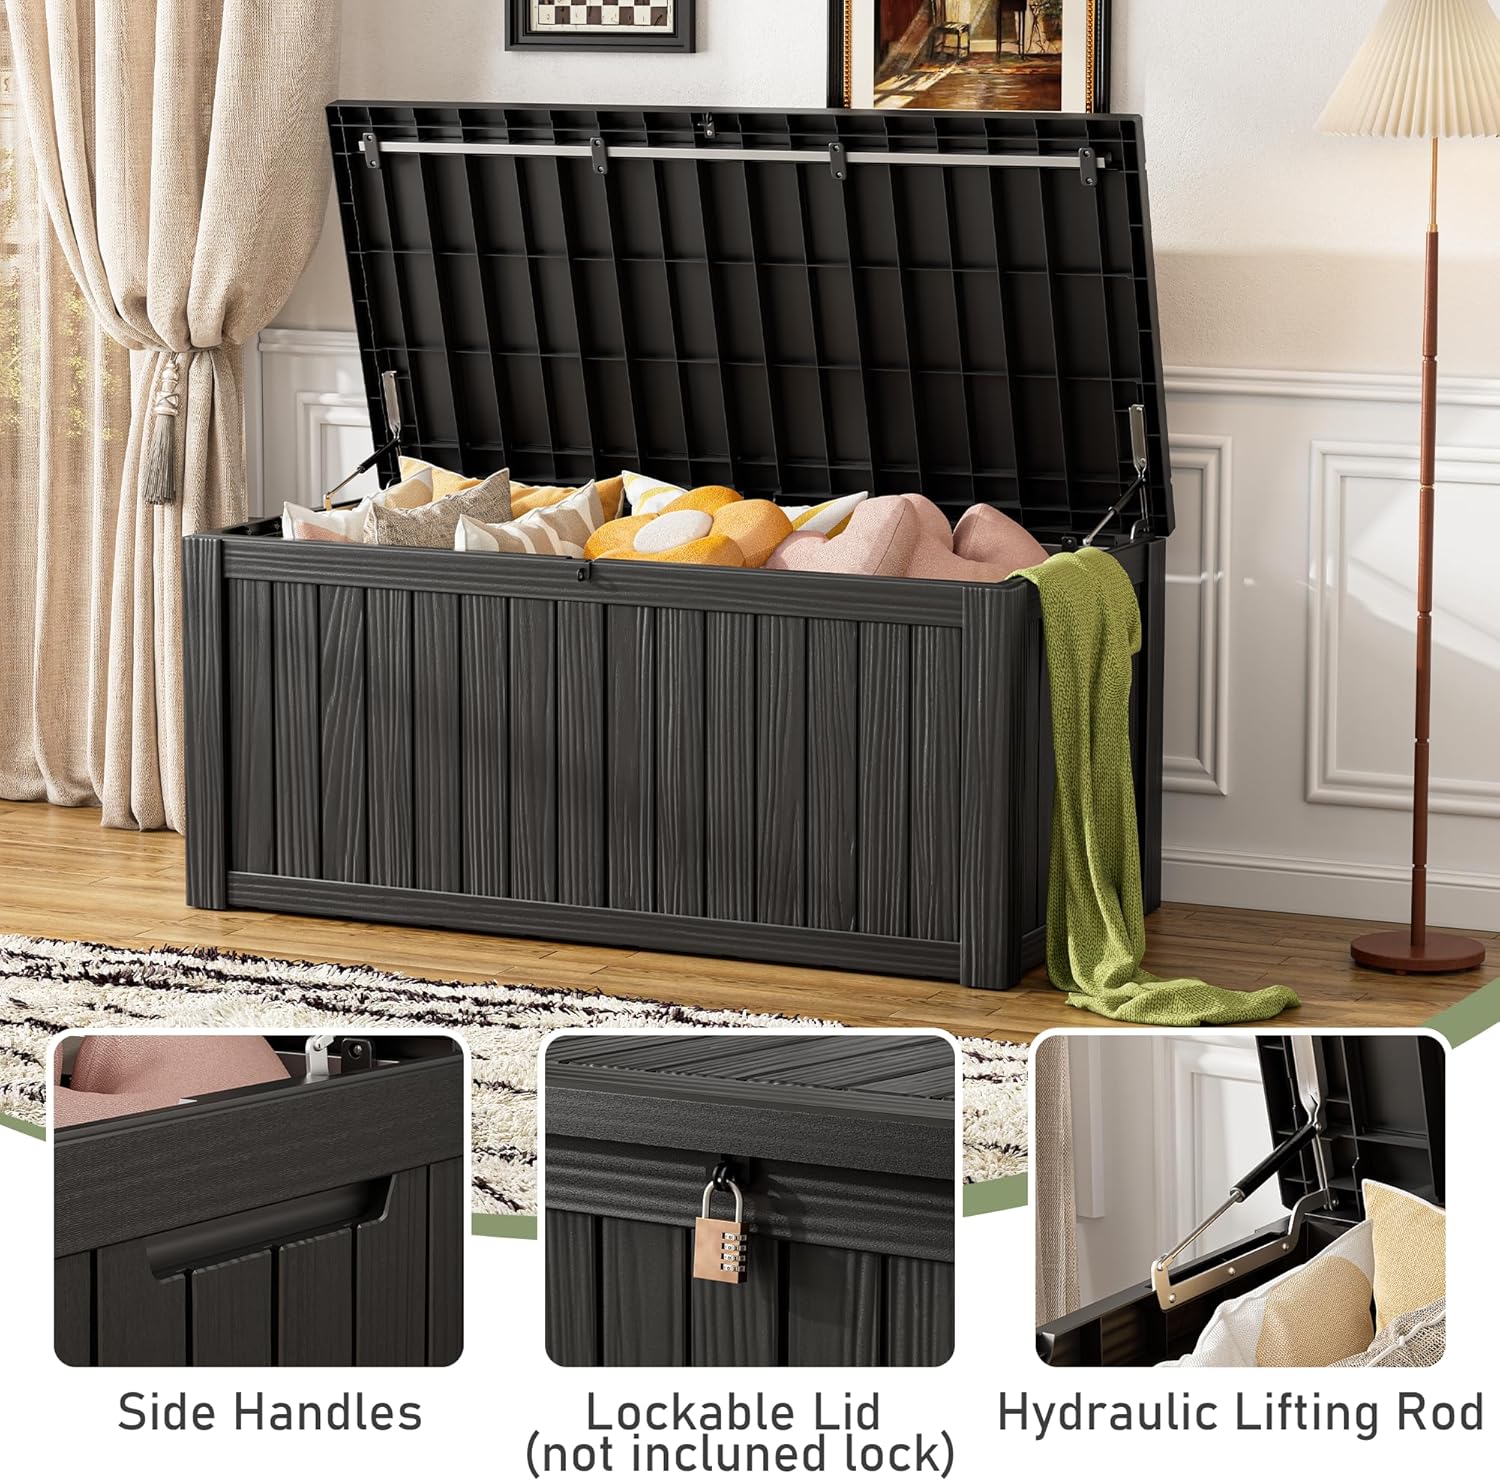
Image: Details of the deck box features, including side handles, lockable lid, and hydraulic lift mechanism.
5.3 Agbara Ibi ipamọ ati Lilo Oniruuru
Agbara 120-galonu pese ample space for various outdoor items. Dividers can be used to separate compartments for sorting, or removed for larger items. The robust design allows the box to function as additional seating or a surface for light items when closed.
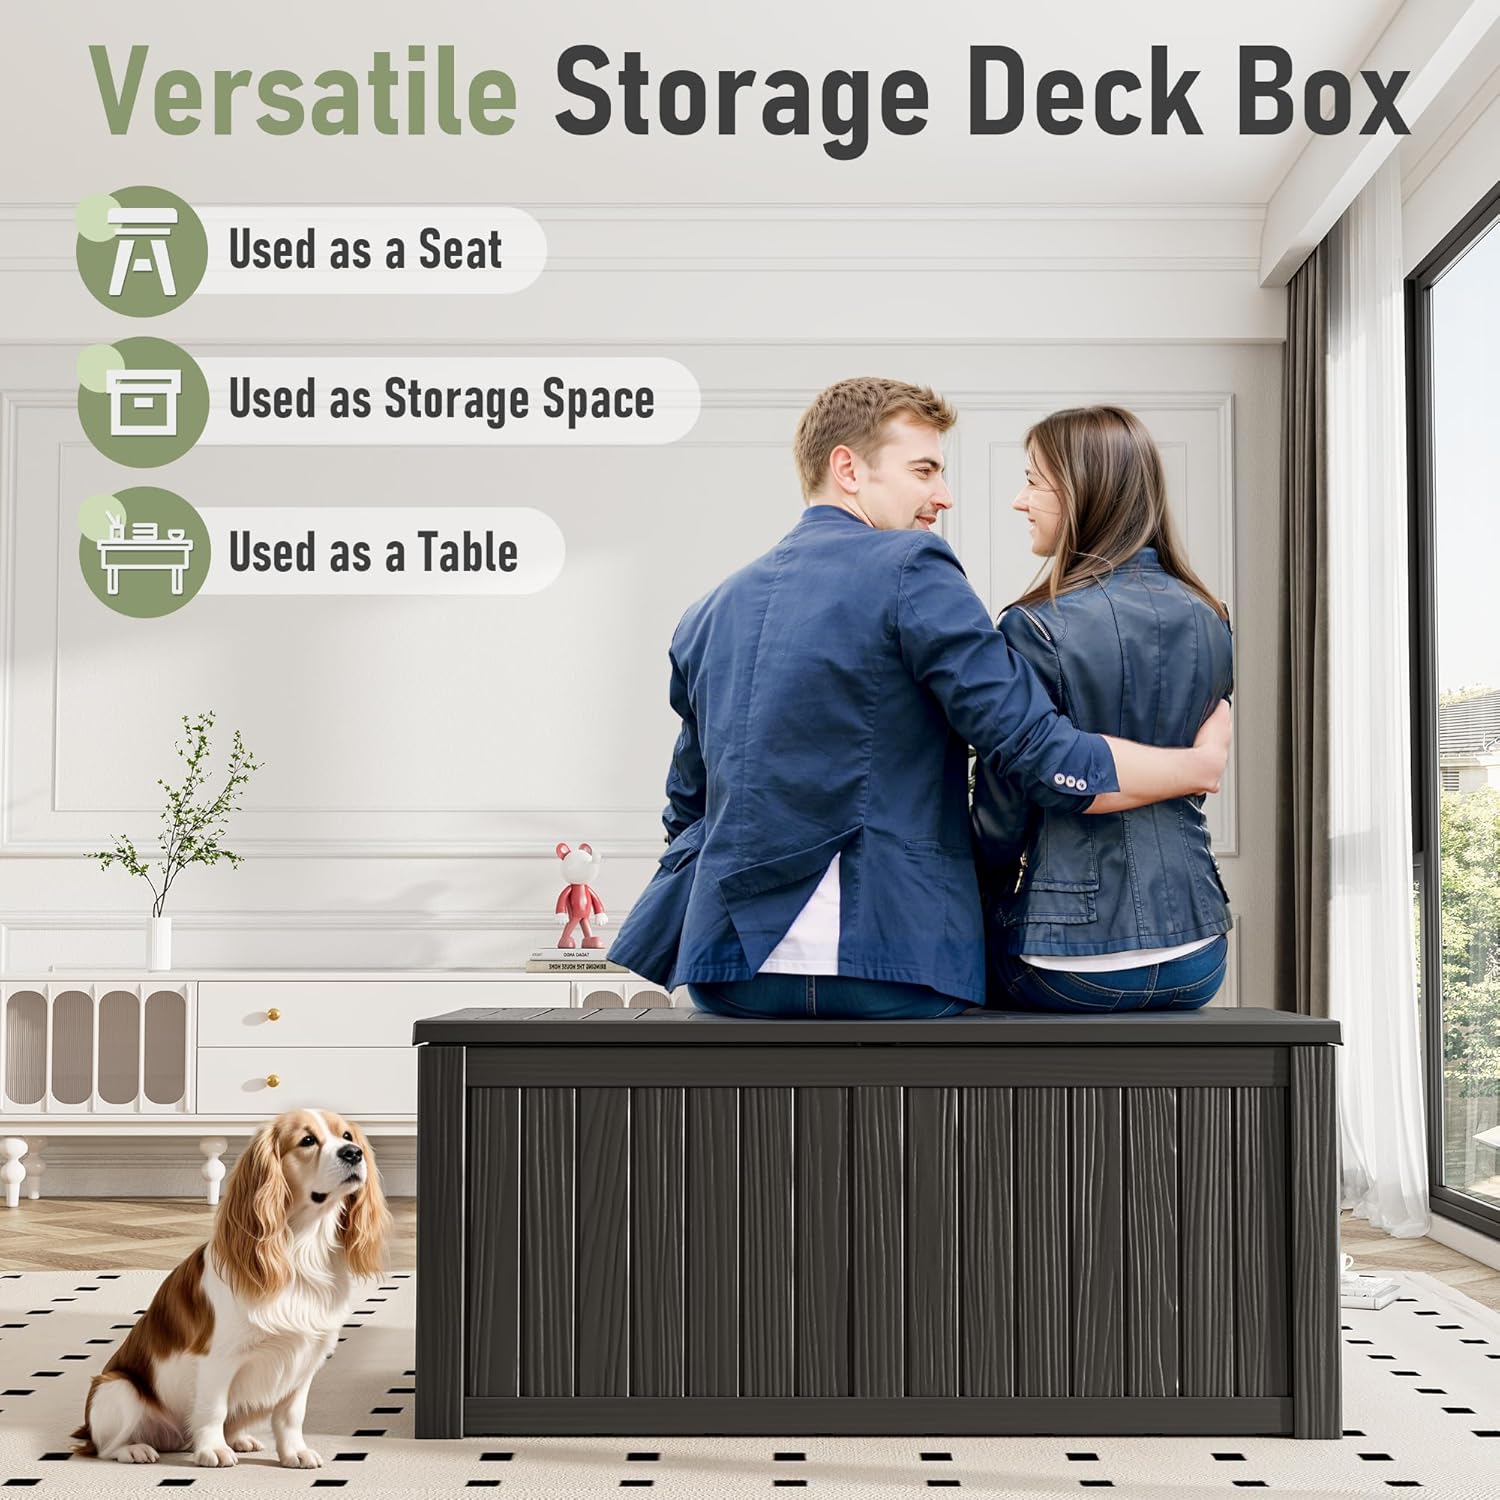
Image: Demonstrating the versatile functionality of the deck box as a seat, storage, and table.
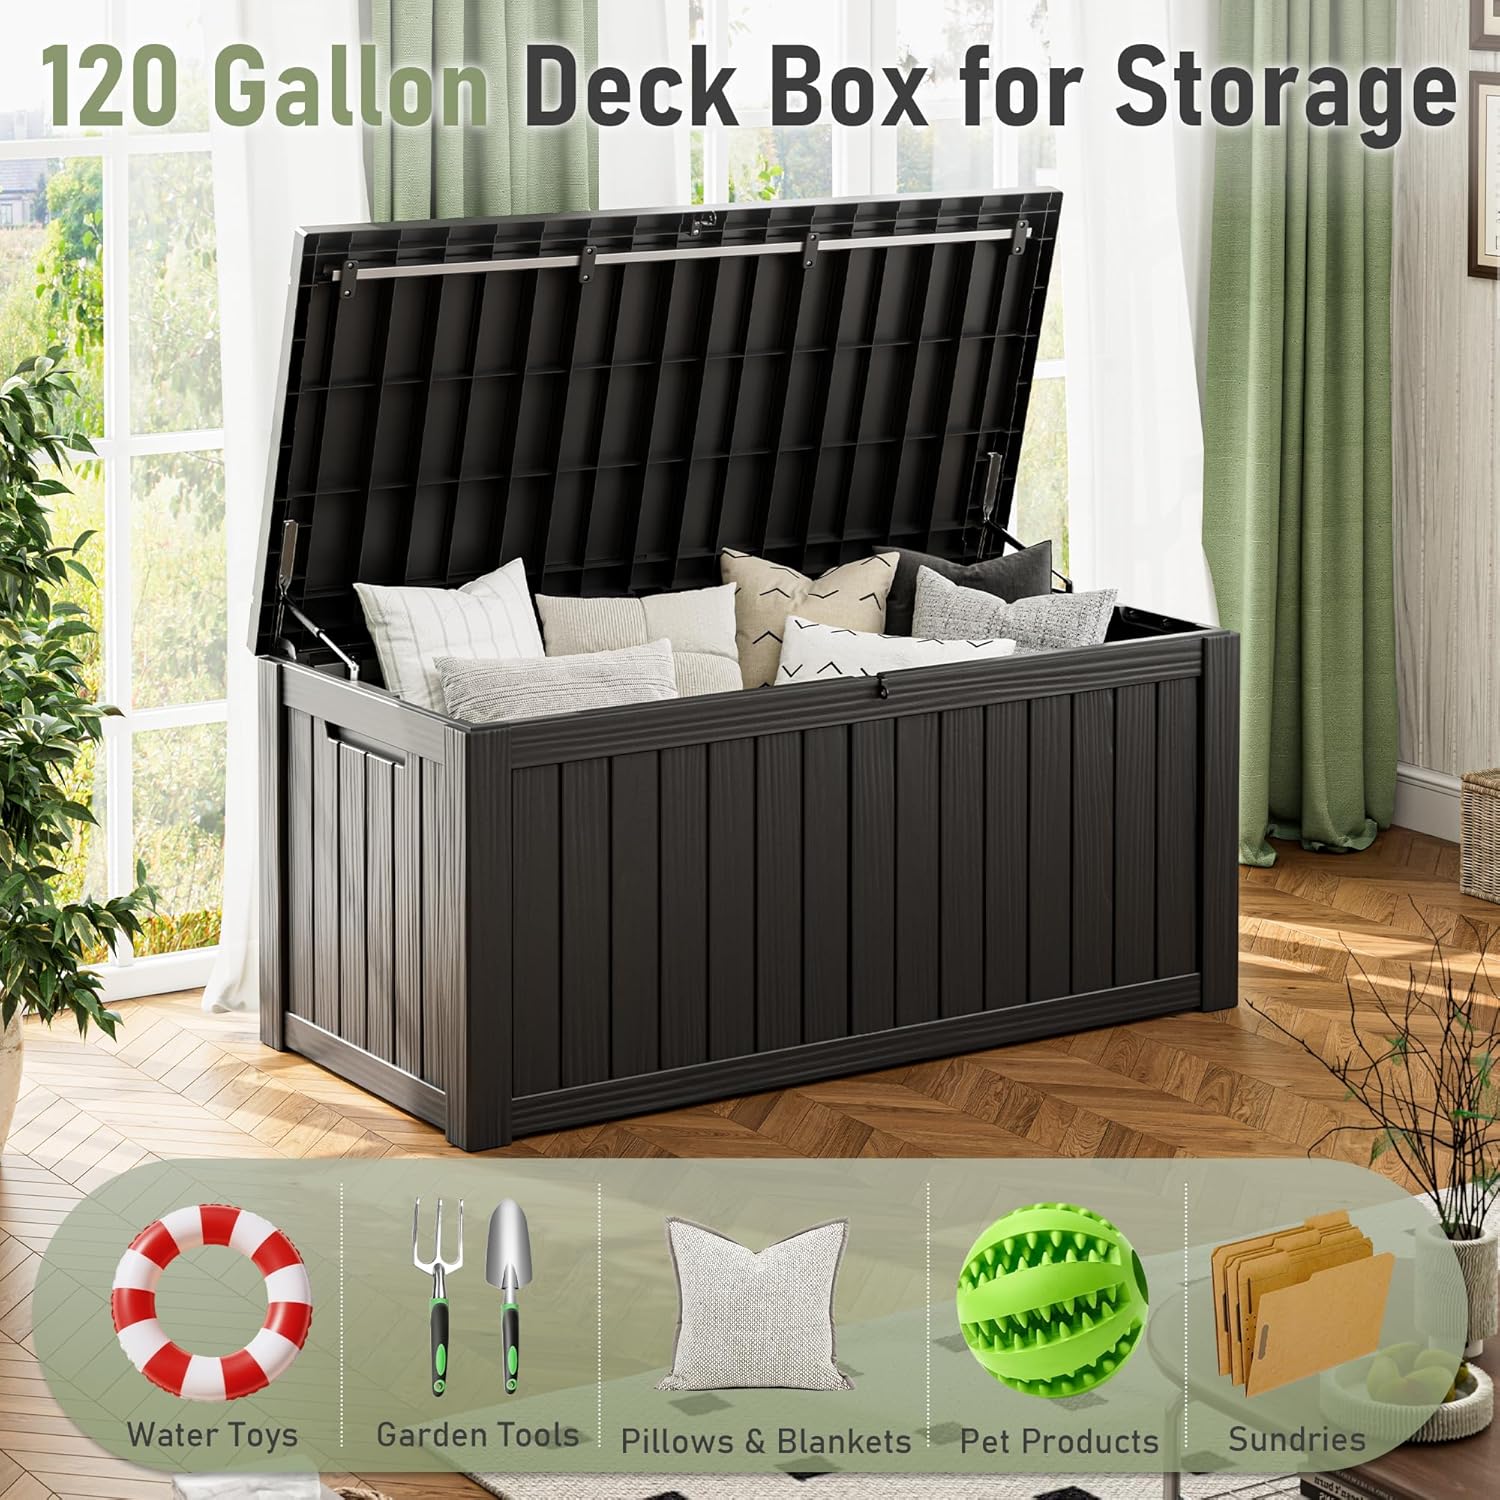
Aworan: Examples of items that can be stored in the 120-gallon deck box.
6. Itọju
6.1 Ninu
To clean the deck box, wipe surfaces with a damp cloth and mild soap. Rinse thoroughly with water and dry with a soft cloth. Avoid abrasive cleaners or harsh chemicals, as these can damage the resin material.
6.2 Oju ojo Resistance
The resin construction is designed to be weather-resistant and waterproof, protecting contents from moisture. Periodically check the lid seal to ensure it remains intact for optimal waterproofing.

Image: Key features of the deck box, including its waterproof and UV-resistant properties.
7. Laasigbotitusita
| Isoro | Owun to le Fa | Ojutu |
|---|---|---|
| Ideri ko tii daadaa. | Obstruction inside the box; misaligned panels; hydraulic rods not installed correctly. | Remove any obstructions. Check panel alignment and re-secure if necessary. Verify hydraulic rod installation. |
| Omi inu apoti naa. | Lid not fully closed; damaged seal; extreme weather conditions. | Ensure lid is completely closed. Inspect the lid seal for damage and contact support if necessary. Consider placing the box under a covered area during severe weather. |
| Àpótí náà dà bí ẹni pé kò dúró dáadáa. | Uneven surface; panels not fully connected; contents unevenly distributed. | Move the box to a flat, level surface. Check all panel connections. Redistribute contents evenly. |
8. Awọn pato
- Brand: KAMABOKO
- Nọmba awoṣe: TT059-BK
- Iwọn Ibi ipamọ: 120 galonu
- Ohun elo: Resini
- Àwọ̀: Dudu
- Awọn iwọn Ọja (L x W x H): 53.94" x 25.98" x 24.21" (137cm x 66cm x 61.5cm)
- Ipele Resistance Omi: Mabomire
- Awọn ẹya pataki: Portable, Waterproof, Lockable, Hydraulic Lid
- Awọn lilo ti a ṣe iṣeduro: Outdoor Storage Box for Garden Tools, Pool Supplies, Patio Furniture, Cushions

Aworan: Awọn iwọn alaye ti 120 Gallon Deck Box.
9. Atilẹyin ọja ati Support
For warranty information and customer support, please refer to the documentation included with your purchase or contact KAMABOKO customer service directly. Return policies typically allow for returns within 30 days of purchase, but specific warranty terms may vary.
For further assistance, please visit the official KAMABOKO store or contact your retailer.
KAMABOKO Store: Visit the KAMABOKO Store on Amazon
Additional Manual: A PDF version of the user manual may be available Nibi.


