1. Ọja Ipariview
The Pioneer® Quantum Ultra™ 9,000 BTU 24 SEER2 115V High-Wall Ductless Mini-Split Air Conditioner Inverter Heat Pump is a versatile climate control system designed for efficient cooling and heating. This Energy-Star rated unit provides year-round comfort with advanced inverter technology for optimal performance and energy savings.
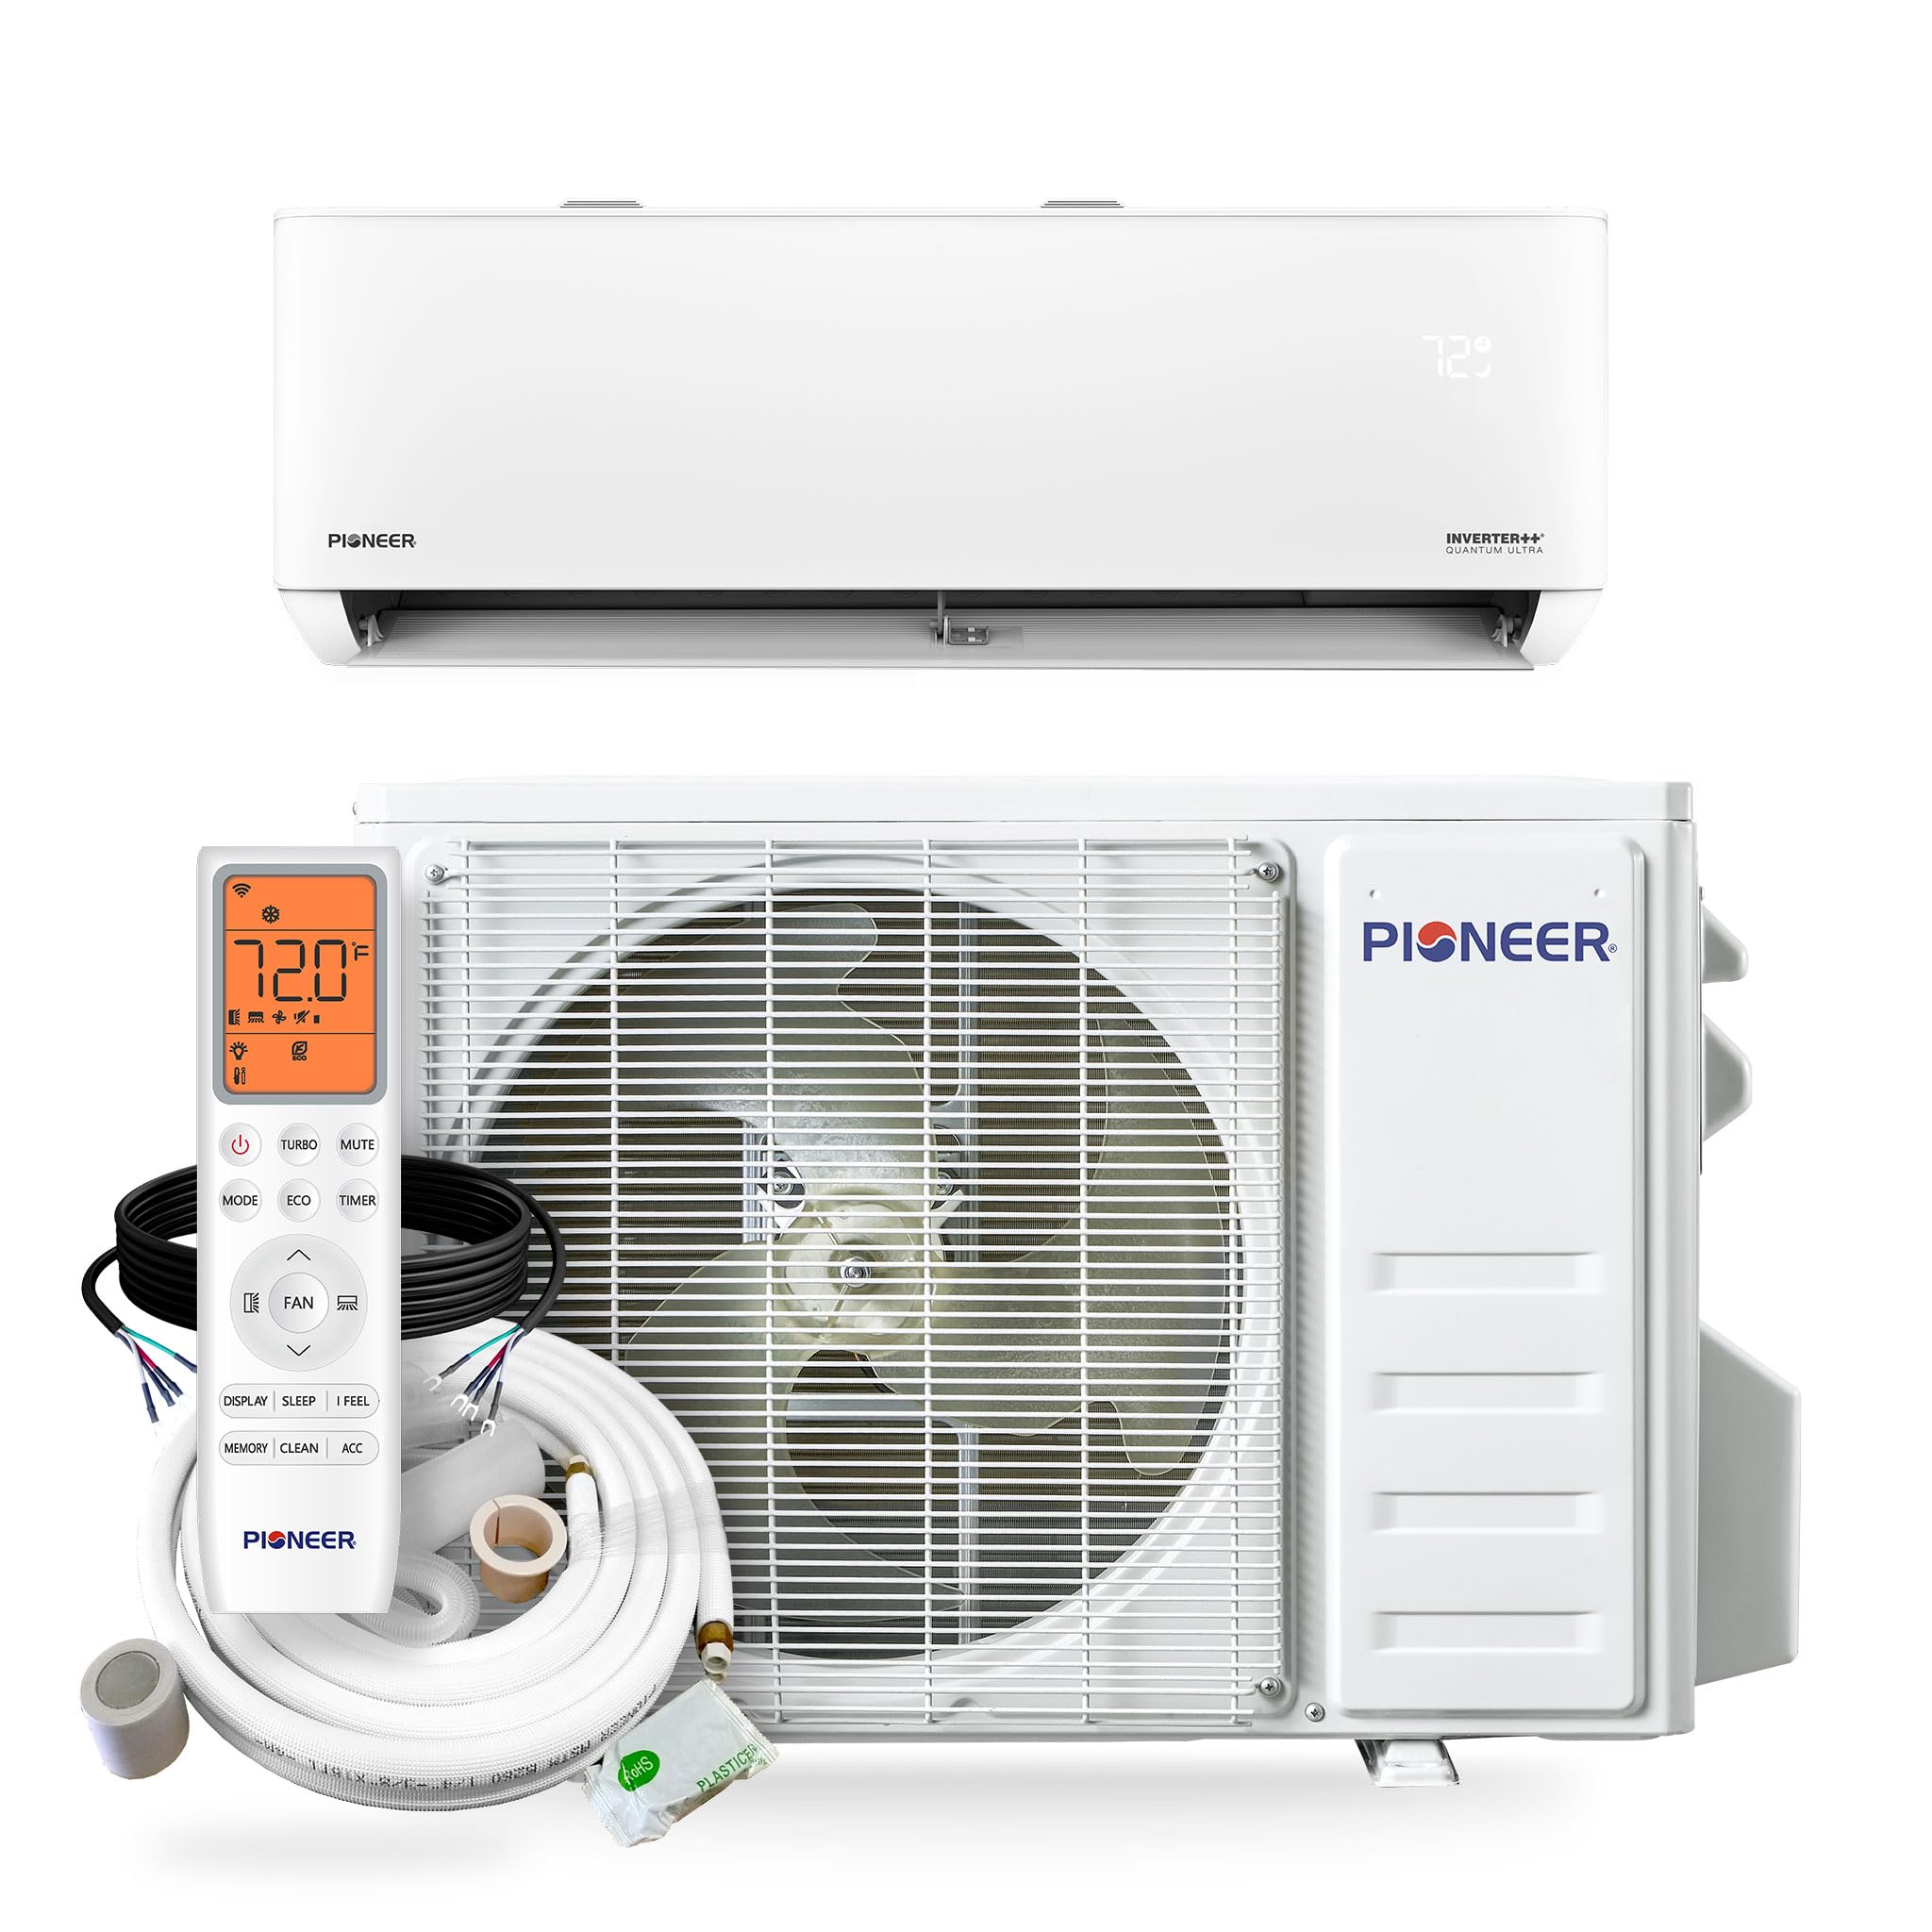
Image: The indoor unit of the Pioneer Quantum Ultra Mini-Split Air Conditioner, a sleek white rectangular device mounted high on a light-colored wall, indicating its high-wall ductless design.
2. Ohun ti o wa ninu Apoti
Your Pioneer Quantum Ultra Mini-Split system includes the following components:
- Inu ile Unit
- Ita gbangba Unit
- Alailowaya isakoṣo latọna jijin
- Remote Control Wall Holder
- Awọn batiri Iṣakoso latọna jijin
- Customizable Length Copper Lines
- Customizable Length Electrical Wire
3. Eto & Fifi sori
Proper installation is crucial for the optimal performance and longevity of your mini-split system. It is highly recommended that installation be performed by a certified HVAC professional to ensure compliance with local codes and warranty requirements.
Awọn igbesẹ fifi sori ẹrọ gbogbogbo:
- Gbigbe Ẹka inu inu: Secure the mounting plate to a sturdy wall, ensuring it is level and has adequate clearance from the ceiling (at least 6-8 inches for proper air intake).
- Drilling the Wall Hole: Create a hole through the wall for the line set, drain hose, and electrical wiring. Ensure a slight downward slope for proper drainage.
- Connecting Line Set and Wiring: Route the copper lines, electrical wires, and drain hose through the wall hole. Connect the line set to the indoor unit, ensuring secure and leak-free connections.
- Gbigbe Ẹka Ita gbangba: Place the outdoor unit on a stable, level surface or a wall-mounted bracket, ensuring sufficient clearance for airflow.
- Connecting to Outdoor Unit: Connect the line set and electrical wiring from the indoor unit to the outdoor unit.
- Vacuuming the Line Set: Evacuate the line set using a vacuum pump to remove air and moisture. This step is critical for system efficiency and preventing damage.
- Opening Service Valves: Slowly open the service valves on the outdoor unit to release refrigerant into the system.
- Asopọmọra itanna: Connect the unit to a dedicated electrical circuit with a disconnect box, as per local electrical codes.
Itọsọna Fidio fifi sori ẹrọ:
For a visual guide on mini-split installation, please refer to the video below. While this video features a DELLA unit, the general installation principles are applicable to many mini-split systems.
Video: A step-by-step guide demonstrating the installation process of a mini-split air conditioner, covering mounting, wiring, and refrigerant line connections.
4. Awọn ilana Iṣiṣẹ
Your Pioneer Quantum Ultra Mini-Split system is controlled via the included wireless remote control. The remote allows you to select various operating modes and adjust settings for optimal comfort.
Awọn iṣẹ iṣakoso latọna jijin:
- Bọtini TAN/PA: Ṣe agbara ẹrọ naa tan tabi pa.
- Bọtini MODE: Àwọn ìyípo nípasẹ̀ àwọn ipò ìṣiṣẹ́ tó wà:
- LATIO: Automatically selects heating or cooling based on the room temperature.
- Itura: Pese itutu agbaiye lati dinku iwọn otutu yara.
- gbigbona: Pese alapapo lati gbe iwọn otutu yara soke.
- GBE: Dehumidifies the air without significant cooling.
- FAN: Circulates air lai alapapo tabi itutu.
- Awọn Bọtini Iṣatunṣe iwọn otutu (▲/▼): Ṣe alekun tabi dinku iwọn otutu ti a ṣeto.
- Bọtini Iyara FAN: Ṣe atunṣe iyara àìpẹ (Aifọwọyi, Kekere, Alabọde, Ga).
- Bọtini SWING: Controls the vertical louver movement for even air distribution.
- Bọtini TIMER: Ó ń ṣètò ẹ̀rọ náà láti tan tàbí pa láìfọwọ́sí lẹ́yìn àkókò pàtó kan.
- Ipo ECO: Mu iṣẹ fifipamọ agbara ṣiṣẹ.
- Ipò Orun: Ṣe atunṣe iwọn otutu ati iyara afẹfẹ fun oorun itunu.
- MỌ ara-ẹni mọ́: Initiates a self-cleaning cycle for the indoor unit.
- Ti ṣiṣẹ WiFi: The unit supports WiFi connectivity for remote control via a smartphone app. Refer to the separate WiFi setup guide for instructions.
5. Itọju
Regular maintenance ensures efficient operation and extends the lifespan of your mini-split system.
- Fifọ Afẹfẹ: Clean the indoor unit's air filters every 2-4 weeks, or more frequently if the unit is used heavily or in dusty environments. Wash with mild soap and water, then dry completely before reinstallation.
- Isọmọ Ẹka ita gbangba: Keep the outdoor unit free from debris, leaves, and other obstructions. Periodically clean the coils with a soft brush or vacuum cleaner.
- Drain Hose Check: Ensure the drain hose is clear of blockages and allows for proper condensate drainage.
- Ayẹwo Ọjọgbọn: Schedule an annual inspection and maintenance service with a qualified HVAC technician.
6. Laasigbotitusita
If you encounter issues with your mini-split system, refer to the following common troubleshooting tips:
- Ẹka Ko Tii: Check the power supply, circuit breaker, and ensure the remote control batteries are not depleted.
- Itutu/Igbona ti ko to: Verify the set temperature, ensure air filters are clean, and check for any obstructions around the indoor or outdoor units.
- Awọn Ariwo Alailẹgbẹ: Minor noises during operation are normal. However, loud or persistent noises may indicate an issue. Consult the full user manual or a technician.
- Sisun omi: Check the drain hose for blockages or improper installation.
- Awọn oran Iṣakoso Latọna jijin: Ensure direct line of sight to the indoor unit and replace batteries if necessary.
For more detailed troubleshooting, please consult the comprehensive user manual or contact Pioneer customer support.
7. Awọn pato
| Ẹya ara ẹrọ | Sipesifikesonu |
|---|---|
| Brand | Aṣáájú-ọ̀nà |
| Orukọ awoṣe | WYT009ALSI24RL-16 |
| Agbara | 9,000 BTU (0.75 Toonu) |
| Oṣuwọn SEER2 | 24 |
| Voltage | 115 Volts |
| Wattage | 730 Watt-wakati |
| Ariwo Ipele | 30 Decibels |
| Ọja Mefa | 7.63"D x 32.25"W x 12"H |
| Iwọn Nkan | 100 iwon |
| Pataki Ẹya | WiFi ṣiṣẹ |
8. Atilẹyin ọja & Atilẹyin
Pioneer provides warranty coverage for its products. Specific warranty details, including terms and conditions, are typically included with your product documentation. Please retain your proof of purchase for any warranty claims.
For technical assistance, troubleshooting, or to inquire about warranty service, please contact Pioneer Customer Support. Contact information can usually be found in your product manual or on the official Pioneer webojula.
Note: Professional installation by a licensed HVAC technician is often required to validate warranty coverage. DIY installation may void certain warranty aspects.