AXIS C8310 iwọn didun Adarí
Fifi sori ẹrọ

Connect your AXIS C8310 Volume Controller to the I/O connector of any device in your system. We recommend that you simply choose the device that is located closest to your AXIS C8310 Volume Controller.
The volume controller 4-pin connector on AXIS C8310 is specifically designed to work with the I/O Port 1 on the connectivity hub, utilizing pins 1-4 (GND, 12V, I/O, and I/O). Once connected, those ports cannot be configured for other uses.
Akiyesi
The host device must have firmware version 11.6 or later.


Bẹrẹ
Use AXIS C8310 Volume Controller with AXIS Audio Manager Edge
For instructions, see Control audio with AXIS C8310 Volume Controller in the AXIS Audio Manager Edge user manual.
Use AXIS C8310 Volume Controller with AXIS Audio Manager Pro
You need to have AXIS Audio Manager Pro version 4.4 to use it with an AXIS C8310 Volume Controller.
For instructions, see Control audio with AXIS C8310 Volume Controller in the AXIS Audio Manager Pro user manual.
Tunto ẹrọ rẹ
Make a SIP call
Use your AXIS C8310 to initiate a SIP call from a speaker with a built-in microphone to a SIP recipient.
Ninu example we initiate and hang up the call with the same button. We have chosen source button 1, but you can choose any button on your AXIS C8310.
Akiyesi
If you are using the same button for source control in AXIS Audio Manager Edge or Pro, you might want to unassign that functionality in those applications.
For more information about rules that trigger actions, see Get started with rules for events.
- Ṣii awọn web interface of the speaker that your AXIS C8310 is connected to:
Enter the IP address of the speaker in a browser. - Go to Audio > Peripherals and make sure your AXIS C8310 is connected.
- Go to System > SIP and make sure SIP is set up and activated.
- Fi olugba kan kun:
- Go to System > Events > Recipients and click + Add recipient.
- Daruko olugba.
- Under Type, select SIP or VMS.
- Select SIP and enter the details.
- Tẹ Fipamọ.
- Add rule for initiating a call:
- Go to System > Events > Rules and click + Add a rule.
- Name the rule.
- Under Condition, select I/O > Digital input is active.
- Under Port, select Source 1 button.
- To avoid initiating more than one call, we add an extra condition:
- Click + Add a condition.
- Select Call > State.
- Under State, select Idle.
- Under Action, select Calls > Make call.
- Under Recipient, select your recipient.
- Tẹ Fipamọ.
- Add a rule for ending the call:
- Click + Add a rule.
- Name the rule.
- Under Condition, select I/O > Digital input is active.
- Under Port, select Source 1 button.
- To only perform the action if there is an ongoing call, we need to add another condition:
- Click + Add a condition.
- Select Call > State.
- Under State, select Active.
- Under Action, select Calls > End calls.
- Tẹ Fipamọ.
Lock the device after a certain time of inactivity
- Go to Audio > Peripherals.
- Turn on Enable auto-lock.
- Under Auto-lock time, select a time.
If no buttons have been pressed on your AXIS C8310 for the selected time, all buttons will be locked. - To unlock the buttons, press the volume up and volume down buttons at the same time.
Awọn pato
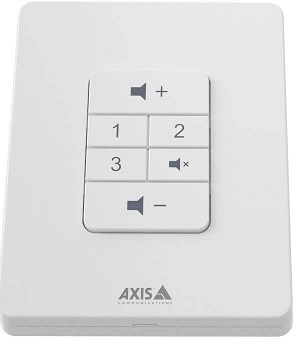
Ọja ti pariview

Olubasọrọ support
Ti o ba nilo iranlọwọ diẹ sii, lọ si axis.com/support.
T10196055
Ọdun 2025-06 (M4.2)
© 2023 - 2025 Axis Communications AB
Awọn iwe aṣẹ / Awọn orisun
 |
AXIS C8310 iwọn didun Adarí [pdf] Afowoyi olumulo C8310 Volume Controller, C8310, Volume Controller, Controller |